facebook_pixel ↓
 

  • Blog
  • Stampin’ Up! Online Store
  • On Line Classes
  • View Our Catalogues
  • Event Calendar
  • Cool Tool Tip Videos
  • Questions and Answers
  • Simply With Heart – Etsy Store
  • Gift Certificates
Home » Blog << 1 2 3 4 5 6 7 … 78 79 >>

Post navigation

← Older posts
Newer posts →

Make Beautiful Handmade Christmas Cards For Your Christmas Card List

Posted on October 6, 2016 by Karen GilbertOctober 6, 2016  

Make Beautiful Handmade Christmas Cards

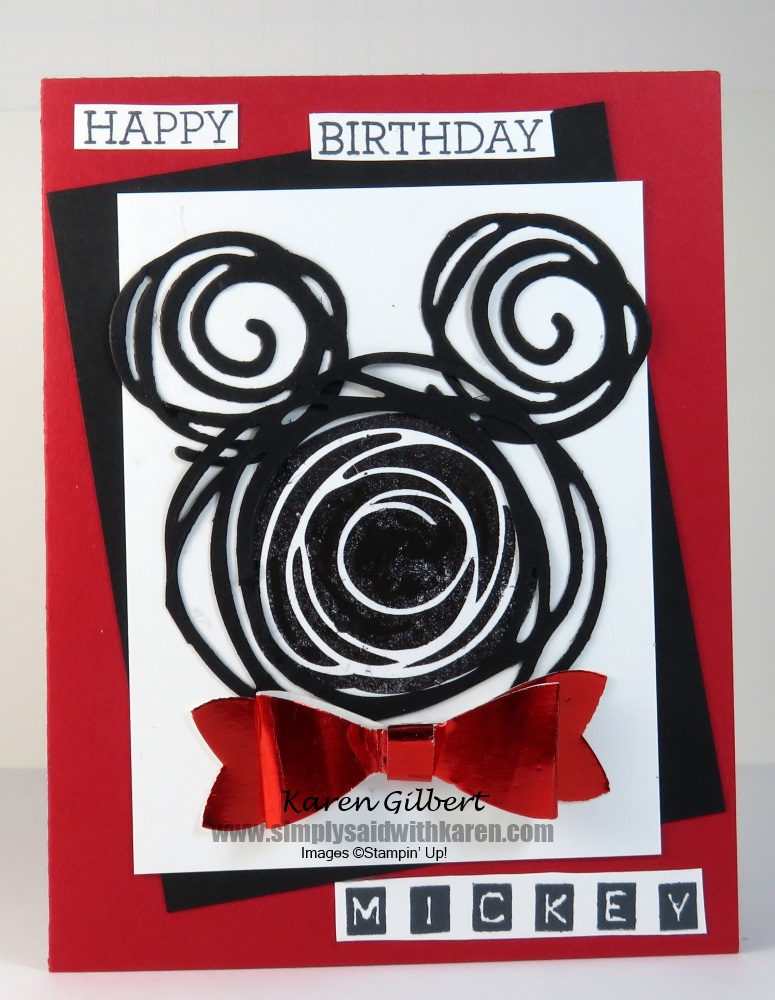
You can make beautiful handmade Christmas cards for your friends and family.  All you need is some imagination and card making products.  While you do need some imagination, there is a word that we use in the crafting world to make our life easier.  That word is CASE. CASE is an acronym for “copy and share everything” , which tends to be a mantra for a lot of crafters.  When I first get a new stamp set, sometimes I don’t have a clue what to do with it.  For me, it’s getting to know your stamp.  Where do I go?  To the catalogue.  Sometimes, I will copy the card exactly and sometimes I will use some of the same elements but mix up the colours and thinlits.  No matter what, it’s your card. Make Beautiful Handmade Christmas Cards

Recipe

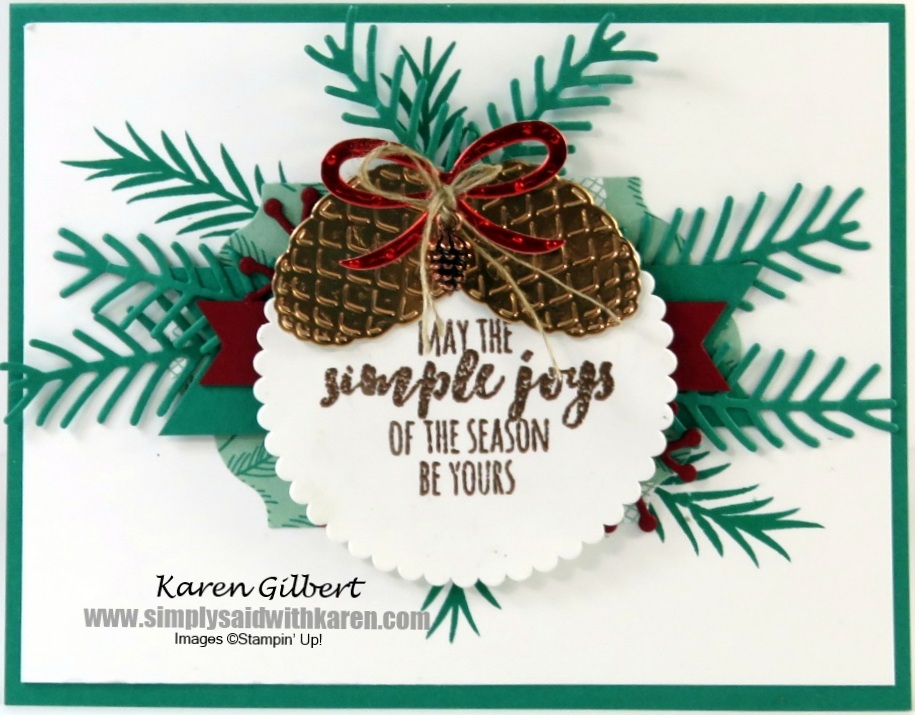
Stamps: Holly Berry Happiness. Ink: Crumb Cake, Cherry Cobbler, Old Olive, Paper: Very Vanilla, Crumb Cake, Old Olive, Cherry Cobbler, Champagne Glimmer, This Christmas Specialty DSP. Accessories: Big Shot, Lots of Labels, Pretty Pines Thinlits Dies, 5/8” Burlap Ribbon, Cherry Cobbler Baker’s Twine, Christmas Trinkets Embellishments, Holly Berry Builder Punch. This card is similar to the one in the catalogue, however, there are some elements that I chose not to use. For example, the holly is stamped on Crumb Cake card stock with Old Olive ink.  One of the pinecones is die cut using Crumb Cake cardstock and the other pine cone is die cut from Very Vanilla and sponged with Crumb Cake ink to bring out the texture of the pine cone. So, if you don’t know where to start to make beautiful handmade Christmas cards, the catalogue will help you out.

Product List

Holly Berry Happiness Photopolymer Stamp Set
[142061]
$21.00
Crumb Cake 8-1/2" X 11" Card Stock
Crumb Cake 8-1/2″ X 11″ Card Stock
[120953]
$10.00
Cherry Cobbler 8-1/2" X 11" Card Stock
Cherry Cobbler 8-1/2″ X 11″ Card Stock
[119685]
$10.00
Old Olive 8-1/2" X 11" Card Stock
Old Olive 8-1/2″ X 11″ Card Stock
[100702]
$10.00
This Christmas Designer Series Specialty Paper
[141628]
$17.00
Very Vanilla 8-1/2" X 11" Card Stock
Very Vanilla 8-1/2″ X 11″ Card Stock
[101650]
$11.25
Crumb Cake Classic Stampin' Pad
Crumb Cake Classic Stampin’ Pad
[126975]
$8.50
Cherry Cobbler Classic Stampin' Pad
Cherry Cobbler Classic Stampin’ Pad
[126966]
$8.50
Old Olive Classic Stampin' Pad
Old Olive Classic Stampin’ Pad
[126953]
$8.50
Lots Of Labels Framelits Dies
[138281]
$35.00
Pretty Pines Thinlits Dies
[141851]
$34.00
5/8" (1.6 Cm) Burlap Ribbon
5/8″ (1.6 Cm) Burlap Ribbon
[141487]
$9.25
Cherry Cobbler Baker's Twine
Cherry Cobbler Baker’s Twine
[123125]
$4.00
Christmas Trinkets Embellishments
[141997]
$10.50
Holly Berry Builder Punch
[141843]
$23.50
Did you like this post? Say thanks by sharing it
Pin It
Posted in Big Shot, Cards | Tagged Christmas, Photopolymar Stamps | Leave a Reply

Walt Disney World Celebrates 45th Anniversary – WCMD

Posted on October 3, 2016 by Karen GilbertOctober 3, 2016  

Walt Disney World Celebrates 45th Anniversary, October 1, 2016

Who will be there when Walt Disney World celebrates 45th Anniversary? Mickey Mouse of course.  It’s hard to believe that Walt Disney World opened it doors that long ago. October 1st was also World Card Making Day, so I created a Happy Birthday Mickey card.  This card uses some creative licence and it was just me having fun.  And that is what creating is all about, having fun. I used the Swirly Bird stamp set and Swirly Scribbles thinlits to create Mickey Mouse. Walt Disney World Celebrates 45th Anniversary

Recipe

Stamps: Swirly Bird, Crazy About You, Labeler Alphabet. Ink: Tuxedo Black. Paper: Whisper White, Basic Black, Real Red, Red Foil. Accessories: Big Shot, Swirly Scribbles Thinlits, Bow Builder Punch. Mickey’s face and ears are created with the largest swirl and the ears used the medium sized swirls.  I didn’t like how the face looked with such a large white space behind the large swirl.  To fill in the face a bit, I used the the medium circle stamp with the swirls. The red bow tie was created with the Bow Builder Punch and Red Foil Paper. If you ever need a stamp that can be used for many different celebrations or to create phrases, the Crazy About You stamp set will meet that need. The “Happy” and “Birthday” are stamped on separate card stock pieces .  This way of creating sentiments is a trend that is occurring in paper crafting right now. Finally, the Labeler Alphabet stamp set can be used to create many words and phrases by combining the different letters, numbers and symbols. There are more than 1 stamp for some of the letters to make it easier to create custom sentiments. Now we know who will be there when Walt Disney World celebrates 45th Anniversary. How did you celebrate World Card Making Day?  #WCMD Product List
Crazy About You Photopolymer Stamp Set
[137137]
$31.00
Swirly Bird Photopolymer Stamp Set
[141749]
$31.00
Labeler Alphabet Photopolymer Stamp Set
[141936]
$21.00
Whisper White 8-1/2" X 11" Card Stock
Whisper White 8-1/2″ X 11″ Card Stock
[100730]
$11.25
Basic Black 8-1/2" X 11" Card Stock
Basic Black 8-1/2″ X 11″ Card Stock
[121045]
$10.00
Real Red 8-1/2" X 11" Card Stock
Real Red 8-1/2″ X 11″ Card Stock
[102482]
$10.00
Swirly Scribbles Thinlits Dies
[141497]
$35.00
Bow Builder Punch
Bow Builder Punch
[137414]
$23.50
Did you like this post? Say thanks by sharing it
Pin It
Posted in Cards | Tagged Big Shot, Birthday, Techniques | Leave a Reply

Awesome Hand Crafted Christmas Projects – Get On The Mailing List

Posted on September 28, 2016 by Karen GilbertSeptember 28, 2016  

Awesome Hand Crafted Christmas Projects

Do you want to create awesome hand crafted Christmas projects this year?  Yes, Christmas is just a short 3 months away and I know that you know that this time goes very quickly.  But, I’m here to help you out.   Awesome Hand Crafted Christmas Projects The 12 Weeks of Christmas begins October 5th at 1:00 pm (Pacific Time).  But, to receive these beautiful, sparkly and awesome projects, you need to be on the Simply Said with Karen email list. It’s very easy to get on the email list.  All you have to do is follow the arrow at the bottom of this post and enter your name and email address into the boxes.

How Does The 12 Weeks of Christmas work?

Each week for 12 weeks, you will receive an email from me.  In this email you will find an incredible Christmas project to create. You will have a detailed list of supplies required to make the project, plus you will get step-by-step instructions. The first 5 weeks will have a Christmas card to create, the next 3 weeks there will be cute gifts, and then the last 3 weeks will be devoted to wraps and tags to create remarkable parcels for under the tree. In addition to signing up to receive the 12 Weeks of Christmas projects, you will receive the following benefits.
  •     Exclusive content
  •     Suggested projects with supplies required and the instructions
  •     Stuck for Scrapbook layouts? – you will find layouts as well
  •     Techniques that will make your projects WOW
  •     Notification of limited opportunities
  •    …and more
  So what are you waiting for?  You have everything to gain and nothing to lose! Follow the red arrow and you will receive 12, count them, 12 awesome hand crafted Christmas projects. Awesome Hand Crafted Christmas Projects
Did you like this post? Say thanks by sharing it
Pin It
Posted in Newsletter | Tagged Christmas, gifts, newsletter | Leave a Reply

Create Thinking of You Card and Show Care For Someone

Posted on September 26, 2016 by Karen GilbertSeptember 26, 2016  

Show Care For Someone

Once in awhile we need to show care for others.  There are many different ways that this can be accomplished.  One of the ways is to send, mail and/or hand deliver a card.  What’s even better, is to hand deliver the card, maybe the person will be up for a chat. This card needed to be cheery, with bright colours.  So, that is what I set out to create. All the image outlines are stamped with Tuxedo Black ink and then stamped with either Watermelon Wonder ink or Cucumber Crush ink or Delightful Dijon ink.  The bumblebee trail is created using the Basic Black Stampin’ Write Marker. The Whisper White layer is mounted on Basic Black cardstock.  Before mounting on the Watermelon Wonder panel, the Watermelon Wonder Mini Striped Ribbon is attached to the Watermelon Wonder panel. Finally, all panels are mounted on the Basic Black card base. Basic pearl jewels at place in the center of the flowers to provide from bling. Show Care

Recipe

Stamps: Garden In Bloom, Basket of Wishes. Ink/Markers: Watermelon Wonder, Delightful Dijon, Cucumber Crush, Tuxedo Black, Peekaboo Peach, Basic Black Stampin’ Write Marker. Paper: Whisper White, Watermelon Wonder, Basic Black. Accessories: Pearl Jewels, Watermelon Wonder 5/8”Mini Striped Ribbon. Take time to show care to someone.  It will not only lift their spirits, but you will get a good feeling as well.   Product List
Garden In Bloom Photopolymer Stamp Set
[139433]
Basket Of Wishes Photopolymer Stamp Set
[142200]
Watermelon Wonder Classic Stampin' Pad
Watermelon Wonder Classic Stampin’ Pad
[138323]
Delightful Dijon Classic Stampin' Pad
Delightful Dijon Classic Stampin’ Pad
[138327]
Cucumber Crush Classic Stampin' Pad
Cucumber Crush Classic Stampin’ Pad
[138324]
Tuxedo Black Memento Ink Pad
[132708]
Peekaboo Peach Classic Stampin' Pad
Peekaboo Peach Classic Stampin’ Pad
[141398]
Whisper White 8-1/2" X 11" Card Stock
Whisper White 8-1/2″ X 11″ Card Stock
[100730]
Watermelon Wonder 8-1/2" X 11" Cardstock
Watermelon Wonder 8-1/2″ X 11″ Cardstock
[138334]
Basic Black 8-1/2" X 11" Card Stock
Basic Black 8-1/2″ X 11″ Card Stock
[121045]
Pearl Basic Jewels Embellishments
[119247]
Watermelon Wonder 5/8" (1.6 Cm) Mini Striped Ribbon
Watermelon Wonder 5/8″ (1.6 Cm) Mini Striped Ribbon
[141433]
Did you like this post? Say thanks by sharing it
Pin It
Posted in Cards, Thinking of You | Leave a Reply

Simple Joys of the Christmas Season Perhaps We Can

Posted on September 22, 2016 by Karen GilbertSeptember 22, 2016  

Simple Joys

To enjoy the simple joys of the holiday is to stay sane.  With all the shopping, baking, sending cards, inviting people to events, going to events yourself can be nerve racking.  So how do you prevent yourself from becoming a zombie and enjoying the holidays. Even now, I can hear your big sigh as you begin to think of the things you need to do. Don’t you think that Christmas in the stores is earlier every year?  I have to admit that I did pick up a decoration in Costco this week.  What was I thinking?  Good marketing Costco.
Here is a 3 tips for you so that you can enjoy October, November and December.
  1. Make lists for everything you want to accomplish.  No, you don’t have to make every single list at one sitting, but do try to get them finished by the end of October.  There are the Christmas gift lists for family and friends.  I don’t rely on myself to determine what to get for everyone.  I have help from parents, children and grandchildren.  Just ask!
  2. Source out the dates of the events and get them on your calendar.  Are you planning on hosting an event?  Get your invitations out early because everyone’s calendars fill up.  Realize too,  that the date you choose will not be good for everyone.  But if you plan early enough and contact the people you have a better chance of getting the date you want.
  3. Take time for yourself.  So often we forget to do this and it is so important.  Do something you enjoy, like a manicure, pedicure, maybe a massage.  If these aren’t for you, get together with a few girlfriends or boyfriends and go out for an evening.  Or, there is your craft room where you can create, get ink of your fingers and make a mess.
  Which brings me to this card. This card is a reminder about the simple joys of the season.  I did CASE the catalogue for this card.  At first I was unimpressed with Emerald Envy. This colour has definitely grown on me and I think it looks beautiful with the Cherry Cobbler. Of course, the Copper Foil paper is beautiful along with the Copper Stampin’ Emboss Powder. To top everything off, the Copper Mini Pine Cones is the added touch. Simple Joys

Recipe

Stamps: Christmas Pines. Ink/Markers: Tuxedo Black, Versa Mark. Paper: Whisper White (Thick, Regular), Emerald Envy, Cherry Cobbler, Presents and Pine Cones DSP, Copper Foil, Red Foil. Accessories: Big Shot, Pretty Pines Thinlits Dies, Lots of Labels, Layering Circle Framelits, Copper Emboss Powder, Linen Thread, Mini Pinecones. Do you have tips to enjoy the Simple Joys at Christmas?  I would love to read them.  Tell me about them in the comment section. Product List
Christmas Pines Photopolymer Bundle
[143496]
Versamark Pad
Versamark Pad
[102283]
Emerald Envy 8-1/2" X 11" Cardstock
Emerald Envy 8-1/2″ X 11″ Cardstock
[141415]
Cherry Cobbler 8-1/2" X 11" Card Stock
Cherry Cobbler 8-1/2″ X 11″ Card Stock
[119685]
Presents & Pinecones Designer Series Paper
[141986]
Copper Foil Sheets
Copper Foil Sheets
[142020]
Lots Of Labels Framelits Dies
[138281]
Layering Circle Framelits Dies
[141705]
Linen Thread
Linen Thread
[104199]
Mini Pinecones
Mini Pinecones
[141990]
Copper Stampin' Emboss Powder
Copper Stampin’ Emboss Powder
[141636]
Did you like this post? Say thanks by sharing it
Pin It
Posted in Cards, Christmas | Leave a Reply

How Do You Decorate a Christmas Pine Tree? Many Choices.

Posted on September 19, 2016 by Karen GilbertSeptember 19, 2016  

Decorate a Christmas Pine Tree

Do you decorate a Christmas Pine Tree?  How do you decorate it?  Trees can be big, small, tall, short.  There is no right or wrong when it comes to selecting your pine tree. Do you decorate a real tree or an artificial tree. There are so many ways to decorate a tree.  Decorations can be natural, themed with certain colours, or characters, or traditional, victorian, or contemporary.  Do you put lights on your tree or is it a fibre-optic tree with changing colours.  No matter how you decorate, what you decorate with, all Christmas trees are beautiful.  There is something magical and mesmerizing about a decorated tree. Did you know that the first Christmas Tree. In the early 16th century, Martin Luther is said to have decorated a small Christmas Tree with candles.  He did this to show his children how the stars twinkled through the dark night. Christmas Pine Tree

Recipe

Stamps: Peaceful Pines. Ink/Markers: Tuxedo Black, Versa Mark. Paper: Very Vanilla, Garden Green, Real Red, Gold Glimmer, Gold Foil. Accessories: Big Shot, Perfect Pines Framelits, Pine Bough Embossing Folder, Gold Emboss Powder, White Emboss Powder, Baker’s Twine Trio Pack (Gold, Garden Green). Two pine trees on this card are decorated with white embossed solid circles and the focal tree is heat embossed with Gold Stampin’ Embossing Powder. Of course the trees would not be complete with a gold start on the top. The tree theme of this card continues with the use of the PineBough Embossing Folder.  To tie it all together (no pun intended), gold and garden green Baker’s Twine from the Baker’s Twine Trio Pack finish off the card. Leave a comment and tell me how you decorate your Christmas Pine Tree.  

Product List

Peaceful Pines Photopolymer Stamp Set
[139728]
Tuxedo Black Memento Ink Pad
[132708]
Versamark Pad
Versamark Pad
[102283]
Very Vanilla 8-1/2" X 11" Card Stock
Very Vanilla 8-1/2″ X 11″ Card Stock
[101650]
Garden Green 8-1/2" X 11" Card Stock
Garden Green 8-1/2″ X 11″ Card Stock
[102584]
Real Red 8-1/2" X 11" Card Stock
Real Red 8-1/2″ X 11″ Card Stock
[102482]
Gold Foil Sheets
Gold Foil Sheets
[132622]
Gold Glimmer Paper
Gold Glimmer Paper
[133719]
Perfect Pines Framelits Dies
[139665]
Pine Bough Textured Impressions Embossing Folder
[141831]
Gold Stampin' Emboss Powder
Gold Stampin’ Emboss Powder
[109129]
White Stampin' Emboss Powder
White Stampin’ Emboss Powder
[109132]
Baker's Twine Trio Pack
Baker’s Twine Trio Pack
[141999]
Did you like this post? Say thanks by sharing it
Pin It
Posted in Cards, Christmas, Occasion Cards | Leave a Reply

Fallish Birthday Card Uses Serene Scenery Paper

Posted on September 15, 2016 by Karen GilbertSeptember 15, 2016  

Fallish Birthday Card

Today, it’s a fallish birthday card.  “Fallish” is not a word you hear often, but it does conjure up a feeling about this time of year. The focal image from the Remarkable You stamp set is watercoloured, but not the watercolour technique that you have come to know. This watercolour techniques uses stamps from the Gorgeous Grunge Stamp Set and ink pads.  Love that Gorgeous Grunge stamp set and try to stamp with it as much as possible.

The Other Watercolour Technique

On a piece of Watercolour paper, stamp various stamps using the Old Olive , Delightful Dijon and Tangerine Tango Inks. Try not to over stamp the colours too much because you want to distinguish the different colours.  Once you have stamped, spritz a bit of water on the stamp images so that they get the watercoloured look..  Once the ink is dry, and if you can’t wait, you can use the Heat Tool, stamp the flower from the Remarkable You stamp set using Stazon Jet Black ink. Stamp the leaves in Stazon ink on the Serene Scenery DSP Stack.  This gives a look of texture to the leaves. Now, it’s fussy cutting time.  Cut the flower and the leaves and attach to the Very Vanilla card stock which has been embossed with the Brick Wall Emboss Folder.  Use the Sponge Dauber and the Soft Suede ink to highlight the bricks. Layer the panels, attach the flower and add the Burlap Ribbon to one side.  Stamp the leaf in VersaMark, heat emboss with Copper Emboss powder, and die cut with matching Leaflet Framelits. Attach to Burlap Ribbon and tie a piece of Linen Thread around the stem. FInally, stamp the sentiment on Very Vanilla with Soft Suede ink and punch with the Duet Banner Punch. Now you have a fallish Birthday Card. Fallish Birthday Card

Recipe

Stamps: Remarkable You, Gorgeous Grunge, Thoughtful Banners, Vintage Leaves. Ink/Markers: Delightful Dijon, Old Olive, Tangerine Tango, Soft Suede, Stazon Black, VersaMark. Paper: Whisper White Thick, Very Vanilla, Delightful Dijon, Watercolour, Serene Scenery DSP Stack Accessories: Big Shot, Leaflets Framelits, Brick Wall Embossing Folder, Copper Embossing Powder, 5/8” Burlap Ribbon, Linen Thread, Sponge Dauber, Duet Banner Punch. Have you enjoyed hearing about a new Watercolour Technique? Leave me comment to let me know if you enjoyed this card.

Product List

Remarkable You Clear-Mount Stamp Set
[139894]
Gorgeous Grunge Clear Stamp Set
[130517]
Watercolor Paper
Watercolor Paper
[122959]
Whisper White 8-1/2" X 11" Thick Cardstock
Whisper White 8-1/2″ X 11″ Thick Cardstock
[140272]
Delightful Dijon 8-1/2" X 11" Cardstock
Delightful Dijon 8-1/2″ X 11″ Cardstock
[138338]
Serene Scenery Designer Series Paper Stack
[141642]
Soft Suede Classic Stampin' Pad
Soft Suede Classic Stampin’ Pad
[126978]
Delightful Dijon Classic Stampin' Pad
Delightful Dijon Classic Stampin’ Pad
[138327]
Old Olive Classic Stampin' Pad
Old Olive Classic Stampin’ Pad
[126953]
Tangerine Tango Classic Stampin' Pad
Tangerine Tango Classic Stampin’ Pad
[126946]
Jet Black Stazon Ink Pad
[101406]
Copper Stampin' Emboss Powder
Copper Stampin’ Emboss Powder
[141636]
Leaflets Framelits Dies
[138283]
Brick Wall Textured Impressions Embossing Folder
[138288]
5/8" (1.6 Cm) Burlap Ribbon
5/8″ (1.6 Cm) Burlap Ribbon
[141487]
Linen Thread
Linen Thread
[104199]
Sponge Daubers
Sponge Daubers
[133773]
Duet Banner Punch
Duet Banner Punch
[141483]
Did you like this post? Say thanks by sharing it
Pin It
Posted in Birthday, Cards | Leave a Reply

Home Based Business – Can I Do It? Yes You Can!

Posted on September 12, 2016 by Karen GilbertSeptember 12, 2016  

Home Based Business

Can I run and manage a home based business?  Have you ever asked yourself that question? All you need is a “Yes I Can” attitude and believe in yourself. There is work to run and manage a business, but I have three mechanisms you can put into play. To some people, manage your business means that you need to work 24/7 to make it a working business.  You don’t have to work 24/7.  Organization, commitment and systems are three necessities to managing a successful business. Home Based Business The first thing you need to do is determine what you want to achieve in your business.  These are you goals.  You can have long-term goals and short-term goals.  A long term goal is something you want to accomplish in the future. These goals take time and planning to accomplish . You cannot accomplish these goals in a week or two. Write down this long term goal and hang it on the wall of your office. Once you have decided what you want to achieve in your business, you must decide how you are going to achieve this goals.

Achieve Your Long Term Goal

For example if your long term goal is to take your family on a holiday, you need to decide how much money you will require for this holiday.  Then chunk out your path to complete your goals. Here’s your business opportunity. Join my team and become a Stampin’ Up! demonstrator. Here are some ideas to help you with chunking your goals.if you decide to take the business opportunity that I offer you:
  • Hold workshops – contact friends, family, and co-workers that like papercrafting and introduce them to products that are colour coordinated. Workshops are an easy way to touch many people in a short time and introduce them to fun and creativity.
  • Hold classes – teach technique classes and show people how they can use the tools to create beautiful cards and scrapbooking pages.
  • Develop online classes to reach people that are unable to attend a class.  These classes can live on forever if you concentrate on techniques rather than the products themselves.
  Business Opportunity   Now that I have whet your appetite to manage a home based business find out more by contacting me and/or visiting this LINK.  On this page you will find information on the value of the starter kit, demonstrator benefits, and a step-by-step guide to becoming a Stampin’ Up! demonstrator. YES, You Can!
Did you like this post? Say thanks by sharing it
Pin It
Posted in Business Opportunity | Leave a Reply

Can You Create a Simple Yet Elegant Card?

Posted on September 10, 2016 by Karen GilbertSeptember 10, 2016  

Simple Yet Elegant Card

Words that describe simple yet elegant are restrained, graceful, refined, tasteful. It’s using the various elements in harmony with each other. It’s also timeless.  So often we use elements that are the in vogue and will not stand the test of time. So that is what I set out to do. Create a simple yet elegant card with these hints. To get started decide:
  • The main colour.  In this card, my main colour was Sweet Sugar Plum. Rich Razzleberry and Emerald Envy are strong colours that compliment the Sweet Sugar Plum.
  • The stamp set. The only stamping on this card is the sentiment.
  • How much and where to position the focal point or, in other words, where does your eye go first..  The focal point on this card is the group of flowers and leaves cut with the Flourish Thinlits.
  • Finally, decide on embellishments, if any.  The embellishments are simply the strip of natural trim with silver accents and the very vanilla lace.
  Simple yet Elegant

Recipe

Stamps: Floral Phrases Ink/Markers: Rich Razzleberry Paper: Whisper White, Sweet Sugar Plum, Rich Razzleberry, Emerald Envy, Silver Glimmer Paper. Accessories: Big Shot, Detailed Floral Thinlits, Flourish Thinlits, Tags and Labels Framelits, Whisper White Thick Baker’s Twine, 1/4” Silver Natural Ribbon, Very Vanilla 1/2” Lace Trim. What are the steps you follow when creating a design? What is your style?  Is it simple yet elegant, or do you like to incorporate many elements into your card?

Product List

Flourishing Phrases Clear-Mount Bundle
[142323]
Rich Razzleberry Classic Stampin' Ink Refill
Rich Razzleberry Classic Stampin’ Ink Refill
[115664]
Rich Razzleberry 8-1/2" X 11" Card Stock
Rich Razzleberry 8-1/2″ X 11″ Card Stock
[115316]
Sweet Sugarplum 8-1/2" X 11" Cardstock
Sweet Sugarplum 8-1/2″ X 11″ Cardstock
[141418]
Emerald Envy 8-1/2" X 11" Cardstock
Emerald Envy 8-1/2″ X 11″ Cardstock
[141415]
Silver Glimmer Paper
[135314]
Flourish Thinlits Dies
[141478]
Tags & Labels Framelits Dies
[138282]
Silver 1/4" (6.4 Mm) Natural Trim
Silver 1/4″ (6.4 Mm) Natural Trim
[141485]
Very Vanilla 1/2" (1.3 Cm) Lace Trim
Very Vanilla 1/2″ (1.3 Cm) Lace Trim
[141672]
Whisper White Thick Baker's Twine
Whisper White Thick Baker’s Twine
[141688]
Did you like this post? Say thanks by sharing it
Pin It
Posted in Cards, Wedding | Leave a Reply

Awesomely Artistic Soft and Peaceful

Posted on September 7, 2016 by Karen GilbertSeptember 7, 2016  

Awesomely Artistic

This stamp set will make you awesomely artistic!  Of course, you are probably wondering why I think that a stamp set can make you artistic. Use this stamp set to create a variety of cards using different techniques.  Can  you spot the techniques?  No? Well, the techniques used are: watercolour, heat embossing, die cutting, splatter, and emboss resist, But, you think, I use those techniques how does that stamp set make be artistic.  Because it’s not what you use, but how you use it. It’s about placement of the stamps, layers, embellishments, to die cut, embossing, watercolour or not, In other words, what I am saying is, just by picking up a stamp and stamping with it makes you artistic in the world of paper crafting. Can you see what I am saying?  I always say that “creativity and artistry” is in the eye of the beholder.  What one person thinks about a piece of art can can differ drastically from another person.  The art may be pleasing to their eye for a number of reasons, such as, placement of the different elements. So, never let anyone tell you that you are not artistic.  And never self-talk yourself into believing that you are not artistic.Awesomely Artistic

Recipe

Stamps: Awesomely Artistic, Basket of Wishes. Ink/Markers: Soft Sky (ink pad and marker), Pool Party (ink pad and marker), Basic Black Marker, VersaMark. Paper: Whisper White Thick and Reg, Pool Party, Soft Sky. Accessories: Big Shot, Rose Garden Thinlits, Mint Macaron 3/8” Sheer Linen Ribbon, Very Vanilla 1/2” Lace Trim, White Emboss Powder, Clear Emboss Powder Aqua Painter Brush. This card is commonly known as a collage card because of all the different elements that are blended into each other. First the main image was stamped in VersaMark and embossed with White Emboss Powder. Don’t  forget to use your embossing buddy. Then, using the Aqua Painter Brush, wash the over the embossed image with Soft Sky ink mixed with a bit of water.  Stamp the ferns, the splatters and circle image with Pool Party. Using the Soft Sky and Pool Party markers, colour the dragonfly wings and colour the body with the Basic Black marker.  Lay the dragonfly image in the VersaMark Pad and emboss with Clear Emboss Powder.  Finally, cut out the dragonfly with the Paper Snips. Stamp the bottom layer with the dotted stamp and Pool Party ink.  Attach the different layers and embellish with the ribbon and lace trim. For more ideas using the Awesomely Artistic stamp set, click on these links: Sympathy Card Copy and Share Everything It’s easy to be Awesomely Artistic?

Product List

Basket Of Wishes Photopolymer Stamp Set
[142200]
Pool Party 8-1/2" X 11" Card Stock
Pool Party 8-1/2″ X 11″ Card Stock
[122924]
Soft Sky 8-1/2" X 11" Card Stock
Soft Sky 8-1/2″ X 11″ Card Stock
[131203]
Pool Party Classic Stampin' Pad
Pool Party Classic Stampin’ Pad
[126982]
Soft Sky Classic Stampin' Pad
Soft Sky Classic Stampin’ Pad
[131181]
Subtles Stampin' Write Markers
Subtles Stampin’ Write Markers
[131263]
Versamark Pad
Versamark Pad
[102283]
Aqua Painters
Aqua Painters
[103954]
Mint Macaron 3/8" (1 Cm) Sheer Linen Ribbon
Mint Macaron 3/8″ (1 Cm) Sheer Linen Ribbon
[141656]
Very Vanilla 1/2" (1.3 Cm) Lace Trim
Very Vanilla 1/2″ (1.3 Cm) Lace Trim
[141672]
Clear Stampin' Emboss Powder
Clear Stampin’ Emboss Powder
[109130]
White Stampin' Emboss Powder
White Stampin’ Emboss Powder
[109132]
Basic Black Stampin' Write Marker
Basic Black Stampin’ Write Marker
[100082]
Did you like this post? Say thanks by sharing it
Pin It
Posted in Cards | Leave a Reply

Post navigation

← Older posts
Newer posts →

Become A Simply Said With Karen Facebook Fan!

Follow Simply Said With Karen On Twitter!

View Our Videos on the Simply Said With Karen YouTube Channel!

Follow Me on Pinterest
Shop on line 24/7
Email me

Simply Said with Karen Online Classes

Simply Said with Karen Online Classes

Classes Just For You

Events Calendar

Click on the Calendar for a list of my Events

Search

Categories

Paper Pumpkin

Paper Pumpkin

30 minutes of exciting creativity with Paper Pumpkin
Join Now
Click On Image to start your monthly subscription

As Featured On EzineArticles

DISCLAIMER

Disclaimer Text and pictures © Karen Gilbert unless otherwise noted; all rights reserved. You may use cards, scrapbook pages, and other project designs shown here are for personal inspiration. Please do not copy my designs for submission to contests, magazines, etc. Thank you for respecting these limitations. This is a personal blog and is not endorsed by any Company or Organization. All stamped images © 1990-2016 Stampin' Up! unless otherwise noted.

Privacy Policy

Privacy Policy
©2017 - - Weaver Xtreme Theme
↑