Bella

Hi and Happy Wednesday.  Well, I am on day 2 of a fitness program and trying to get the mojo back or at least stop gravity from taking over.

Speaking of mojo, this card was based on MoJo 135 from over at http://www.mojomonday.blogspot.com/.  Check it out for inspiration and you can have a new one each week delivered to your email box.  How easy is that.

This card is for co-worker and friend who is away from home and is celebrating a birthday, so thought the card may make her birthday a little more cheerier.

Recipe

Stamps: Fifth Avenue Floral, Teeny Tiny Wishes
Paper: Ballet Blue, Rose Red, Whisper White, Garden Green, Sweet Pea DP
Ink: Black Embossing Ink, Regal Rose, Rose Red, and Summer Sun
Accessories: Scallop Trim Punch, Big Shot, Manhattan Flower Embossing Folder, Original Ribbon, Black Embossing Powder Blender Pen, X-Large 2-Step Bird Stamp, Dimensionals, Square Scallop punch
Technique: layering

How To

1. Card Base – Ballet Blue 5 ½” x 4 ¼”
2. Layer 1 – Whisper White – 5 ¼” x 4”
3. Layer 2 – Rose Red – 4” x 3” and embossing with Manhattan Flower Embossing Folder
4. Using Black Embossing Ink, stamp Fifth Avenue Floral on Whisper White and emboss using Black Embossing Powder
5. Water colour the rose with various inks using a blender pen, which will create dimension for the rose.
6. Cut out with Paper Snips
7. Cut a strip from the DP 2” x 3” and a 2” x 3” strip from Ballet Blue and punch the long edge using the Scallop Trim Punch. Attach the punched strip to the DP strip.
8. Attach the ribbon and layer the DP over all layers.
9. Attach rose to the card, punch out leaves using the 2 step bird punch and attach to rose
10. Stamp sentiment on whisper white and cut out using square circle punch and cut in half
11. Using the whisper white as a guide, cut out an underlying piece from rose red and attach to card. .

As I promised in my last post, here is a picture of Bella, the puppy. Isn’t she the cutest?

So until next time……….

Karen

Share Button

More Birthdays for April

Hello everyone…It’s a beautiful morning and it’s easy to get inspired to do so many things, however, I am going to be finishing up income taxes today and maybe I will get some time to play with the ink.

I am puppy sitting this weekend.  Bella is a pom and about 5 months old, so it is like having a baby in the house…I guess she is a baby. Bella belongs to my son and his family, so that actually makes her a grand-puppy. I don’t have a picture to share with you as she is sleeping peacefully so maybe next time I can share he

Here is a birthday card that I made for my son-in-law’s birthday this week.  This card was fun to make and there will be so much that I can do with it.  One of my next purchases from Stampin Up will the be the Loads of Fun stamp which will extend the possibilities.  These stamp sets “Loads of Love” and the “Loads of Love Accessories” really work well for manly birthday cards. They are fun and whimsical and you can make a variety of cards using them, from birthday to harvest, to Christmas.


All products are Stampin Up unless otherwise noted

Recipe

Stamps: Loads of Love, Loads of Love Accessories
Paper: More Mustard, Baja Blue, Pumpkin Pie, Sweet Pea DP, Textured Basic Brown, Creamy Caramel
Ink: Basic Black, Garden Green, Chocolate Chip
Accessories: Scallop Punch, Big Shot, Matchbox die, Coloured Markers, Brads (other), Dimensionals
Technique: 2 step stamping, layering

How To

1. Card Base done in Creamy Caramel – 51/2 x 41/4
2. Baja Blue – cut 5 ¼” X 4”
3. A strip of textured basic brown punched with the scallop punch on one edge
4. A piece of SPDP cut to resemble a grassy hill
5. The truck stamped with basic black on the pumpkin pie and cut out
6. The pieces were layered and assembled on the baja blue and the truck placed so that it looks like it’s travelling down a road.
7. The presents, the trees and the man figure were stamped using the 2 step stamping technique. The trees where stamped using both the garden green and chocolate chip ink and the presents were coloured using various markets
8. The sentiment is stamped on a piece of creamy caramel from the label portion of the matchbox die and accessorized with the brads and attached to the card using dimensionals

I hear the birds singing outside, the sun is shining and everything is right with the world.

So, until next time…………

Karen

Share Button

Dad’s Birthday

Masculine cards are always difficult, although I have seen flowers on a card for a gentleman and it was very effective. I made this card based on the sketch MOJO 133. This site is such a great source on inspiration. If you have a chance, please give it a visit at http://www.mojomonday.blogspot.com/

This card is for my Dad’s Birthday this month….he is 86 years young.  Can you imagine the changes that he has seen in the world over 86 years?  Amazing…one tool that we use frequently, the computer was not even thought of. 

Recipe
Stamps: Happy Moments
Paper: Really Rust, Old Olive, Creamy Caramel, Sweet Pea DP
Ink: Stazon Black, Basic Black
Accessories: Oval Die Cuts (Cricut), Brads (other), Corner Punch, Dimensionals
Technique: Layering

 
How To


1. Card Base done in Really Rust – 51/2 x 41/4
2. Sweet Pea DP cut 11/2” x 13/4” and 11/2” x 11/2” and layered on Old Olive cut 2” x 21/4” and 2” x 2”
3. The larger layer is attached to the top of the card base and the smaller layer is attached to the lower third of the card
4. A strip of really rust was cut 4” x 11/4” and layered in the middle and then the flag in creamy caramel was cut 3” x 11/2”. The points of the flag were cut using the corner punch.
5. A larger oval, 21/2” x 31/2” was cut from the creamy caramel and a smaller oval, 3” x 2” was cut from really rust
6. The image was stamped on the really rust and coloured using marker and the sentiment stamped
7. Brads attached
8. Attach layers using a dimensional for the ovals

And that’s it and now my Dad has his birthday card.

So until next time………..

Karen


Share Button

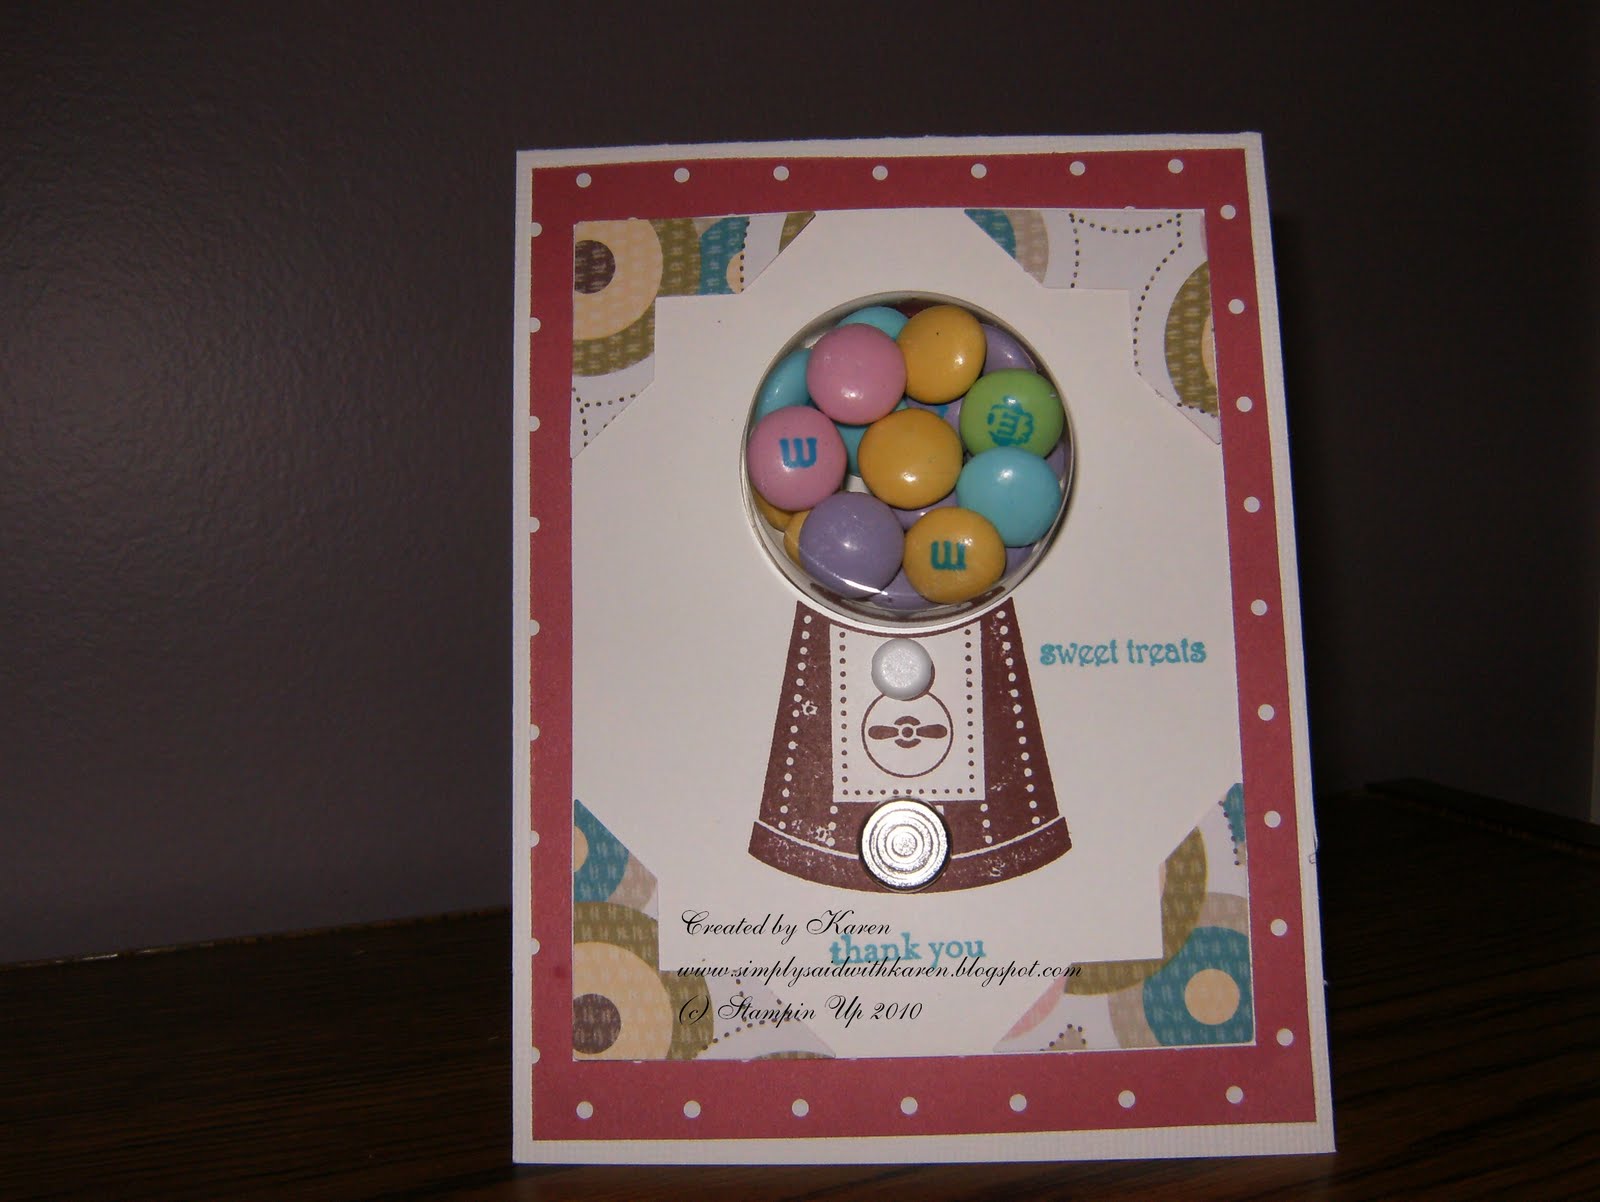
Co Worker Appreciation and Candy Machine

Why does income tax come the same time every year?  I spent yesterday trying to get it done and I almost made it, just a few things to tidy up and I gave myself permission not to work on it today.  Instead, I will work on my cards, visit my parents and generally just have a restful day to get ready for the week ahead.

The card for today is one that I did for a couple of co-workers who travelled with me to Toronto.  I wanted to show my appreciation for the time and effort that they spent in getting the “job done”….

Recipe

Stamps: Something Sweet, Teeny Tiny Wishes
Paper: Whisper White Textured, Sweet Pea DP, Whisper White
Ink: Bravo Burgundy, Taken With Teal

Accessories: Sweet Cups, Corner Punch, 13/4” Circle Punch, Circle Designer Brads, Neutral Brads
Technique: Punch Art

How To
1. Card Base done in Textured Whisper White – 51/2 x 41/4
2. Sweet Pea DP cut 51/4 x 4
3. Large corners layered on Whisper White
4. Circle punch just above the candy machine and insert the sweet cup and fill with whatever you like
5. Candy Machine stamped on Whisper White
6. Brads attached
7. Sentiments stamped in Taken with Teal
8. Attach layers

I hope you enjoy and until next time…….

Karen

Share Button

Snow Day

Well, when I went to work this morning, I could have been in the past like Feb 8th instead of April 8th.  It was blowing, snowing, hailing, raining depending upon where in the city you were. I guess we were paying for the nice weather we had in Feb and March.  But later in the morning the sun came out and it actually turned into not a bad day.

Here is a Birthday Card that I have done for my friend Dianne.  I so enjoy the time that I get to be creative.  Hope you enjoy.

This card was cased from mybratsmom over at http://www.splitcoaststampers.com/

Recipe

Stamps: Upsy Daisy, Vintage Labels
Ink: Cameo Coral, Close to Cocoa
Paper: Ballet Blue, Close to Cocoa, Whisper White, Cameo Coral
Accessories: Perfect Polka Dots, 13/4” Circle Punch, Versa Mark, Iridescent Ice EP, Ribbon (Other) 

How To


1. Card Base is 51/2 x 41/4, second layer is 51/2” x 4”, 3rd layer is 41/4” x3”
2. Upsy Daisy is stamped on the Whisper White with Cameo Coral and divided into 3rds and cut.
3. The second layer is embossed with the Perfect Polka Dots texture folder
4. The 3rd layer is attached
5. The sentiment if embossed using the Vintage Labels, stamped with the “Happy Birthday”, punched and added to the card with dimensional
6. The ribbon is attached over the sentiment.

Enjoy your evening and until next time…..

Karen

Share Button

Happy Easter

Well, it’s good to back on my blog.  I have been in Toronto for the past 2 weeks, not a holiday but for work, so I have itching to get  back and work on some cards to share.

The ones today are not exactly cards but Easter gifts for my grandchildren. 

These gifts I cased from Kim Lampone over at http://www.splitcoaststampers.com/ and I also came across another idea on how to save paper using 12″ X 12″ cardstock when cutting the match box dies.  http://stampingwithlisa.com/paper-saver-template-for-matchbox-die  You can cut four match boxes using this paper saver template.

I so enjoyed making these gifts for my grandchildren….can you tell which one is for my granddaughter?

Recipe
Stamps: Loads of Love Accessories
Ink: Eggplant
Paper: Perfect Plum, Whisper White, DSP, Black, Ballet Blue, Brocade Blue, Garden Green, Regal Rose, So Saffron
Accessories: Oval Punch, Scallop Oval Punch, Circle Punches (13/4”, 3/4”, 1/2”), Butterfly Embosslit, Square Scallop Punch, Crop-o-dial, Ribbon (other), Scallop Punch, Big Shot Match Box die, Dimensionals, uni-ball Signo Gel Pen, archival black pen
Technique: Punch art


How To


1. Using the Match Box die, assemble 2 boxes and attach to each other using 2-sided tape. I used textured whisper white for the boxes.
2. For the boxes in brocade blue, cut the card stock 73/4” by 61/4”
3. Score the long edge 31/2” and 41/4”
4. Assemble bunnies
5. Cut the Garden Green CS 1/14” and scallop punch one edge
6. Cut the DP 2” and edge with decorative scissors
7. Attach to top of box
8. Attach the match boxes to the inside spacing evenly from the side and aligning the back of the match boxes with the ¾” space that was scored
9. Punch a hole in the top and bottom for the ribbon which will act as the closure
10. Assemble the bunny and attach using dimensionals.
11. Decorate with embossed butterflies and sentiment.
12. Fill the matchboxes with chocolate Easter eggs.
13. Insert the ribbon and tie.

Have a wonderful day.

Karen

Share Button

Has Spring Arrived Early

Hi Everyone:  Spring is definitely here, at least for now.  Today was a sunny18 degrees even though the calendar says Spring won’t be here for another few days.  Suprises do happen, so we shouldn’t get used to it.

Here is a couple of Mother’s Day cards that I have created.  The first one is based on MOJO Monday 129.

Mother’s Day Card 1

Recipe
Stamps: Vintage Vogue, Teeny Tiny Wishes
Paper: Textured French Vanilla, DSP, Basic Grey, Bordering Blue
Ink: Bordering Blue, Versa Mark
Accessories: White Embossing Powder, Scallop Trim Corner Punch, Pearl Brad (other)
Technique: Emboss Resist

How To

This card uses the Emboss Resist technique. I stamped the Vintage Vogue flower with Versa Mark and embossed with the white embossing powder and then sponged with Bordering Blue ink. I only embossed the small flower, cut out and attached with the pearl brad. I stamped the swirl Vintage Vogue stamp in the corners. The sentiment was also stamped with versa mark and embossed with white embossing powder. I trimed the corners with the Scallop Trim corner punch on the 2 top layers with the basic grey showing through the scallops.

Mother’s Day Card # 2

Recipe:

Stamps: Of the Earth (Hostess Set), Teeny Tiny Wishes
Paper: French Vanilla Textured, DSP, Bride Specialty Paper
Ink: Versa Mark, Bordering Blue, Brocade Blue
Accessories: Ribbon (other), Scallop Trim punch, Big Shot – Perfect Polka Dots, Dimensionals
Technique: Brayering, Emboss Resist

How To

This card was based on Saturday Sketch Challenge 142, another great choice for that stamper block.


I embossed the 2nd layer with the Perfect Polka Dots impressions folder and then layered the DSP, the brayered Bride specialty paper, trimmed the 5th layer with the scallop trim punch and stamped and emboss resist the sentiment. I then stamped the last layer with the bird from the Of the Earth stamp set and edged with Brocade Blue ink.

Now I have 2 Mother’s Day cards and will have to decide who will receive which one.

 I hope Spring is coming in your area and you are enjoying as much as I am, although we were very spoiled during the winter.
Have a great evening
Karen
Share Button

Resist Embossing

Happy Monday Everyone.  This card was based on Mojo Monday 128.  One of these days, I will get to making the Mojo card in the right week instead of being a week late.  But that’s ok as Mojo Monday sketches are good source of inspiration.

I used the resist embossing technique for this card as it was a class that my demonstrator used for her March classes, so I thought I would practice.  I like the technique as it brings real focus to the stamp on the card. 

All supplies are Stampin Up unless otherwise noted

My Recipe

Stamps: Fifth Avenue, Teeny Tiny Wishes
Ink: Versa Ink, Always Artichoke
Paper: Creamy Carmel, Sweet Pea DP, Always Artichoke, So Saffron

Accessories: Big Shot – Scallop Circle, Beautiful Wings Embosslits Die, White Embossing Powder, Sponge
Technique: Resist Embossing
How To
I stamped the Fifth Avenue stamp using versa mark and embossed with white embossing powder, then sponged with Always Artichoke over the stamped flower to bring out the embossing. I love this stamp and the elegant look it gives to a card.

I have a couple of more cards to showcase, but they will have to wait.

Until next time….

Karen

Share Button

A Birthday Card fit for a Summer Drink

Well, here we are, the first day of DST and I always find this day to go so fast, even if I turned the clocks ahead before I went to bed last night.  Lloyd and I just came back from visiting my parents in their new home.  Once the boxes all get unpacked, the pictures hung on the wall and with a little more organization, their new home will look and feel very comfortable. 

The Birthday card if for Lloyd’s daugher whose birthday is coming up this month and I thought she would get some fun from this card.  It’s call the HAPPY DRINK card. 
Card Recipe
Stamps: Upsy Daisy

Ink: Close to Cocoa, Creamy Carmel, Taken with Teal, Brocade Blue, Bordering Blue, Champagne Mist Glimmer Paint, Cameo Coral


Paper: Vellum, Pumpkin Pie, Real Red, So Saffron, Sahara Sand, Regal Rose


Accessories: Glue Dots. Dimensionals, Oval Punch, Cricut – Life’s a Beach, Dazzling Diamonds, 2 sided tape


Technique: Sponging, Cup Technique


The How Tos


I used the cup technique from the SCS found here: http://www.splitcoaststampers.com/resources/tutorials/cup_card/

 
I sponged the sand with Close to Cocoa, went over it lightly with Creamy Carmel and then sponged on Champagne Mist Glimmer Paint; the water was sponged in Taken with Teal and Brocade Blue and the sky sponged with Bordering blue. For the cup, I sponged on Cameo Coral, Creamy Carmel and Pumpkin Pie and then attached the 2-sided tape to the cup rim and dipped into the Dazzling Diamonds. I cut out the cherry, orange slice, umbrella and straw with the Cricut and attached with glue. I drew lines on the straw with the uni-ball Signo Gel pen. And vola, it looks like a delightful summer drink, just right for sipping on a beach somewhere where it’s warm and sunny.

Hope you have had a happy Sunday and until next time………….

Karen

Share Button

The sun shines brightly

It seems so long between times that I can get to my blog.  The card that I did is a sympathy card based on Saturday Sketch Challenge 140.  You can see the different designs they send out and the beautiful cards that the designers have on the site for inspiration.  http://stamping411.blogspot.com/  Take a look, you cannot help but be inspired.

Card Recipe – all product are Stampin Up unless otherwise noted
Stamps – Of the Earth, Whimsical Words
Paper – Textured Whisper White, Regal Rose, Brocade Blue
Ink – Night of Navy, Versa Ink
Accessories – White Grosgrain Ribbon, Silver Brads (other), Dimensionals, Curly Label Punch

I stamped the Brocade Blue with the Of the Earth stamp with the Versa Ink to make a subtle background.  For the ribbon, I used a craft knife and put two slits on other side of the main stamped image and then used the brads as stoppers.

We have had some wonderful sun over the past couple of days.  It gets very warm if you stand in it long enough.

Have a great day

Karen
Share Button