↓
 

  • Blog
  • Stampin’ Up! Online Store
  • On Line Classes
  • View Our Catalogues
  • Event Calendar
  • Cool Tool Tip Videos
  • Questions and Answers
  • Simply With Heart – Etsy Store
  • Gift Certificates
Home » Blog << 1 2 … 72 73 74 75 76 77 78 >>

Post navigation

← Older posts
Newer posts →

It’s HOT! HOT! HOT!

Posted on July 8, 2010 by Karen GilbertJuly 8, 2010

Hi Everyone:  Well, give us 3 days of hot weather and we are complaining again.  First it’s not warm enough and then it’s too hot!  We are at bout 95 degrees today and it looks like it’s getting hotter for the weekend.  The older I get the less I like the heat or the cold.  Please whisk me away to the lake, I can take the heat there.  Thank goodness for air conditioning.

It’s project #2 from my workshop last Friday.  I thought I would get back here sooner, but no…life gets in the way.  Don’t ask me what I have been doing…the time passes.

I am planning to change the look of my blog and am waiting for the new Stampin’ Up! downloads for the My Digital Software.  The downloads  will be available on Tuesday, July 13.  All the new colours, ribbon , etc will be available, plus you can purchase down loadable software to match the new punches, etc. 

The latest group of digital downloads for My Digital Studio are now available!

122150 Eyelet Border digital punch $1.25
122151 Dotted Scallop Border digital punch $1.25
122152 Bitty Bat digital punch $1.25
122153 Two Step Owl digital punch $1.25
122154 Ornament digital punch $1.25

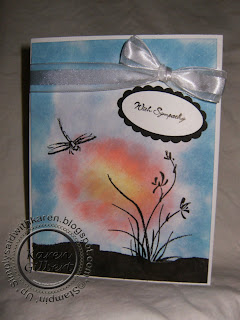
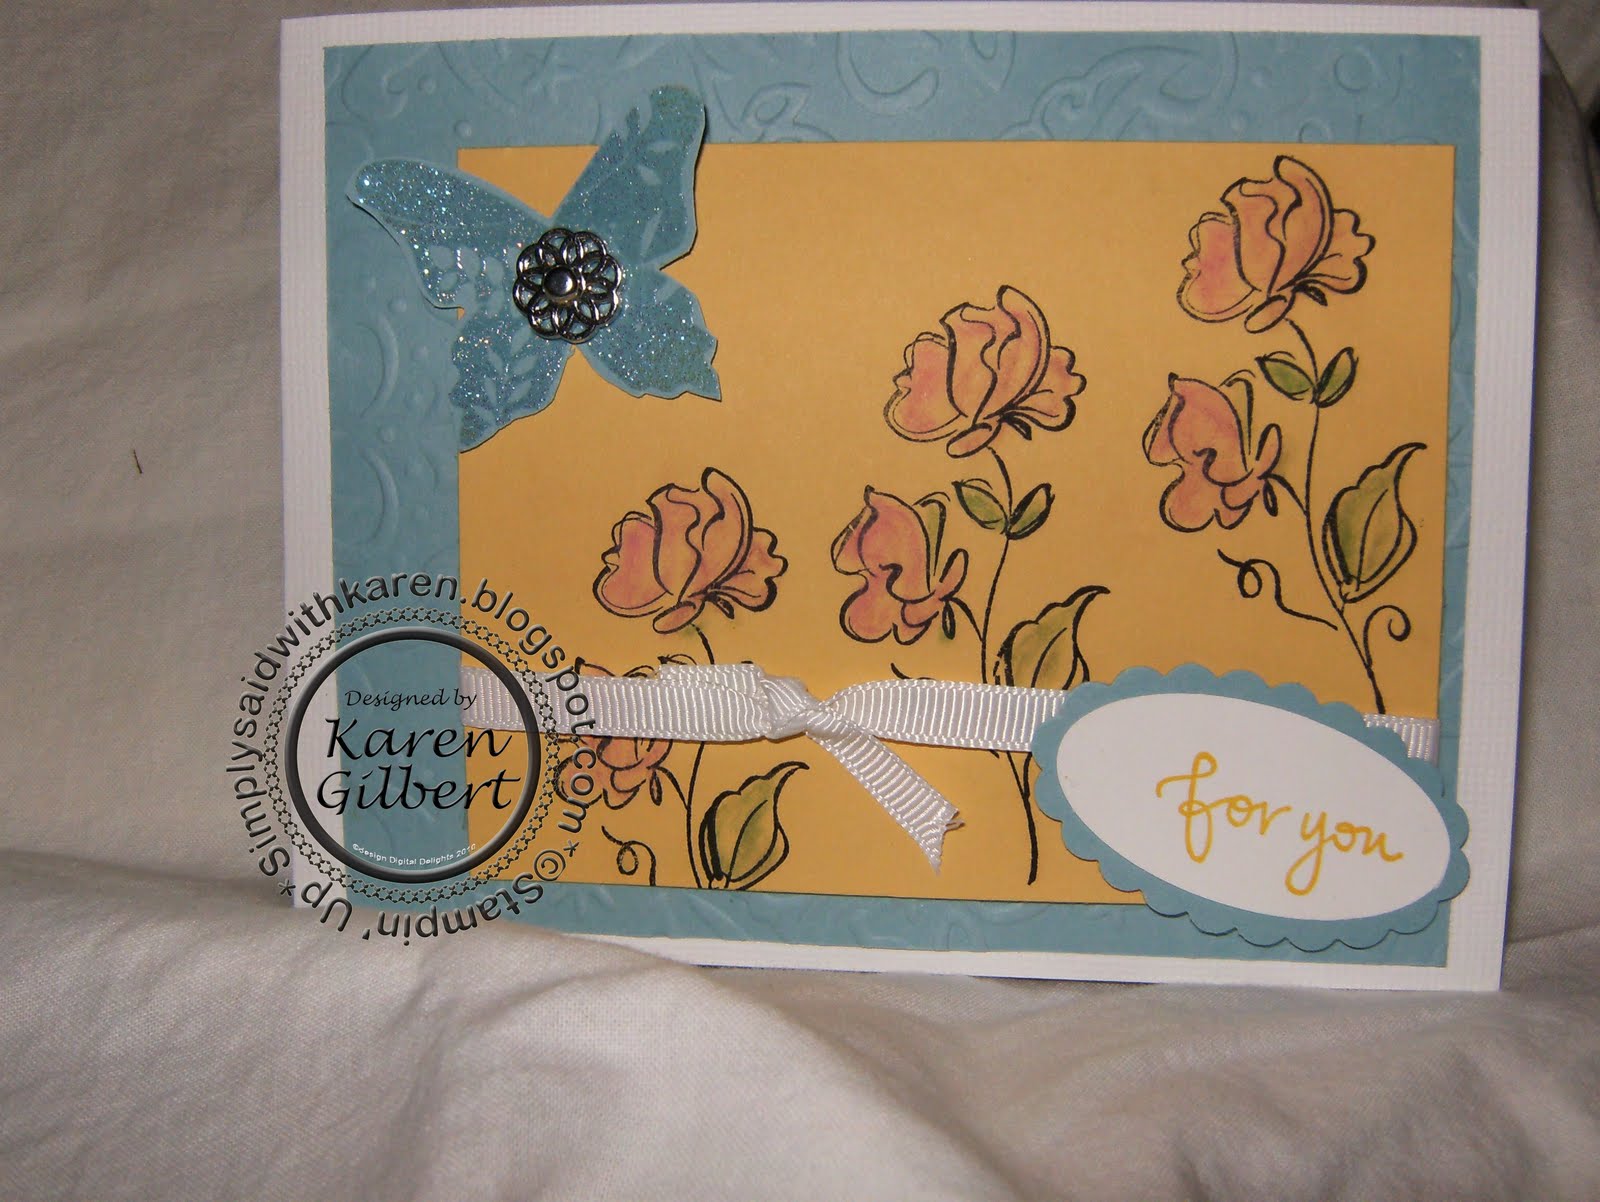
Project #2 – Elements of Style

This card is fairly easy today and uses the new Stampin’ Up! colours and stamps.  I love the Elements of Style stamp as I feel it is very versatile.

Stamps: Elements of Style
Paper: Whisper White, Rich Razzleberry, Soft Suede
Ink: Rich Razzleberry, Soft Suede
Accessories: Scallop Oval Punch, Oval Punch, Brads, Ribbon

  •  The card base is the standard 5 ½” x 4 ¼” of whisper white. Layers 2 – 5 are cut so that they nest with borders of the other layers showing through. The roses were stamped using Soft Suede on the whisper white, the sentiment was stamped using Rich Razzleberry, cut out with the oval punch and layered on the CS punched with the scallop oval punch and attached using brads. The ribbon was encircles the 4 layers 2-5.

Well, it’s time to go and get some supper and enjoy the evening.

Until next time…..

Karen

Did you like this post? Say thanks by sharing it
Pin It
Posted in Elements of Style | 7 Replies

First Stampin’ Up! Workshop

Posted on July 3, 2010 by Karen GilbertJuly 3, 2010

Hi Everyone.  Well, last night I held my very first Stampin’ Up! workshop.  It was a make and take and I can call it a relative success.  We made 3 projects, 1 of which I am sharing today.  All the projects were made with the new colours…(I think they are gorgeous, OK maybe I am a bit biased LOL), and new stamps using a mix of the wooden and clear stamps.  Some of the ladies had never stamped before, so I was excited to share the products with them.

Promoting products is always so much easier when you truly believe in the product for its quality and looks.
The products used in this project can all be purchase through my Stampin’ Up! website, or you can contact me to host a workshop.

This is a set using an A5 envelope which has been altered to be a gift card holder.  This could be used for small gifts, chocolate bars, or whatever will fit in the envelope.  The insert could be used as a gift tag.

Recipe

Stamps: Artistic Etchings, Elements of Style
Paper: Whisper White, Cherry Cobbler, Crumb Cake, Early Espresso
Ink: Cherry Cobbler, Crumb Cake, Early Espresso
Accessories: A5 Envelope, (fits a standard card – 5 1/2” x 4 1/2”) Big Shot, Lattice Embossing Folder, Scallop Circle Die Cut, Crimper, Sponge Dabber, 1 ¾” Circle Punch, Dimensionals

The A5 envelope is sealed and a strip 1 ½” wide is cut off; this will become the cap to the holder.


The swirl image from the Elements of Style is stamped randomly on the front of the envelope using Crumb Cake ink and using a sponge dabber, sponge Crumb Cake ink around the edges of the holder and the cap; this will provide the vintage look. The envelope is put through the crimper width wise so that the crimp runs the length of the envelope holder.

The medallion image from the Artistic Etchings stamp set is stamped on whisper white using Cherry Cobbler ink, punched out and layered on the Cherry Cobbler circle scallop using Cherry Cobbler CS. A strip of Crumb Cake is layered on a strip of Cherry Cobbler and finally the medallion is attached to the strips using a dimensional and all is attached to the envelope.

The sentiment from the Elements of Style is stamped on the cap with Early Espresso.

The layers for the insert are Cherry Cobbler, Crumb Cake, embossed using the Big Shot and the Lattice Embossing Folder, Early Espresso, Cherry Cobbler and Whisper White.


The Eiffel Tower image is stamped on the Whisper White using Early Espresso, and the crown is stamped using Cherry Cobbler and cut out. Finally the sentiment “AMOUR” is stamped using Cherry Cobbler on Crumb Cake, cut out and layered onto the Eiffel Tower.

Next time I will share project #2.
 
Have a great Saturday and until next time….
 
Karen

Did you like this post? Say thanks by sharing it
Pin It
Posted in Artistic Etchings, Elements of Style | 12 Replies

Happy Canada Day

Posted on July 1, 2010 by Karen GilbertJuly 1, 2010

Hi Everyone. I’m so excited and I just can’t hide it.

It’s July 1st and it is CANADA DAY and the new Stampin’ UP! Idea Book and Catalogue along with new stamps, new colours, new accessories as well as many returning favourites is available for you to have a look and decide what you “just can’t live without”. 

Remember, if you host a workshop, one of these catalogues will be available to you absolutely free.

The weather has not been great today and I have been able to enjoy making some cards with the new products.  I will share those with you in a later posts.  I wanted to get the information to you on the new catalogue.

Enjoy your evening and until next time…..

Karen 

Did you like this post? Say thanks by sharing it
Pin It
Posted in Stampin Up | 3 Replies

Live Life to the Fullest

Posted on June 30, 2010 by Karen GilbertJune 30, 2010

Hi Everyone.  A couple of posts ago, I was saying that I hoped I wouldn’t have to make another sympathy card for a while, but here I am.

A tragic and sad day greeted all of us when we went to work on Monday.  A friend and colleague had passed away suddenly over the weekend.  His wife was also a friend and colleague.  One begins to realize how vulnerable we are and our lives as we know them can change in an instant.  He was due to retire in a couple of years and had been building a home on a lake a couple of hours drive from here.  That’s what they lived for…”to be at the lake” and were planning to make that there home after retirement.  He was far to young, not quite 55 and had many days and years ahead or so they thought.   Moments like these cause you to reflect on your life and maybe rethink your priorities in life and realize that no matter how huge your problems appear there are those who likely have larger and more traumatic problems.

My heart goes out to his wife and my thoughts are with her.

I cased this card from TeresaCC over at Splitcoast Stampers, although I changed the images and the colours that I used.  The card had the effect that I wanted to create, serene and elegant.

Recipe

Stamps: Asian Artistry, Teeny Tiny Wishes
Paper: Whisper White, Basic Black
Ink: Basic Black, Marina Mist, Bashful Blue, Cameo Coral, So Saffron
Accessories: Sponges, Organza Ribbon, Oval Punch, Scalloped Oval Punch

Layer 1 is the standard card base in whisper white – 5 1/2” x 4 1/4”.


Layer 2 was sponged using a variety of inks:


A small portion in the center sponged using So Saffron, Cameo Coral was sponged around the So Saffron, and Bashful Blue sponged to create the sky and blended into the Cameo Coral. Last, the Marina Mist was sponged around the outside of layer 2.


Finally, the top portion of the card was masked using post-it notes leaving a portion at the bottom exposed and these areas were sponged with Basic Black


The images were stamped using Basic Black to give a silhouette effect.


The sentiment was stamped in Basic Blank, using the Teeny Tiny Wishes, punched out with the oval punch and attached to Basic Black punched with the scallop oval punch.

Give all that you love a hug tonight….Until next time…
 
Karen

Did you like this post? Say thanks by sharing it
Pin It
Posted in Sponging, Sympathy | 5 Replies

Tangled Up in Creativity #2

Posted on June 27, 2010 by Karen GilbertJune 27, 2010

Hi All and what a weekend it has been and now it’s almost over.  What with buying a new computer and rebuilding with my softward and files, it has taken almost 3 days to get back up and running with what I had last week.  I have a new found respect for the IT people when they say it takes 3 days to load everything.  Thank goodness I have a Clickfree device that I use to back up my files.  It has paid for itself in spades. 

This week, Paige over at She Who Must Stamp set up challenge # 2 for the Tangled Up in Creativity group.  We were to do a card using Red, White and Blue as the United States 4th of July is being celebrated this week.  The card didn’t necessarily have to be a patriotic card.  Hope I am not late in getting to the challenge.

For those of us in Canada, we will celebrate July 1st , Canada Day.

Recipe

Stamps: Petal Pizzazz, Oval All
Paper: Whisper White, Real Red, Pacific Point
Ink: Real Red, Brocade Blue
Accessories: Red Grosgrain Ribbon, Big Shot, Lattice Texturized Impressions Folder, Versa Mark, Iridescent Embossing Powder, Oval Scallop Punch, Oval Punch, Flower Brad (other), Dimensionals.


Layer 1 is the standard card base in whisper white – 5 1/2” x 4 1/4”. The blue layer is embossed with the Lattice Texturized Impressions Folder (Summer Mini).


The large petal was stamped using Versa Mark and embossed with the Iridescent EP, the smaller petals were stamped using Brocade Blue ink, all were cut out and attached using dimensionals.


The sentiment was stamped in Real Red using the Oval All, punched out with the oval punch and attached to Real Red punched with the scallop oval punch. The blue flower brad was attached and the attached to the card.

Have a great week, hopefully I will get back here sooner than a week.  Until next time…..
 
Karen

Did you like this post? Say thanks by sharing it
Pin It
Posted in Embossing, Tangled Up in Creativity | 5 Replies

New SU Colours and Stamps

Posted on June 21, 2010 by Karen GilbertJune 21, 2010
Hi and welcome to Monday.  At least I am finished my work day, so now I can sit back and relax and enjoy our amazing warm, sunny weather.
The card I am sharing today is a Sympathy card for my BFF’s mother who passed away last week.  She was a strong and caring person who saw the beauty in life.  She will be missed by her children, grandchildren great grandchildren and many friends.
I hope this is the last Sympathy card that I make for awhile.  I have made too many in the past couple of months, but I guess it is the stage of life that I am in.

This sneak peek card uses one of Stampin’ Up!’s new colours as well as a new Level 1 hostess set – Because I Care.  New colours and new stamps as well as new accessories will be available in the new cattie coming out July 1st.

Stamps: Because I Care, Teeny Tiny Wishes
Ink: Cherry Cobbler, Old Olive, Basic Black
Paper: Cherry Cobbler, Whisper White, Basic Black,
Accessories: White Grosgrain Ribbon, Vintage Wallpaper Embossing Folder, Oval Punch, Scallop Oval Punch, Glue Dots, Dimensionals

Layer 1 is the standard 5 ½” x 4 ¼” in Whisper White textured card stock

Layer 2 in Cherry Cobbler is embossed using the new SU Vintage Wallpaper embossing folder.

Layer 4 in Cherry Cobbler is layered on Basic Black. The image from the new Level 1 Hostess Set, Because I Care is stamped using Cherry Cobbler and Old Olive ink and attached at an angle.

The sentiment is stamped using Cherry Cobbler on Whisper White, punched out with Oval punch and attached to Basic Black which was punched out using the Scallop Oval Punch. This was attached to the card using dimensionals.


The white grosgrain ribbon was dyed using Cherry Cobbler ink and attached using a glue spot.

Well that’s it for today, enjoy what is left and until next time…..
 
Karen

Did you like this post? Say thanks by sharing it
Pin It
Posted in Because I Care, Sympathy | 10 Replies

Happy Birthday Sagan

Posted on June 17, 2010 by Karen GilbertJune 17, 2010
Hi Everyone.  Well, here I am and I want to share the Birthday Card that I did for my grandson who was 2 years old last week.  Sagan is a happy little boy and lovesssss his trains.  Of course, Thomas, the Train is his favourite, so I tried to do something in his favourite.  Unfortunately I don’t have a Thomas the train, so gave him a little red engine.

Recipe
Stamps: Happy Moments

Ink: Basic Black
Paper: Basic Black, Red Riding Hood, Basic Gray
Accessories: Markers – Basic Black, Cricut – George’s Shapes, Every Day Paper Dolls

The card base is the standard 51/2” x 41/4” in Red Riding Hood Textured and layered with the Basic Gray and then attached the train engine, train tracks, and train signal. The train was outlined with the Basic Black marker to give depth and definition. The sentiment was stamped in Basic Black.

My order from Stampin’ Up! is waiting for me at home and I can hardly wait to start making cards and other things with the NEW COLOURS (on the top left hand side of my blog) and the new In Colours.  The In Colours will now be available for 2 years with a new set being added every year.  What a bonus!

The new cattie and the new products will be available starting July 1, so check out the retiring stamps, accessories and decor items that will be disappearing June 30th.  That’s only another 14 days!  Check Here to see what is available and then contact me if you do not want to miss out on these  stamps and colours that are going away.

The next posts will have cards showing the new colours.

So, until next time………….

Karen

Did you like this post? Say thanks by sharing it
Pin It
Posted in Birthday, Cricut, Punch Art | 12 Replies

Happy Birthday

Posted on June 13, 2010 by Karen GilbertJune 13, 2010
Hi Everyone:  It’s been a week since I did my last post and I do have an idea where the time has gone….work, graduations, life in general. 

The card I have for you today is a birthday card for my BFF.  She insisted that there were to be no suprises and this was her party and she wanted to have all friends and family to come over and help her celebrate this milestone birthday.  So she did just that, having about 30 people for dinner and fun times.  But we didn’t listen to her, of course, and surprised her with a new BBQ and Bird Bath.  A good time was had and the sun came out and shone that day so we could be outside.

She is a stamping fanatic and runs her own business doing what she loves…stamping and scrapbooking. I just couldn’t help but use Totally Tess.
Recipe:
Stamps: Totally Tess, Party Hearty, Happy Moments

Ink: Basic Black, Chocolate Chip
Paper: Whisper White, Regal Rose, Pink Pirouette, DSP
Accessories: Corner Scallop Punch, Markers – Saffron, Regal Rose, Chocolate Chip, Cricut – George’s Shapes, Rhinestone Brad (other)

  1. Totally Tess was stamped on the Pink Pirouette and coloured in using the Stampin’ Up! Markers.
  2. The sentiments were stamped using chocolate chip and a brad added to create some bling.
  3. The card base is the standard 51/2” x 41/4” and Regal Rose and the DSP layered and finally Totally Tess!

Hopfully, I will get to do another post this week, however, I am on a business trip, so don’t know how much time that will leave me.

So….until next time

Karen

Did you like this post? Say thanks by sharing it
Pin It
Posted in Birthday, Totally Tess | 6 Replies

Hello Again Goodbye

Posted on June 6, 2010 by Karen GilbertJune 6, 2010
Hi and I hope it’s sunny where you are.  This has been a busy weekend with birthday parties, graduation and general life.  However, I did find time to make a card with a few of the products that will be retiring from Stampin’ Up! at the end of June.  If you are interested in any of the products, or you just have to have something before it’s gone, then check out those items HERE!  There are last chance stamps, accessories and home decor.
The inspiration for the colours came from this week’s Paper Pals Art and the sketch from Mojo Monday 141.
Recipe

Stamps: Hello Again
Paper: Sahara Sand, Dusty Durango, Whisper White, DSP
Ink: Summer Sun, Garden Green
Accessories: White Grosgrain Ribbon, Photo Corners Punch, Scallop Punch

Have a happy week and until next time…..
 
Karen

Did you like this post? Say thanks by sharing it
Pin It
Posted in Mojo Monday, Paper Pals | 10 Replies

Ten To Tango Challenge #1 – Fight against Breast Cancer

Posted on June 3, 2010 by Karen GilbertJune 3, 2010

Hi Everyone and it’s Thursday and the sun has finally shone today and there was no rain…bonus.

Here is the card for the FIRST Ten to Tango challenge.  Jenn challenged us to make a card in support of the fight against breast cancer and then donate the card to a Cancer Foundation or a Hospice.  I will be donating mine to the Marjorie Willoughby Snowden Memorial Hospice Home located in Kamloops.  As the butterfly is the symbol for hospice, I thought it appropriate to use that on my card as well as bring the colour pink into it as well which symbolizes the fight against breast cancer. 

Recipe
Stamps: Echoes of Kindness, Great Friends
Paper: Whisper White, Baja Blue, Summer Sun
Ink: Basic Black, Summer Sun

Accessories: Big Shot, Texturz Plates – Backgrounds 1, Oval Punch, Scallop Oval Punch, White Grosgrain ¼” Ribbon, Pastels, Filigree Brads, Versa Mark, Iridescent Ice EP

One of the techniques I used to get a sharper embossed image from the Texturz Plates was to spray the CS with rubbing alcohol before I ran it through the Big Shot.  Using this technique sure did pop the design.

Hope you enjoy and don’t forget, that the challenge is open to everyone.  Go to Jax Bean Stalks for all your information.  You will also notice the watermark that is on my card as well.  This is the watermark that I won from Digital Delights.  Please check out the many watermarks that are availalbe, plus they will design one for you.  Wendy did a great job and I am very happy with it.

So until next time…..Hugs

Karen

Did you like this post? Say thanks by sharing it
Pin It
Posted in Big Shot, Ten To Tango Challenge | 2 Replies

Post navigation

← Older posts
Newer posts →

Become A Simply Said With Karen Facebook Fan!

Follow Simply Said With Karen On Twitter!

View Our Videos on the Simply Said With Karen YouTube Channel!

Follow Me on Pinterest
Shop on line 24/7
Email me

Simply Said with Karen Online Classes

Simply Said with Karen Online Classes

Classes Just For You

Events Calendar

Click on the Calendar for a list of my Events

Search

Categories

Paper Pumpkin

Paper Pumpkin

30 minutes of exciting creativity with Paper Pumpkin
Join Now
Click On Image to start your monthly subscription

As Featured On EzineArticles

DISCLAIMER

Disclaimer Text and pictures © Karen Gilbert unless otherwise noted; all rights reserved. You may use cards, scrapbook pages, and other project designs shown here are for personal inspiration. Please do not copy my designs for submission to contests, magazines, etc. Thank you for respecting these limitations. This is a personal blog and is not endorsed by any Company or Organization. All stamped images © 1990-2016 Stampin' Up! unless otherwise noted.

Privacy Policy

Privacy Policy
©2017 - - Weaver Xtreme Theme
↑