Valentines Day Heart Cart
Valentines Day Heart Cart
The Valentines Day Heart cart is sure to greeted with ooos and awws. Fill it with Valentine treats and you will be a hit.
Valentines Day is coming soon so get started on your projects now. This cart started as as a simple project and then I thought why not just keep adding hearts (lots of different hearts) so that the cart gives the illusion of being packed full with hearts.
So here is the reveal and I will give you general instructions as to how I created this.
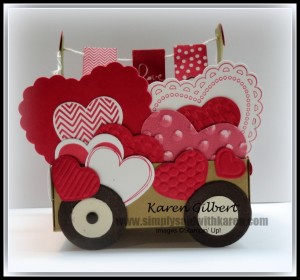
Stamps: Hearts a Flutter (c- 129252, w- 131922, p124 2013/14 Annual Catalogue), Banner Blast (c- 133554, w- 133551, 2014 Sale-a-Bration).
Paper: Whisper White, Real Red, Baked Brown Sugar, Basic Black, Naturals White, Primrose Petals Core’dinations.
Ink: Primrose Petals, Real Red.
Accessories: Big Shot, Circle Framelits, Hearts a Flutter Framelits, Hearts Collection Framelits, Fashionable Hearts Embosslits, Decorative Dots Embossing Folder, Watercolor Washi Tape, Neutral Candy Dots, Whisper White Bakers Twine, Banner Punch, Owl Builder Punch.
How I Did It
Create Cart
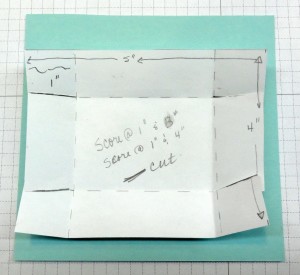
- Using Baked Brown Sugar card stock, cut 5″ x 4″and score at 1″ and 4″, turn card stock and score at 1″ and 3″cart (refer to template below).
- To create posts – cut 2 pieces of cardboard 3″ x 1/2″ – I used the white cardboard from the Designer Paper packages. Cover with the solid gold washi tape and set aside.
- Cut large wheel from Basic Black card stock with the 2nds smallest circle and from Naturals White, cut wheel using smallest circle (Circles Collection Framelits). Attach an Early Espresso Candy dot to the center of each wheel.
Create Valentines for cart
- Using Real Red ink, stamp hearts from the Hearts a Flutter stamp set on Whisper White card stock. Die cut using the Hearts a Flutter framelits.
- Stamp and die hearts from Primrose Core’dination paper and emboss with Decorative Dots embossing folder. Using the Stampin’ Sanding System, distress some of the embossed hearts. This will add some texture.
- Cut some hearts using the smaller hearts from the Hearts Collection Framelits using Real Red card stock.
- Using the Fashionable Heart embosslit, cut hearts from Real Red card stock and Primrose Core’dination paper.
- Attach the hearts to the inside backside of cart, front of cart, back of cart and on each end of cart. Layer the hearts and add as many as you would like. Start with the inside back of cart placing the hearts.
- Attach wheels to each side of cart.
- Stamp 3 banners from the Banner Blast stamp set on Whisper White card stock using Real Red ink. Make one of the banners the “love” banner. Punch banners using the Banner Punch. Punch 3 banners from Real Red card stock (these will be used to attach the banners to the Baker’s Twine.
- Using the Paper Piercer, pierce one hole in the top of each of the posts. Cut a 6″ piece of Whisper White Baker’s Twine and string through the holes in the post. Knot the twine.
- Attach the banners to the Baker’s Twine using Multipurpose Glue and place one of the Real Red banners behind the stamped banner.
- Using the Owl Builder Punch, punch 2 hearts from Real Red card stock and attach on the outside of posts to cover the knots in the Bakers’ Twine.
- Fill a cellophane bag with Valentine goodies, tie the top and place in the cart. Oh so cute!!
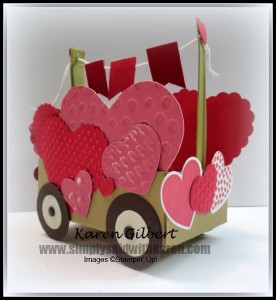
Side View
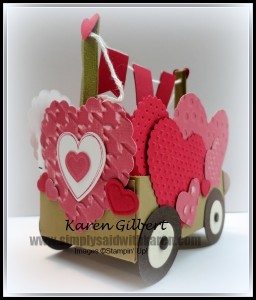
Back View
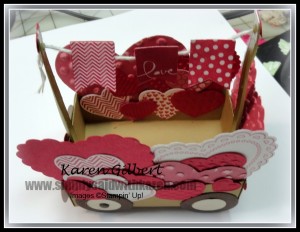
Cart Inside
Need any supplies to make your own Valentines Day Heart cart? Contact me at karen@simplysaidwithkaren.com or shop my ONLINE STORE
Happy Stamping


Not able to pin this beautiful heart wagon. No pin button for pintreset on your page here. Love this wagon!!!!!
What an adorable project Karen, I love the cute banners on the line and can imagine how delightful this will be on Valentines Day filled with chocolates. xx
OH MY Word.. This is fabulous! Love all the beautiful hearts.
OMG Karen this is adorable! Thanks so much for the instructions. hugs.
This is a sensational table-topper for Valentine’s Day, Karen! Masterful work on this great design!