Using Your Die Cuts To Create A Wow Handmade Card
Using Your Dies In Other Ways
Have you ever tried using your die cuts in interesting ways? Today, I have a card to share that I cased from Dawn Griffiths. This is one of those wow cards that really lets you express yourself through your handmade card and yes, you can use this technique on a multitude of images.
I also have a picture tutorial to share with you so that you can recreate this card.
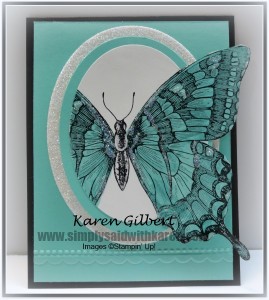 Recipe
Stamps: Swallowtail (c-129216, w- 131943, p71 2013/2014 Annual Catalogue).
Paper: Basic Black, Coastal Cabana, Whisper White, Silver Glimmer Paper.
Ink: Black Stazon, Coastal Cabana.
Accessories: Big Shot, Ovals Collection Framelits, Needlepoint Border Embossing Folder, Dazzling Diamonds, Sponge Daubers.
Instructions:
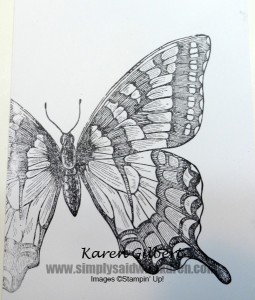
Stamp the Swallowtail image on Whisper White card stock using Black Stazon ink.
Make sure ink is dry and then using a Sponge Daubers, sponge the image with Coastal Cabana ink.
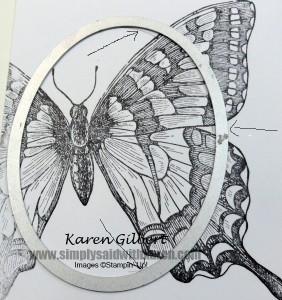 Using the 4th largest oval from the Ovals Collection Framelits, determine how much of the Swallowtail image you want to appear on your card. At this point it may appear that you are eliminating some of the wing…do not fear!
Using a pencil, draw a faint line on the inside of the die. See arrows on picture showing you where to draw the pencil lines
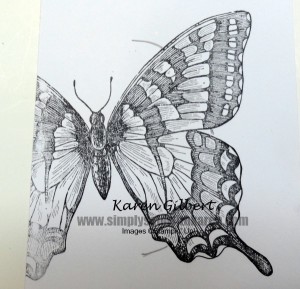
Pencil markings after die removed.
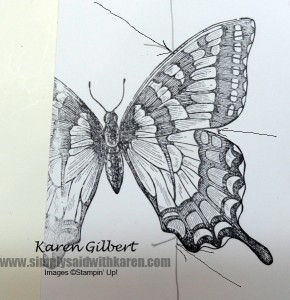
Using your scissors, cut straight up from the edge of card stock to the intersection of the pencil mark and bottom wing.
Continue to cut out the image until you reach the top of the wing and then cut straight up to edge of card stock.
At the side of the wing there is a tiny pencil mark, make sure that you cut outside of the mark.
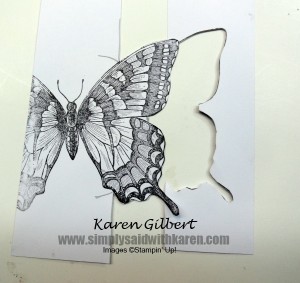 This is how your image should look after cutting out.
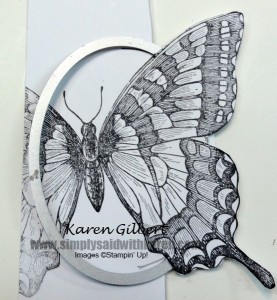
To die cut the image, slide the oval die under the wing that you cut out .
Make sure the oval fits into the intersection of the 2 pencil lines on the top and bottom wing.
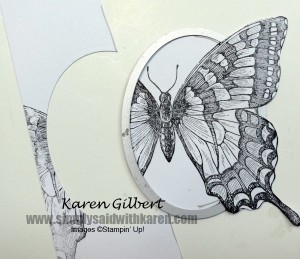
Using the Big Shot, cut out the oval. By having the framelit placed under the wing, you will not cut the image.
Remove the pencil marks using a white eraser.
Add Dazzling Details to various areas of the wings.
Add touches of White Gel Pen to the body.
The other two ovals are die cut using the 5th and 6th largest dies.
Complete the rest of the card .
To purchase any of the supplies for this project, order from my ONLINE store or email me with your order karen@simplysaidwithkaren.com
Happy Stamping


I love this beautiful card!! Excellent tutorial, too, Karen!
What a stunning Butterfly Card Karen, I love the color and the tip on how to use your dies to create this off the page effect TFS. xx
Karen gorgeous card and I love how you did the cut out. Very cool indeed. hugs.
Gorgeous! Might have to CAS!
wow, what a stunning card. Thanks for the tutorial.
What a lovely card and terrific idea Karen. The butterfly stamp you used would have to be one of my most inked!