Soft and Fluffy Snowflakes – Each One Unique and Beautiful
Before I start my post on Soft and Fluffy Snowflakes, I would like to remind you that today is the last day for Bonus Coupon Redemption. If you earn theses coupons during July. You will need to submit and order today by 11:59PM MT.
Did you know that soft and fluffy snowflakes are unique? There must be an explanation as to why they are all different from each other, but, I don’t really want to know. Do you want to know why they are different? I am sure that there is a scientific explanation, but it’s only their beauty that is important.
Soft and Fluffy Snowflakes Card Recipe
Stamp Set: Snowflake Wishes.
Ink: Balmy Blue, Highland Heather, Midnight Navy, VersaMark.
Paper:Whisper White, Thick Whisper White, Balmy Blue, Balmy Blue Glimmer Paper, Snowflake Splendor Designer Series Paper
Accessories: Stampin’ Emboss & Cut Machine, So Many Snowflake Dies, Layered Circle Dies, Winter Snow Embossing Folder, Silver Stampin’ Emboss Powder, Snowflake Splendor 1/4″ Ribbon, Night of Navy Ribbon (Playing with Patterns Ribbon Combo Pack), Blue Adhesive Backed Gems.
Details to Create This Card
Cutting Measurements
- Thick Whisper White: 8-1/2″ x 5-1/2″. Score at 4-1/4″, fold and burnish with Bone Folder.
- Highland Heather, Balmy Blue variegated from the Snowflake Splendor Designer Series Paper.
- Balmy Blue – 3-3/4″ x 5″. Use the double pointed die and cut out center. Lay the piece aside and use in another project. Scraps for snowflake.
- Whisper White – 3″ x 3″ (for 3 snowflake), 2-1/2″ x 2-1/2″ (for sentiment).
- Night of Navy – 3″ x 3″ for sentiment layer.
- Snowflake Splendor 1/4″ Ribbon -4-1/4″- trim ends on diagonal.
- Night of Navy Ribbon (Playing with Patterns Ribbon Combo Pack) – 4″ – trim ends on diagonal.
Put The Card Together
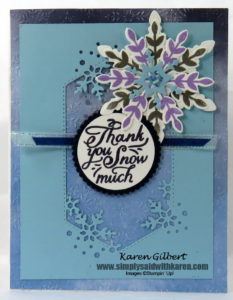
- Emboss the DSP with the Winter Snow Embossing Folder. Attach to Thick Whisper White card base.
- Layer and attach the Balmy Blue cut out layer on the DSP.
- Die cut the Whisper White cs with the large Snowflake die (one with the circle in the middle)
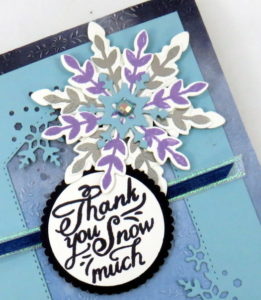
- Ink one large snowflake stamp with Heather Highland and stamp on Whisper White cardstock. Clean the stamp, ink large snowflake stamp with VersaMark and stamp on Whisper White cardstock. Sprinkle Silver Emboss powder on the stamped image and Heat Emboss. Die cut the 2 snowflakes.
- Attach and layer the snowflakes to the Whisper White snowflake. (See photo). Die cut a small snowflake from Balmy BLue cs and attach to center and layer a Blue Adhesive-Baked Gem.
- Stamp the sentiment on Whisper White cs with Night of Navy ink. Die cut with Layered Circle Die and cut the Night of Navy with scallop circle.
- Layer the ribbons and attach to the card front,
- Adhere the sentiment to the scallop circle and attach over the ribbons using Stampin’ Dimensionals.
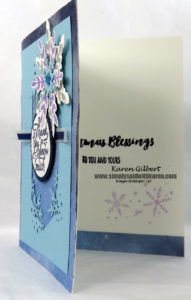
To finish the inside of the card, attach at strip of DSP to the bottom and stamp a sentiment.
You can get the full Snowflake Splendor Suite so that you can create your own Soft and Fluffy Snowflakes card order from my ONLINE STORE. You can purchase the whole suite or the individual items.


Great card, really pretty x
Thank you Karen. I really like this set.
I do love a snowflake on a card I love the colours you’ve done your large snowflake in such a lovely card x
Thank you Natalie for your kind words. I really enjoyed creating this card.
I love snowflakes. Great card Karen. Thanks for being part of my International Highlights this month! All the best with the voting.
Thank you Kylie. I appreciate your comment