Pretty Floral Wedding Card for a Bride & Groom
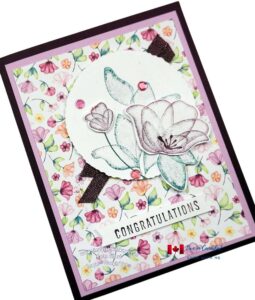
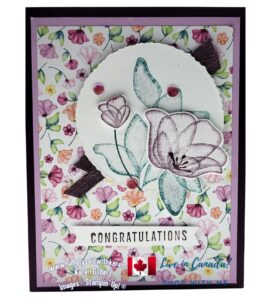
Create a pretty floral wedding card with the Translucent Floral Bundle.
I have had a terrible few weeks which has impacted my ability to craft and post on my blog, facebook, etc. About 6 weeks ago I sprained my knee which has been very painful and prevented me from getting to by crafting space, and yes, I am having withdrawals. Plus, while all this was happening, my father passed away. I am slowly getting better with my knee and coming to terms with my father’s death.
I did this card before, all these things happened, so I am finally getting it posted.
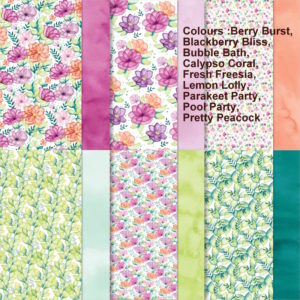
Stampin’ Up! released new Designer Series Paper in their OnLine Exclusives. This release was planned for the Fall Sale-a-Bration period, however it was decided not to continue with this promotion. (SAB will return in January 2024) It is a floral pattern on one side and plain pattern on the other side.
Because it is an Online Exclusive, you will not see it in any catalogue, you must view online. It will be available until the stock is exhausted. So it you want this paper and others like it, I suggest that you get it soon.
Wedding Card Recipe
Stamps: Translucent Floral Bundle
Ink: Blackberry Bliss, Pretty Peacock, Stampin’ Blends Blackberry Bliss (dark)
Papers & Cutting Measurement:
Blackberry Bliss: 8-1/2″ x 5-1/2″,
Fresh Freesia: 5-1/4″ x 4″,
Basic White: 3-3/4″ x 3-3/4″, 5-1/4″ x 4″, scraps for sentiment and Flowers
Delightful Floral 12″ x 12″ Designer Series Paper -3-3/4″ x 6″ and 1/2″ x 4″
Accessories: Lost Lagoon 1/4″ Bordered Ribbon. – 8″ cut in half, Adhesive Backed Sequins Trio (white)
Tools:
Stampin’ Cut & Emboss Machine, Translucent Floral Dies, Deckled Circle Dies.
Basic Supplies:
Paper Trimmer,Bone folder, Paper Snips, Take Your Tool Pick, Stampin’ SEAL+, Multipurpose Liquid Glue, Stampin’ Dimensionals, Mini Glue Dots.
Assemble the Card
- Cut the Blackberry Bliss cardstock, score at 4-1/4″ and burnish with Bone Folder, Card Base.
- Die cut the circle using the Deckled die that measures 3-3/4″ across (inside the edge).
- On the circle, stamp the large leaf stamp with Pretty Peacock ink. Stamp off once to get a lighter colour.
- Use the Basic White scraps, and double leaf stamp and Pretty Peacock ink. Again stamp off. Stamp the large flower and the smallest flower on Basic White scraps with Blackberry Bliss (stamp off).
- Stamp the stem in full-strength Pretty Peacock ink on white circle (see card for placement).
- Die cut the 2 flowers and the double leaves. Stamp the stamen on the large flower with full strength Blackberry Bliss.
- With Blackberry Bliss Stampin’ Blends, colour the ribbon. Colour both sides. Attach to the back of the circle with Stampin’ Seal+.
- Stamp the sentiment on the Basic White scrap and punch with the Banners Pick a Punch.
- Attach the flowers to the circle.
- Layer and attach the Fresh Freesia to the card base . Attach the Circle and the sentiment.
- Colour the sequins with the Blackberry Bliss Stampin’ Blends and attach 3 to the card front.
- On the inside panel, attach the strip of DSP and stamp a sentiment and 2 small flowers.
Please contact me to order any products or you can directly order from my ONLINE STORE if you wish to recreate this card with the supplies that I used. Have questions? Email Me
Product List


