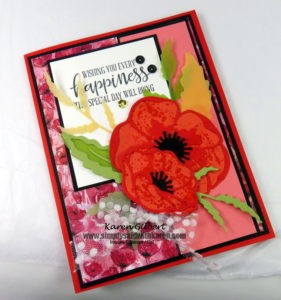
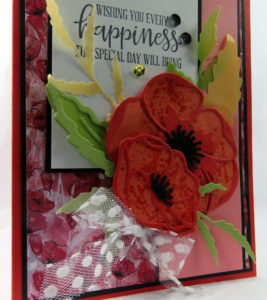
Peaceful Poppies For Those Special Moments and Special People
The Peaceful Poppies suite found in the 2020 Mini Catalogue is wonderful. It’s bright and cheerful and you will be delighted with the cards you can create using this set.
The stamp set and dies used on this card are part of an all encompassing suite.
The one thing I really like about the suites is that everything is coordinated and you don’t have to go looking for embellishments or papers that fit together. In fact, for this catalogue, Stampin Up added the colors that are complementary to the suite. Yeah, again making it easier.
Thank you to Mary Deatherage for inspiring me with this card.
Peaceful Poppies Card Recipe
Stamp Sets: Painted Poppies, Peaceful Moments.
Ink: Tuxedo Black Memento, Poppy Parade.
Paper: Poppy Parade, Basic Black, Flirty Flamingo, Calypso Coral, Pear Pizzazz, Whisper White, Peaceful Poppies Designer Series Paper, Perennial Essence Vellum Cardstock.
Accessories: Die Cutting & Embossing Machine, Painted Labels Dies, Poppy Moments Dies, 5/8″ Polka Dot Tulle Ribbon, Peaceful Poppies Sequins.
Details to Create This Card
Cutting Measurements:
Poppy Parade cs – 5-1/2″ x 8-1/2″, score at 4-1/2″ and burnish. 3-1/4″ x 2-3/4″ (for flower outline dies).
Whisper White: 2-1/2″ x 3″.
Basic Black: 4-1/8″ x 5-3/8″, 5-3/8″ x 1-3/4″, 2-5/8″ x 3-1/8″, scraps for flower centers.
Flirty Flamingo: 5-3/4″ x 1-5/8″.
Calypso Coral: 3-1/4″ x 2-3/4″ (base for flowers).
Pear Pizzazz: scraps for leaves.
Perennial Essence Vellum: So Saffron & Old Olive scraps for leaves.
Peaceful Poppies Designer Series Paper – 5-3/8″ x 4-1/8″.
5/8″ Polka Dot Tulle Ribbon 7-1/2″
Details to build the card:
This card has a lot of layers and could be classified as a card for avid stampers. If I were to use this card for a class, I would certainly revamp it a bit so it would not be overwhelming for class attendees.
The best way to build this card is to assemble the flowers and the panels before attaching the various elements.
- Use Poppy Parade ink and stamp the splatter stamp on the Calypso Coral. Die cut with the 2 flower dies. Now, die cut the cutout dies that match the solid flowers from Poppy Parade and attach to the solid flowers. Die cut the flower centers from Basic Black.
- From the Perennial Essence Vellum, die cut a variety of Old Olive and So Saffron leaves. Cut a couple of leaves from Pear Pizzazz cardstock. You can also layer the vellum and cardstock leaves.
- With Tuxedo Black ink, stamp a sentiment on the Whisper White Panel and adhere to the Basic Black panel. Attach the Flirty Flamingo cs strip on the Basic Black strip.
- Adhere the Peaceful Poppies Designer Series Paper panel to the largest Basic Black panel.
Now it’s time to put it all together:
- Layer the DSP and Basic Black panel on the Poppy Parade card front.
- On the right hand side, attach the Flirty Flamingo and Basic Black panel on the DSP layer.
- Adhere the sentiment panel to the left hand side. Adhere the the smaller flower on the larger flower and attach the flower centers. Arrange and attach the leaves behind the flowers. Finally, attach the flowers with Stampin’ Dimensionals.
- Tie a bow with the 5/8″ Polka Dot Tulle Ribbon and attach below the flower with a couple of glue dots. Place sequins from the Peaceful Poppies Sequins on the sentiment panel.
- If you would like cut, a panel of 4″ x 5-1/4″ Whisper White, stamp a sentiment and attach to the inside of the card.
Your card is done, so mail it off or hand deliver to a special person.
If you like it all, you can purchase the Peaceful Poppies Suite – dies, stamps, sequins, ribbon and Peaceful Poppies Elements. Click on the link to check it out.
Click on the images below to order from my ONLINE STORE.


