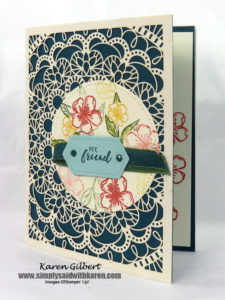
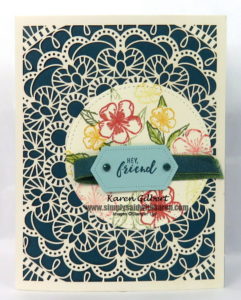
Laser-Cut Cards Are Elegant And So Easy To Create
Laser Cut Cards with the Bird Ballad Laser-Cut Cards & Tin are so easy to create. The card bases are beautiful and delicate and come in Very Vanilla with matching scalloped flap envelopes.
Friend Laser Cut Card Recipe
Stamp Sets: Free as a Bird, Itty Bitty Greetings
Ink: Calypso Coral, Daffodil Delight, Old Olive, Pretty Peacock.
Paper: Pretty Peacock, Very Vanilla, Pool Party, Bird Ballad Laser-Cut Cards & Tin.
Accessories: Die Cutting Machine, Stitched Shapes Dies, Stitched Nested Labels Dies, Sponge Daubers, Pretty Peacock/Old Olive 3/8″ Reversible Ribbon, 2019-2021 In Color Faceted Dots, Post-It Notes for Masking.
How-To Details
Why do I say “so easy to create”? Using the laser-cut cards as a base, allows you to have minimal embellishments on the project, because the card base is the embellishment. All you need to do is concentrate on the focal image.
- Cut Pretty Peacock cardstock 5-1/2″ x 8-1/2 and score at 4-1/4″. Trim 1/16″ from each 5-1/2″ side. Apply adhesive to the inside of Laser-Cut Card and attach the Pretty Peacock cardstock. ** The reason for trimming the Pretty Peacock is to allow the edges to line up with the card base and allow all the pieces to lie flat.***
- Use largest circle from the Stitched Shapes Die cuts. Cut circle from Whisper White cardstock. Create a mask for the 2 flower stamps. Stamp on the Post-It-Note and cut out. Randomly stamp the large flower, small flower and leaves on the circle. Remember to stamp a few flowers that fall off the circle.
- See below for the Masking Technique.
- Once you have the stamping completed, use a sponge dauber and matching color ink pad to color in the centers of the flowers and the leaves.
To Use the Masking Technique
- Stamp the flowers that you would like to have in the foreground (very front) of the scene on your cardstock.
- Stamp the same images on a Post-It Note™, making sure that part of the stamped image is on the sticky part of the paper.
- Carefully cut the flowers on the Post-It Note™ out with your scissors. Cut right on the line or even slightly inside of it.
- Layer your Post-It Note™ flowers over the ones stamped on your cardstock. Stamp the leaves or other flowers over your mask. This step gives the illusion that the stamped image is in the background.
- Once you have finished stamping over one image, remove the mask, place it over the next foreground image and continue to stamp. Color your image if necessary.
Complete the Card
- Layer and attach the circle so that it is framed on one side with the inner lace circle.
- Stamp the sentiment on Pool Party cardstock with Pretty Peacock ink. Use the 2nd smallest Stitched Nested Label dies and attach a length of ribbon which has been doubled to the back of the label.
- Attach to the stitched circle.
- Put the card in the matching envelope and send in the mail or hand deliver to someone special.
If you want to recreate this card, please shop my ONLINE STORE.
Product List


