Focus on the Cheerful Daisies Bundle and the Coordinating DSP
Focus on the Cheerful Daisies bundle is the theme this month. And with that focus comes the Inspirations in Ink Blog Hop.
We would really appreciate it if you were to hop along with us.
This stamp & die set when used together or separately has so many possibilities. I cannot seem to use it enough.
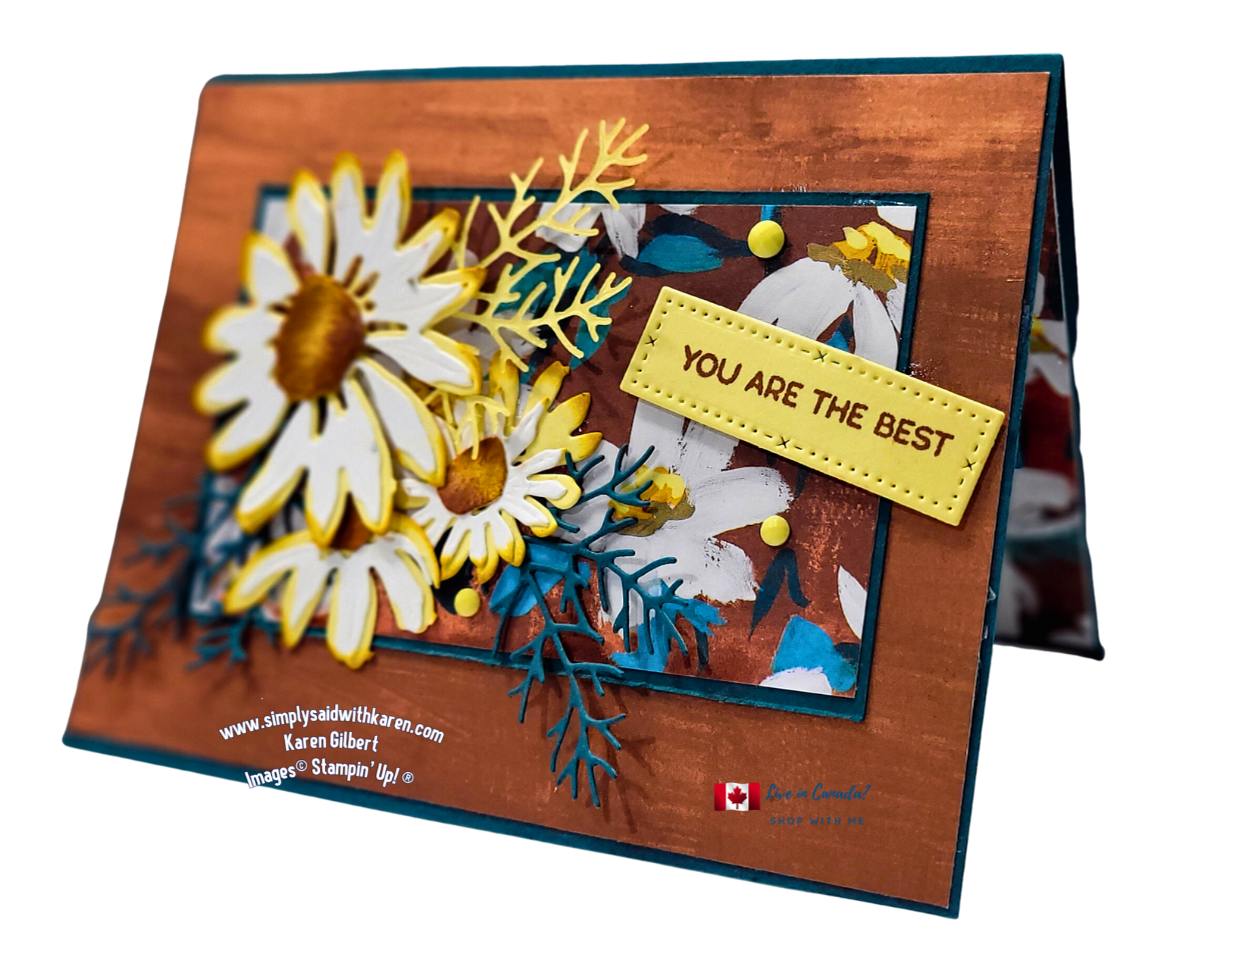
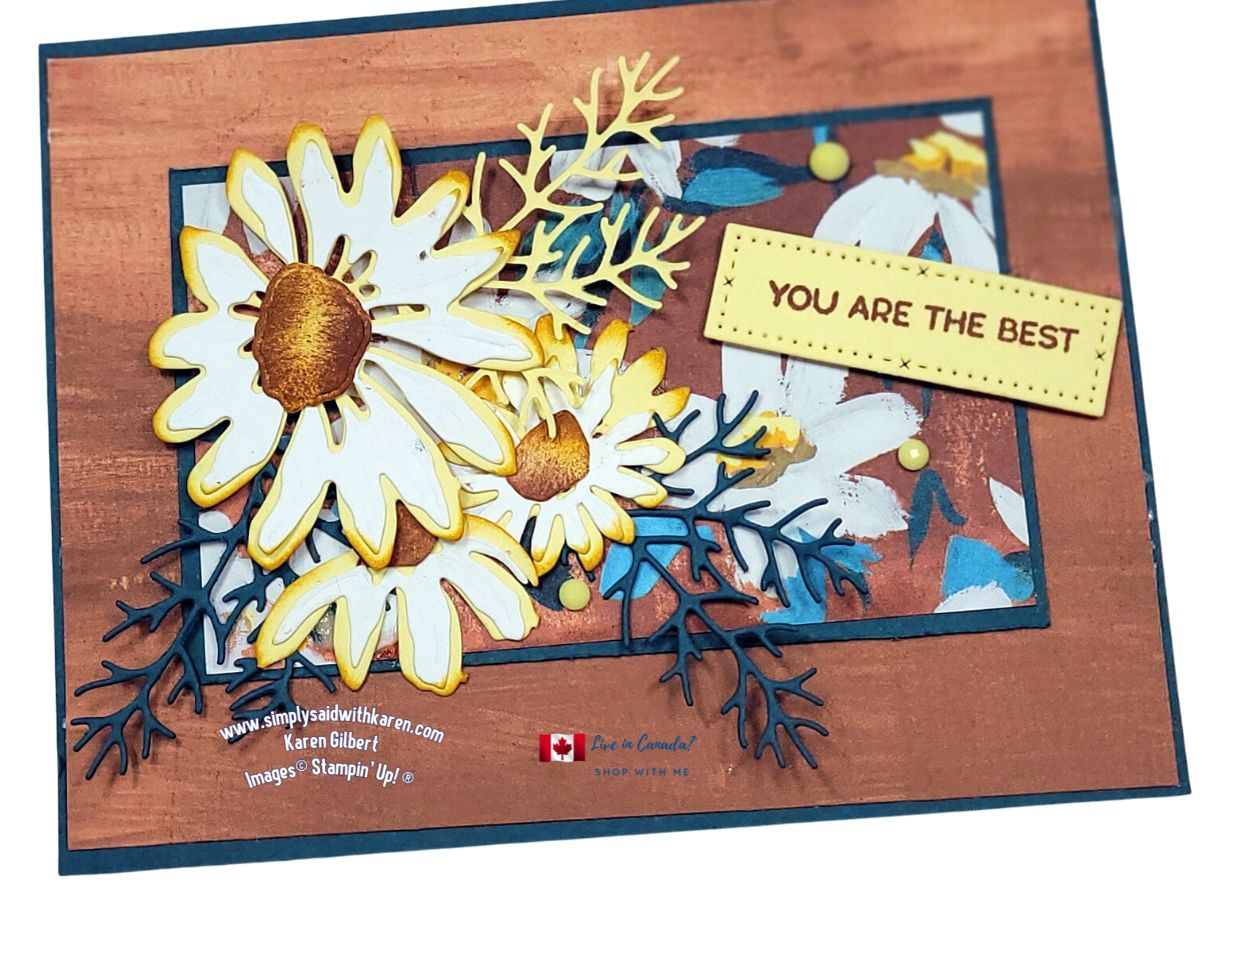
Encouragement Card Recipe
Stamp sets:
Cheerful Daisies.
Timeless Arrangements.
Inks:
Copper Clay
Crushed Curry
Paper with measurements:
Basic White
4” x 5-1/4”
Pretty Peacock 8 ½” x 5 ½”, scored @ 4 ¼”
4-1/4” x 2-5/8”
Scraps for twigs.
Lemon Lolly
4-1/4” x 3-1/2”
Scraps for twigs and sentiment
Fresh as a Daisy Designer Series Paper
4-1/8” x 5-3/8”
4-1/8” x 2-1/2”
Accessories
Adhesive Backed Solid Gems
Tools
Sponge Daubers
Stampin’ Cut & Emboss Machine
Cheerful Daisies Dies
Basic Supplies
Paper Trimmer
Bone folder
Paper Snips
Take Your Tool Pick
Shammy
Stampin’ Seal/Seal+
Multipurpose Liquid Glue
Stampin’ Dimensionals
Mini Glue Dots
Instructions
- Fold Base Card in half along score line prior to burnishing with Bone Folder.
- Use a piece of the plain Copper Clay DSP and attach to Card Base.
- Cut a piece of the flowered DSP and attach it to the smaller Pretty Peacock panel. Attach this panel to the the DSP.
- Die cut the joined daisy from Lemon Lolly cs. Cut the leaves off and save for another project, separate the remaining daisies. Cut 1 twig from Lemon Lolly.
- Use Crushed Curry ink and Sponge Dauber to apply ink to the daisy petals.
- Die cut the daisy inserts from Basic White cs. Attach to the Lemon Lolly daisies.
- Die cut 2 small daisy centers and large one from Basic White. Use Sponge Dauber and Copper Clay ink to apply to centers. Leave some white space and fill that with Crushed Curry ink. Adhere to the white dailies with Glue Dots.
- Arrange and attach the 2 smaller daisies and twigs with Seal, Seal + or Multipurpose Liquid Blue as per the photo below. Attach the large daisy with Dimensionals.
- Stamp a sentiment from the Timeless Arrange stamp set on Lemon Lolly. Die cut with the appropriately sized label die. Attach to card front and attach 3 Adhesive Backed Solid Gems.
- On the Basic White panel for the inside, place a DSP strip to the righthand side.
- Stamp a sentiment on the inside of the card panel.
I hope you have enjoyed this focus on the Cheerful Daisies Bundle. If you have any questions, please contact me at karen@simplysaidwithkaren.com and I will get back to you with an answer. Below is list of demonstrators who are taking part in this blog hop. Please hop along with us to see the various card designs.
Just click on the hyperlinks below and you will be taken to the other blogs.
Thank you for taking part in our Blog Hop.
Blog Roll
Deirdre Croal – USA
Julie Golding-Page – Canada
Karen Beck – Canada
Theresa McEntee – USA
Rebecca Nutley – Australia
Robbie Rubala – USA
Christy Gridley – USA
Product List


Very pretty, love the colour choices.
Lovely Card Karen!!!
This is gorgeous! I really love your colour scheme and the wood grain effect of the background paper.
Lovely card!