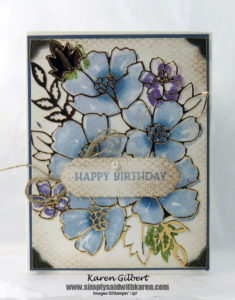
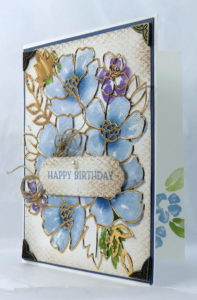
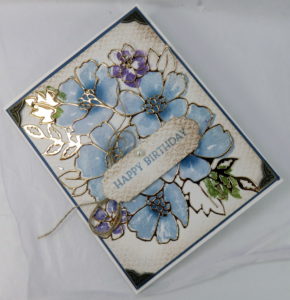
Focus on the Brass Foil Paper – Outline The Blossoms In Bloom Bundle
it’s time to focus on the brass foil paper, a new product in the 2020/21 Annual Catalogue. The Blossoms in Bloom stamp is the perfect stamp to use with this technique.
The next several blog posts will feature this stamp set with various techniques.
Focus on the Brass Foil Card Recipe
Stamps: Blooms in Blooms.
Ink: Seaside Spray, Old Olive, Highland Heather, Crumb Cake.
Paper: Misty Moonlight, Whisper White, Brass Foil, Adhesive Sheets.
Accessories: Embossing & Die Cutting Machine, Many Layered Blossoms Dies, Tasteful Textures 3D Embossing Folder, Lovely Labels Pick a Punch, Antiqued Corners & Slides, Linen Thread, Sponge Daubers, Stampin Sponges, Stamparatus.
Details to Create Card
- Place Adhesive Sheet on the back of Brass Foil. Use the Embossing & Die Cutting Machine and the Many Layered Blossoms Dies to cut out the Brass Foil. Use the die that has the very thin outline.
- Place the Whisper White panel on your Stamparatus. Lay the cut out Brass Foil on the paper. Make sure that no parts of the die cut are off the Whisper white pane.
- Lay the stamp over the die cut. Match up the flowers with the flowers in the die cut. Press the Stamparatus plate onto the stamp and lift up. Remove the die cut.
- Ink the Stamp the Blossoms in Bloom with Seaside Spray ink. Lower the plate and stamp and stamp the image.
- Return the foil die cut to the Whisper White panel. Line up with stamped blossoms. Place the individual flowers and leaves on the Brass Foil, align with the die cut flowers and leaves. Lower the Stamparatus Plate to pick up the stamps.
- Raise the plate with the stamps and ink with Highland Heather. Remove the brass foil die cut and stamp the flowers.
- Use this same process to stamp the leaves.
Finish Up the Card
- Run the panel through Embossing & Die Cut Machine with the Tasteful Textures 3D Embossing Folder. Use the Stampin’ Sponge loaded with Crumb Cake ink and sponge the 4 sides to create definition. Set aside
- Attach to Misty Moonlight panel. Adhere the panel to Whisper White card base.
- Attach 4 Antiqued Corners to each corner of the card with Glue Dots.
- Stamp the sentiment on Whisper White with Seaside Spray ink. Punch with Lovely Labels Pick a Punch. Emboss with the Tasteful Textures 3D Embossing Folder, and sponge the edges with Crumb Cake ink.
- Wrap a length of Linen Thread around 4 fingers to make loops, tie in the middle with a piece of Linen Thread and attach underneath the upper left corner of the label with Glue Dot.
- Attach to card with Dimensionals.
- Decorate with inside by stamping a couple of flowers and leaves on the right bottom side. Decorate the envelope if you wish and send to someone who love flowers, and antiquing.
To purchase any of the products to recreate this card from my ONLINE STORE.
Have fun and focus on the Brass Foil Paper.


