Christmas Snow Globe Greeting Card Create One for Yourself
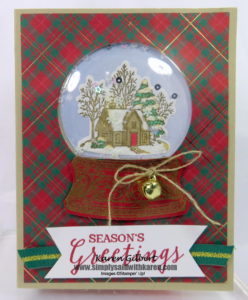
Create your own Christmas Snow Globe for yourself or someone else. A snow globe is magic and it’s so peaceful to look at it.
Stampin’ Up!’s 2019 Holiday Catalogue goes live on Wednesday, September 4th, 2019. Anyone who loves Stampin’ Up! and their products, love the Holiday Catalogue. Did I hear Wish List, or pages marked and remarked, or maybe it’s under your pillow so that you can dream on it. However you enjoy the catalogue, you don’t have to wait much longer to order.
 Snow Globe Recipe
Stamp Set: Still Scenes.
Ink: Cherry Cobbler, Soft Suede, VersaMark.
Paper: Crumb Cake, Cherry Cobbler, Whisper White, Wrapped in Plaid 6″ x 6″ Specialty Designer Series Paper (DSP), Feels Like Frost 6″ x 6″ Specialty Designer Series Paper (DSP).
Accessories: Die Cutting Machine, Snow Globe Scenes Dies, Layering Circle Dies, Snowflake Sequins, Snow Globe Shaker Domes, Shaded Spruce/Gold 3/8″ Striped Ribbon, Jingle Bells, Stampin’ Gold Embossing Powder, Banner Triple punch, Snowfall Accents Puff Paint, Linen Thread, Stampin’ Blends: Shaded Spruce, Real Red, Crumb Cake, Daffodil Delight.
How to Create the Focal Art Piece
You can purchase and use the Globe shaped stamp to create your globe and it will be mail friendly. The Snow Globe Shaker Domes give the card a 3-Dimensional look, however it has some height to it, so will not be able to go regular mail. You could send it in a padded envelope or hand-deliver with a package of Christmas Cookies.
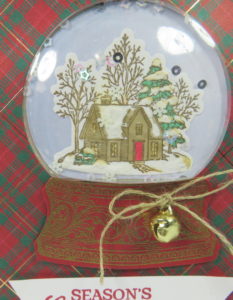
- To start, stamp the house scene with Soft Suede ink, and color using the Stampin’ Blends. When everything is dry, apply the Snowfall accents Puff Paint on the roof, trees, and front yard. To make the paint puff, heat with a Heat Tool. Do not put too much snow on the card.
- Cut a circle from a sheet of Feels Like Frost (DSP) using the largest circle die. Adhere the die cut house image to the center of the DSP. Use the 3rd largest circle die to cut a circle in the Wrapped in Plaid DSP. Make sure that the circle is centered and towards the top of the DSP.
- Remove the front backing from the globe and slip the globe through the circle and press down to attach. Turn the globe over and sprinkle some Snowflake Sequins into the globe. Remove the adhesive backing from the bottom of the globe, center on the house scene image and press down. Before pressing the adhesive, make sure that the image is centered in the globe.
Assemble the Card
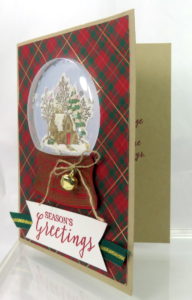
- Adhere, the image background circle and the Wrapped in Plaid DSP to the Crumb Cake card base.
- Stamp the filigree image on Cherry Cobbler CS with VersaMark. Springle with Gold Embossing Powder and heat set. Die cut with matching die. Attach to the bottom of the globe. String a piece of Linen Thread through the Jingle Bell and tie a bow. Attach to globe stand with a Stampin’ Mini Glue Dot.
- Stamp the greeting on Whisper White CS and punch both ends of strip with the Banner Triple Punch.
- Attach a piece of the Shaded Spruce/Gold Ribbon to the back of the sentiment and secure on the front of card with Stampin’ Dimensionals.
- Finally stamp a sentiment in the inside of the card.
So, now it’s your turn to create your very own Christmas Snow Globe and enjoy the magic.
All materials to create this card will be available to order from my ONLINE STORE starting Wednesday, September 4th, 2019.


