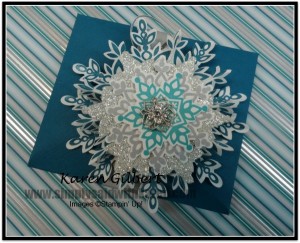
Christmas Packages
Christmas Packages Under the Tree
Christmas packages under the tree will certainly delight many at Christmas. Then, there is the mystery of “What is in the package”.
This Christmas package does double duty as it holds a gift and the Christmas decoration can be hung on the tree. You can do beautiful packaging using Stampin’ Up! products
The Festive Flurry stamp set, along with the Festive Flurry framelits, makes this decoration so easy create. You will hear oohs and awws when the recipient sees this beautiful package.
Recipe
Stamps: Festive Flurry (c – 131781 w- 131778, p30 2013 Holiday Catalogue)
Paper: Whisper White, Island Indigo, Silver Glimmer Paper, Winter Frost DSP
Ink: Island Indigo, Bermuda Bay, Versamark
Accessories: Big Shot, Festive Flurry Framelits, Circle Framelits, Smokey Slate Embossing Powder, Silver Ribbon, Frosted Finishes Embellishment, Envelope Punch Board.
To start with, you will need to stamp 2 of the largest Festive Flurry stamps as they will form the base of your decoration.
Using you score board, score each of the points of the snowflake. As it is difficult to line up the centers of the snowflake points, I suggest that you start in the middle and score up to the top of the point.
You will also have to decide which points will be your mountain fold and which points will be your valley fold. For this snowflake I chose to make the mountain folds on the longest points.
Once you have the snowflake scored, cut along 1 point to the middle and start fan folding the snowflake. Do this for each of the snowflakes. Once you have both snowflakes folded, attach them together to make a full circle. You will need to overlap a section of each snowflake to get a nice finish on the points.
Start layering the other snowflakes using dimensionals. Stack 3 or 4 dimensionals between the bottom layer and the next layer to achieve the 3-D effect.
Cut a circle using the Circle Framelits to finish the back of the decoration. Before you attach the circle to the back, slip a folded piece of the Silver Ribbon between the circle and the back of the snowflake. This will act as a hanger for the decoration.
The final step is to attach the Frosted embellished to the top of the decoration.
The Christmas packages can be created using the Envelope Punch Board and Island Indigo textured card stock. A belly band made from a piece of the Winter Frost DSP will hold the package together.
See the video on how to make this Festive Flurry decoration, http://youtu.be/-PU0YSd2T68
To see how the Christmas package was made using the Envelope Board Punch, check out this video link.
Envelope Punch Board – Not Just for Envelopes – Make a Few Boxes
So go ahead and create your own Christmas packages. You can create different feelings by changing up the colours.
Happy Stamping


Gorgeous silver and blue color combo for your stunning layered snowflake!
Wow, beautiful snowflake!