Use Blended Seasons Stamps – Fall and Christmas
Use Blended Seasons Stamps For Fall and Christmas
Create cards for Fall and Christmas with the Blended Seasons stamp set. I know that the words Fall and Christmas at this time of year may not be the greatest to use. As much as we don’t want summer to end, we always need to look ahead.
Yes, the Color Your Seasons bundle (Blended Seasons stamps and Stitched Season Framelits) will be available to purchase starting August 1, 2018. To find out the information on this promotion, visit this LINK
Use the leaf stamps in many ways to add interest to your Fall cards. In addition, use the leaf framelit in conjunction with the stamps. As for the Christmas stamps, there are evergreen boughs with holly and berries, and a Christmas bell.
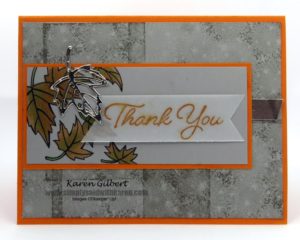
 Recipe:
Stamps: Blended Seasons, Bokeh Dots.
Inks: Gray Granite, VersaMark, Memento Tuxedo Black, Pumpkin Pie.
Paper: Pumpkin Pie, Gray Granite, Champagne Foil Vellum.
Accessories:Big Shot DIe Cutting Machine, Stitched Season Framelits, Clear Stampin’ Emboss Powder, Banner Triple Punch, Stampin’ Blends: Pumpkin Pie Duo, Pear Pizzazz, Color LIfter.
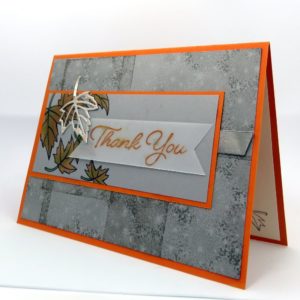
Ink the Bokeh Dots stamp with Gray Granite ink and stamp the Gray Granite cardstock. Overlap the images changing the direction of the stamp. You will achieve an interesting background. Stamp the leaves with the Memento Tuxedo Black ink and color using the Stampin’ Blends.
Stamp the Velum with Pumpkin Pie ink and heat emboss with Clear Stampin’ Emboss Powder. Die cut the leaf from Champagne Foil paper and apply to card front.
Add the layers of the card and slip a strip of Champagne Foil behind the Pumpkin Pie banner.
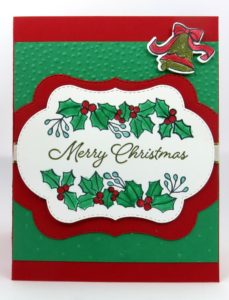
Recipe
Stamps:Blended Seasons.
Inks:Memento Black Tuxedo, VersaMark.
Paper: Real Red, Whisper White, Call Me Clover.
Accessories: Big Shot Die Cutting Machine, Softly Falling Emboss Folder, Stitched Season Framelits, Tiny Spatula, Aqua Painter Brush, Call Me Clover Marker Real Red Marker, Coastal Cabana Marker, Gold Stampin’ Emboss Powder, Gold 3/8″ Metallic-Edge 3/8″ Ribbon.
Stamp the holly bough 2 times on the Whisper White cardstock. Use the Call Me Clover Marker to outline the holly. Draw the color into the leaves with a bit of water and the Aqua Painter Brush.
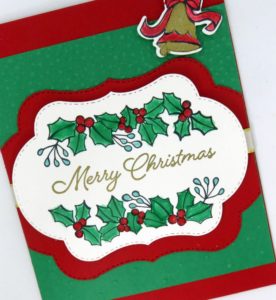
Stamp “Merry Christmas” in VersaMark between the holly boughs. Make sure that the ink in the previous step is dry and use the Embossing Buddy to eliminate static before applying the Gold Emboss Powder. Heat with Heat Tool. Die cut the Whisper WHite Panel, and die cut the Real Red panel using the largest Stitched Season Framelit.
Apply the ribbon across the center of the Real Red die cut and attach the Whisper White panel.
Emboss the Call Me Clover panel with the Softly Falling Emboss Folder and attach to Real Red background,
Using a tiny spatula apply VersaMark to the stamped bell. Emboss with Gold Emboss powder and heat set. Color the ribbon with Real Red Marker. Attach to upper right.
If you create a portrait card, you will need to trim the Real Red die cut a bit on each side.
Tune in on August 1st to shop for the Color Your Season suite and you can create your own Blended Seasons Fall and Christmas Cards.
Keep in touch with all Stampin’ Up! Promotions!
Download the Color Your Seasons Flyer


