Birthday Cards Elegant or Sweet Whimsical?
Birthday Cards Can be Elegant or Whimsical
Creating Birthday cards can allow you to enter into different types of emotions depending upon the person who will receive the card. Do they like elegant? Do they like fun? Do they like certain colors? Do they like certain elements? These are the types of questions you need to ask yourself when creating birthday cards for a certain person.
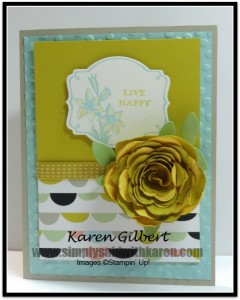
With these 2 cards, I want to show you that by keeping the same layout and changing up the colors, treatments, papers and embellishments you can have either a vintage type card or a whimsical sweet card.
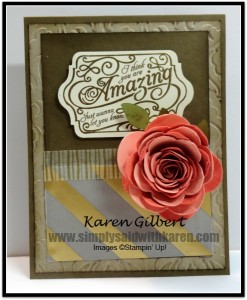
The first card I created with the vintage feeling. It’s been a while since I created something vintage so it was rather refreshing as I really do like this style.

Recipe
Stamps: Lovely Romance (c-130267, w- 1302465, p63 2013/2014 Annual Catalogue).
Paper: Soft Suede, Crumb Cake, Calypso Coral, Crisp Cantaloupe, Very Vanilla, Pear Pizzazz, Gold Specialty Vellum.
Ink: Soft Suede, Versamark.
Accessories: Big Shot, Beautiful Baroque Embossing Folder, Spiral Flower Die, Chalk Talk Framelits, Gold Embossing Powder, Watercolor Designer Washi Tape, Sponge Dauber, Hot Glue Gun, Bird Builder Punch.

Recipe
Stamps: You’re Lovely (c-133578, w- 133575, Sale-a-Bration Catalogue).
Paper: Sahara Sand, Pool Party, Summer Starfruit, Daffodil Delight, Pistachio Pudding, Sweet Sorbet DSP.
Ink: Versamark.
Accessories: Big Shot, Decorative Dots Embossing Folder, Spiral Flower Die, Pool Party Embossing Powder, Daffodil Delight Marker, Bird Builder Punch, Summer Starfruit Stitched Satin Ribbon.
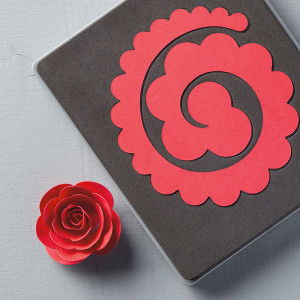
Did you notice the beautiful rose? That was created using a new Stampin Up rule die. What does rule die mean? This type of die allows you to cut several layers at a time making this tool a time saver when you are making birthday cards or in fact any type of paper crafting.
Here are a few tips for creating the roses on these birthday cards:
- Cut 2 pieces for card stock for 2 different colors. These colors can be contrasting or monochromatic to achieve different emotions. You can cut the 2 pieces at once.
- Take your bone folder and distress the card stock. Start from the smaller end as this will also help with forming the rose.
- Spray with rubbing alcohol as this dries faster than spraying with water.
- Ok, now take the card stock and crumple – oh no! It will be ok I promise.
- Align the 2 pieces of card stock as you will roll them together.
- Start rolling from the small end. You can use a pair of tweezers, or a pencil or just do it by hand. Because the paper is a tad damp and it has been distressed, the rose will be quite easy to roll.
- When you come to the end, fold both larger parts onto the bottom. At this point you can leave the formed rose or you can relax it a bit by laying on a flat surface and gently pull the petals in a circular motion. This will help spread out the rose so that it looks like it is full bloom.
- Once you are happy with the way your rose looks, hot glue the 2 layers on the bottom to make a platform for your rose to sit on. Once the glue is dry, use the rose any way you would like.
For any of the supplies to make these Birthday cards, go to my online store.
Happy Stamping


Those die cut roses are gorgeous and definitely make a statement on your cards Karen. Beautifully done. xx
Hi Kelly. Yes this die will work in the cuddle bug
Oh Karen, I love them both! Each one is so unique!
I have a question for you 🙂 Does the rose die (above) work in the Cuttlebug as well or just the big shot?
Blessings to you! x0x0