Painted Petals – Amazingly Amazing 2-Step Stamping
Painted Petals
I hate to admit this, but the Painted Petals stamp set wasn’t my first choice in the catalogue. I loved the coordinating paper, Painted Blooms, and the stamp set had to grow on me. Well, grow on me it did. I can now see endless possibilities with this stamp set and over the next few posts, I will share different projects that you can create yourself. I guess sometimes it just takes time.
Because this is a Two-Step stamp set, I adore the fact that it is available in Photopolymer – the stamps that you can see right through.
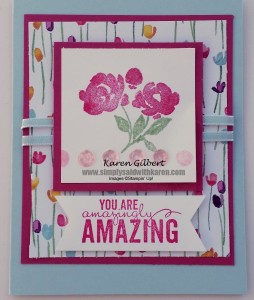
So what is two-step stamping? Two-step stamping allows you to build fine details into your stamped images giving dimension and depth. It also is used for adding details to images to join them together. For example, on this card, the Painted Petals are stamped separately from the leaves and stems.
Now, you can use a Stamp-a-ma-jig that allows you to line up the different elements and also creates another step. However, using the Photopolymer stamps, allows you to stamp the images with out the extra step of the Stamp-a-ma-jig. Why? Because you can see right through these stamps, and have the ability to see where you have stamped previously.
 Recipe
Stamps: Painted Petals.
Ink/Markers: Rose Red, Wild Wasabi, Blushing Bride.
Paper: Whisper White, Soft Sky, Rose Red, Painted Blooms DSP
Accessories: Itty Bitty Accents Epoxy Stickers, Soft Sky 1/8” Taffeta Ribbon.
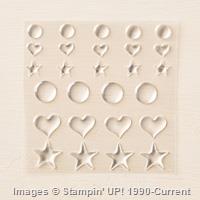
Did you notice the Itty Bitty Epoxy Stickers? They are located at the bottoms of the roses and I placed them on the dots stamped in Blushing Bride. These Epoxy Stickers can be painted with the Blendabilities to add colour to them or just left clear and placed on top of a stamped image. That is what I did in this case.
Built for Free Using: My Stampin Blog


