Beautiful Butterflies from Not So Beautiful Caterpillars
Beautiful Butterflies
The not so beautiful caterpillars morph into Beautiful Butterflies. Who would think that those creepy crawly caterpillars could turn out to be so beautiful. In life there are many things that start off not so beautiful and to our surprise turn into Beautiful Butterflies.
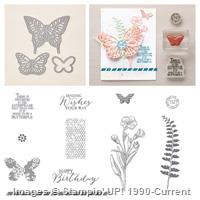
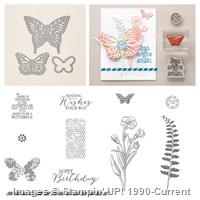
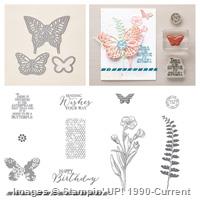
The card uses the Butterfly Basics stamp set from the 2015 Occasions catalogue. The stamp set has 11 stamps that you can mix and match to create beautiful cards, scrapbook pages and/or home decor items. Combine the stamp set with the Butterflies Thinlits Dies and the Painted Blooms DSP and you have a winning combination.
Purchase the stamp set and the thinlits as a bundle and save 15%. Purchasing either the wood set or the clear set,will earn you a Free Product from the Sale-a-Bration catalogue. The Butterfly Basics stamp set is also available in photopolymer, however, you would need to purchase another item to reach the $60.00 threshold.
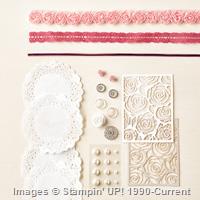
You can purchase the Artisan Embellishment Kit along with the photopolymer stamp to reach the $60.00. This kit is packed with beautiful embellishments to go along with your beautiful butterflies.
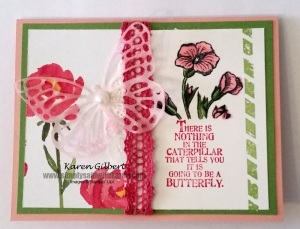 Recipe
Stamps: Butterfly Basics.
Ink/Markers: Tuxedo Black, Rose Red, Wild Wasabi Blendabilities: Pink Pirouette, Wild Wasabi.
Paper: Whisper White, Wild Wasabi, Blushing Bride, Vellum, Painted Blooms DSP.
Accessories: Big Shot, Butterflies Thinlits, Artisan Embellishment Kit.
Using the Butterflies Thinlits Dies:
These thinlits are intricate dies and have many little pieces that are cut from the main image. As such, you need to be prepared to poke out a few of these tiny pieces when you release the die from the paper.
The method that I use is to put a piece of wax paper between the thinlit and the paper. The wax paper helps the die release from the thinlit. I also run the sandwich back and forth in the Big Shot about 3 times.
Butterfly:
The Beautiful Butterflies can be cut from Vellum to give them a translucent and delicate feel. Before attaching to the card front, lightly sponge ink onto the vellum Be careful though, so you don’t tear the butterfly.
Built for Free Using: My Stampin Blog

