Halloween Boo Banner
Halloween Boo Banner
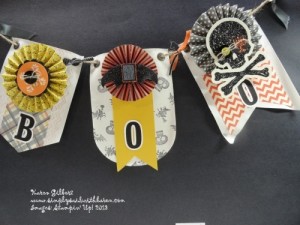
Halloween is still a couple of months away and I wanted to show you what you could do with the Banner Simply Created Kit and the Halloween Banner Simply Created Accessory Kit.
The banners and the accessory kits are fabulous as they save you time and energy to create designer banner – plus banners are all the rage right now.
Everyone has limited time and/or supplies so these two delightful kits solve those 2 issues. Woo Hoo!
 Here’s How to Put the Banner Together
- Create a couple of rosettes from other designer papers
- Ink up the chevron emboss folder and transfer design by inserting canvas in the folder and rolling with a rolling pin.
- The second banner background is created using the images from the Halloween Hello stamp set and randomly stamping the images using Black Stazon ink.
- Create the bat by cutting out an oval, cutting in half and then use the large oval punch to create the wings.
- Cover the bat with Versa Mark ink, sprinkle with Heat and Stick powder, melt with heat gun, sprinkle Black Glitter over the bat and heat again.
- Stamp the “Bats About You” image on basic black paper with Whisper White Craft ink and cut out
- Mount to a piece of Basic Black paper that you have treated with Heat and Stick Powder and Orange Glitter.
- Create the third banner by attaching Designer Series Paper, create a rosette, and attach one of the large embellishments from the kit – attach a small Summer Starfruit button to the Black Vintage faceted button with Linen Thread and glue to one eye on the skull.
- Stamp the candelabra image on Basic Black using Versa Mark and cover with Heat and Stick powder and then the Orange Glitter.
- When the banners are completed, string together with the Jute Twine, leaving spaces to tie ribbon onto different places.
Voila, you have a Halloween banner
The letters were created using MDS (My Digital Studio) and then imported in Silhouette software and cut out using the Silhouette onto Whisper White card stock.
Stamps: Halloween Hello (c – 131721, w- 131718/, p21 2013 Holiday Catalogue)
Paper: Crushed Curry, Whisper White, Basic Black, Howlstooth DSP (retired)
Ink: Black Stazon, Whisper White Craft Ink, Tangerine Tango
Accessories: Banner Simply Created Kit, Halloween Banner Simply Created Accessory Kit, Big Shot, Chevron Embossing Folder, Oval Framelits, Versa Mark, Heat and Stick Powder, Orange Glitter, Black Glitter, 2-3/8 Scallop Circle Punch, 1-1/4” Circle Punch, Large Oval Punch, Linen Thread, MDS – Sweet Details Alphabet and Numbers, Silhouette Cameo
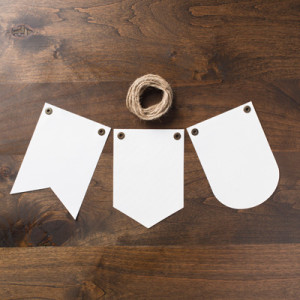
The banner kit comes with 18 5″ x 7″ canvas pennants – 6 each of 3 designs. Each of the banners have grommets in both corners and there is also 9′ of jute twine.
So, if you use 3 of the banners in a project, you will get 6 projects. Value or what.
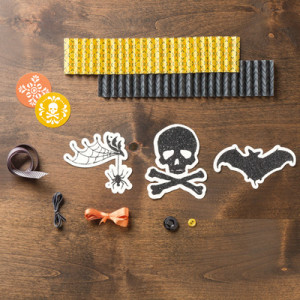
The Halloween Banner kit comes with rosettes, glittered die-cut accents, ribbon, buttons so you can do your banner up right!
If you choose to, you can use other papers, embellishments and ribbons to stretch this kit for 2 banners.
Have fun and Happy Stamping


What a fun project!!! And it does double duty – not only fun to make but a great decoration too! 🙂
Great card and banner, Karen 🙂
So fabulously fun Karen, and those rosettes are a perfect addition to a these Halloween Banners. xx
Fabulous papers and images on this fun project, Karen!! Won’t this look great hanging across your door on Halloween???
Really cute banner!
oh woweeeee…these are KILLER!! lol
Cute, cute, cute! Thanks for the little tutorial!
Karen so cute. I didn’t purchase any of the banner kits but they sure are cute. Makes want to have little kids again…… NOT!
Just kidding… I’ll stick with my grandkids … 😎
Hugs.
SUPER cute and am loving that new stamp set!
Lynn