Reindeer Fun Christmas Card – Inspiration in Ink Blog Hop
 It’s time for the Reindeer Fun Christmas Card and welcome to the October Inspiration in Ink Blog Hop. I hope that you enjoy this blog post and continue to hop along with us to see what the others have created.
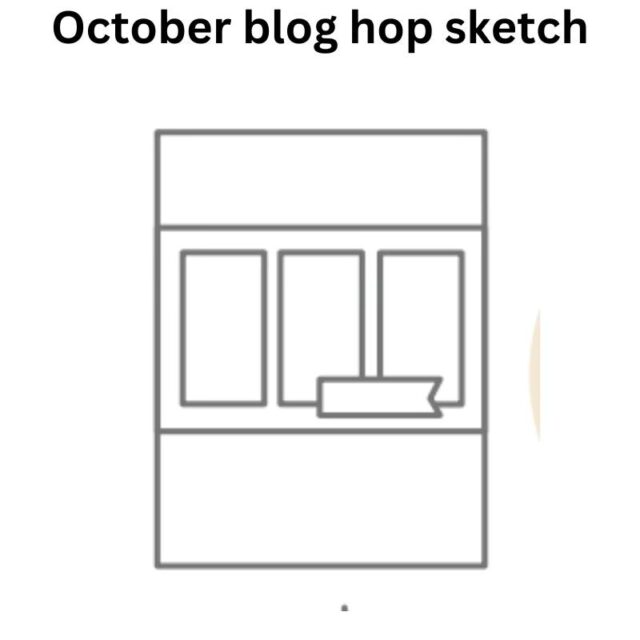
This card is based on a sketch that will help you if you like to have ideas to draw on when creating. The sketch serves as an idea which you can interpret as you like. It is important you can see the elements of the sketch in your card.
The suite is located in the 2024 August to December Mini Catalogue and if haven’t seen it, then you can look at it online in MY STORE.
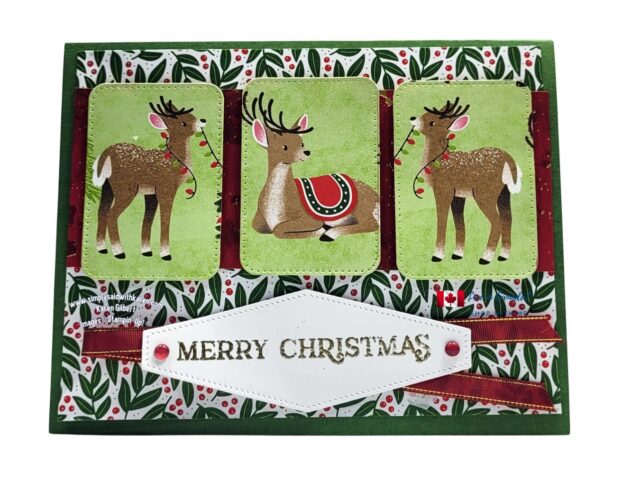
The card uses traditional Christmas colors of red & green and will light up a young person’s eyes with delight.
Reindeer Fun Recipe
SUPPLIES:
Stamps: Reindeer Fun Bundle
Inks: VersaMark, Real Red
Paper: Garden Green (CardBase: 5-1/2″ x 8-1/2″) , Take a Bow 6″ x 6″ Designer Series Paper – 5-1/4″ x 4″, 1/2″x4″,Basic White: Scrap, 4″ x 5-1/4″, Season of Elegance Designer Series Paper – 4″ x 2″ (red and gold side)
Accessories: Cherry Cobbler & Gold 1/4″Satin Ribbon 10″, Cherry Cobbler and White Adhesive Backed Berries.
Tools:Stampin’ Cut & Emboss Machine, Metallics Wow Embossing Powder, Heat Tool Embossing Additions Tool Kit, Nested Essential Dies,
Basic Supplies: Paper Trimmer, Bone folder, Paper Snips, Take Your Tool Pick, Stampin’ SEAL+, Multipurpose Liquid Glue, Stampin’ Dimensionals, Mini Glue Dots, Tear & Tape Adhesive, Paper Snips.
INSTRUCTIONS:
- Score card base at 4-1/4″ and burnish with Bone Folder.
- Attach the Designer Series Paper to the card base with the adhesive of your choice.
- Attach the strip of Season of Elegance Designer Series Paper in the top third of the previous layer.
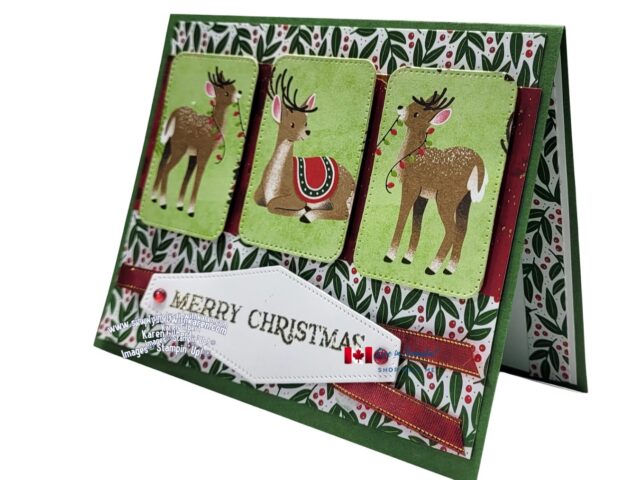
- Use the Designer Series Paper with the reindeer on the Granny Apple Green background, Use the Nested Essential rounded corner die (2nd smallest) to die cut 3 images.
- Evenly align the die cuts across the red designer series paper. Attach with Stampin’ Dimensionals.
- On a scrap of Basic White, swipe the Embossing Buddy to eliminate the static cling. Stamp a sentiment in VersaMark. Cover the ink with Gold Embossing Powder and heat set with Heat Tool.
- Die Cut using the Nested Essential Dies (the smallest die that looks like the sentiment panel on the card (i don’t know what this shape is called.) Use the smallest die.
- Attach the ribbon to the back of the die cut with Stampin’ Seal.
- Finally, adhere a red embellishment from the Cherry Cobbler and White Adhesive Backed Berries to each end of the die cut.
- Stamp a sentiment on the Basic White panel in Real Red ink. Adhere a strip of Designer Series Paper to the right hand side of the panel. Then attach it to the inside of the card.

I hope that you give the Reindeer Fun Christmas card a try. It’s easy and will give someone such delight.
If you want any supplies to recreate this card, you can order from My Shop with Me store,
You can always email me if you have any questions


Wonderful Christmas card Karen!! Those reindeer are super cute!!