Lovely & Sweet Oct Sketch Inspiration Ink Blog Hop
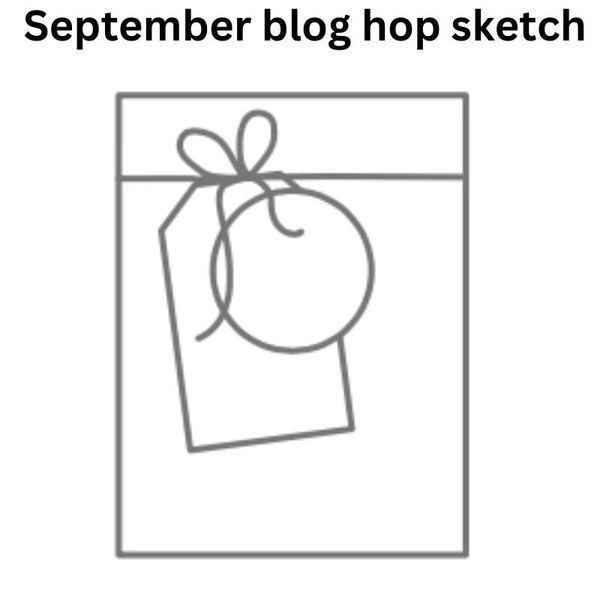
 The Lovely & Sweet stamp set and dies set, along with the Sketch from the Sept -Dec 2024 Mini Catalogue is my inspiration for the Blog Hop. The Sketch makes a great jumping off point. Have you used any of the sketches to create a card or a scrapbook page? (see page 16). Please hop to the other participant blogs so that you can see how the other bloggers were inspired by the sketch. We thank you for visiting our blogs ,please leave a comment, we would appreciate it.
Inspiration SKETCH 

Lovely & Sweet Card Recipe
SUPPLIES:
Stamp Sets Lovely & Sweet
Ink: VersaMark, Tuxedo Black Memento
Papers: Pebble Path CS – 8-1/2″ x 5-1/2″(card base), 3″ x 3″, Nature’s 12″ x 12″Sweetness Designer Series Paper – Cross hatch – 5-1/4 x 4″, Pebble Path with Gold Writing. (4-1/4″ x 2-3/4″), and a strip 3/4″ x 4″ , Basic White- 4″ x 5-1/4″, Scrap for flower.
Accessories: Gold & Silver Trim- 7″, Gold Textured Adhesive Backed Dots, Basics Embossing Powder (White).
Tools: Stampin’ Cut & Emboss Machine, Blends: Pecan Pie, LemonLime, Granny Apple Green, Country Corner Dies, Spotlight on Nature Dies, Lovely & Sweet Dies,Heat Tool Embossing Additions Tool Kit.
Basic Supplies: Paper Trimmer, Bone folder, Paper Snips, Take Your Tool Pick, Stampin’ SEAL+, Multipurpose Liquid Glue, Stampin’ Dimensionals, Mini Glue Dots, Tear & Tape Adhesive, Paper Snips.
INSTRUCTIONS
- Score cardbase at 4-1/4″ and burnish with Bone Folder.
- Adhere the cross hatch panel to the cardbase.
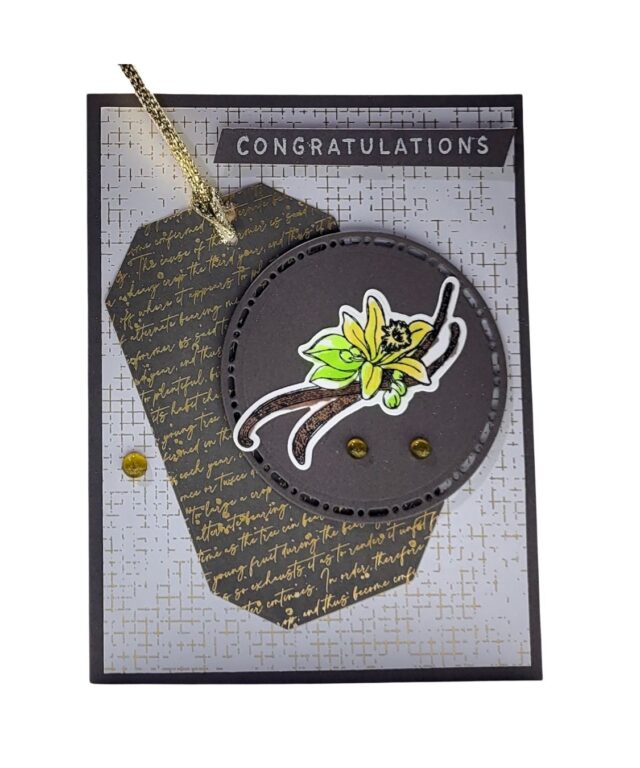
- Die cut the Pebble Path DSP with the 3rd largest Country Corners Dies. Use a hole punch and punch a hole in the top of the die cut.
- With Stampin’ Cut & Emboss Machine, die cut the circle from Pebble Path with the smaller die cut with the dots.
- With Memento Black ink, stamp the flower on Basic White cs, on a scrap of Basic White cs. Use the Stamp’ Blends to color the leaves, flowers and stems. Die cut with the coordinating Die from the Lovely & Sweet Dies.
- On a scrap of Pebble Path, stamp the Sentiment with VersaMark ink. Remember to use the Embossing Buddy from the Embossing Essentials kit. Sprinkle with the White Emboss Powder and set with Heat Tool.
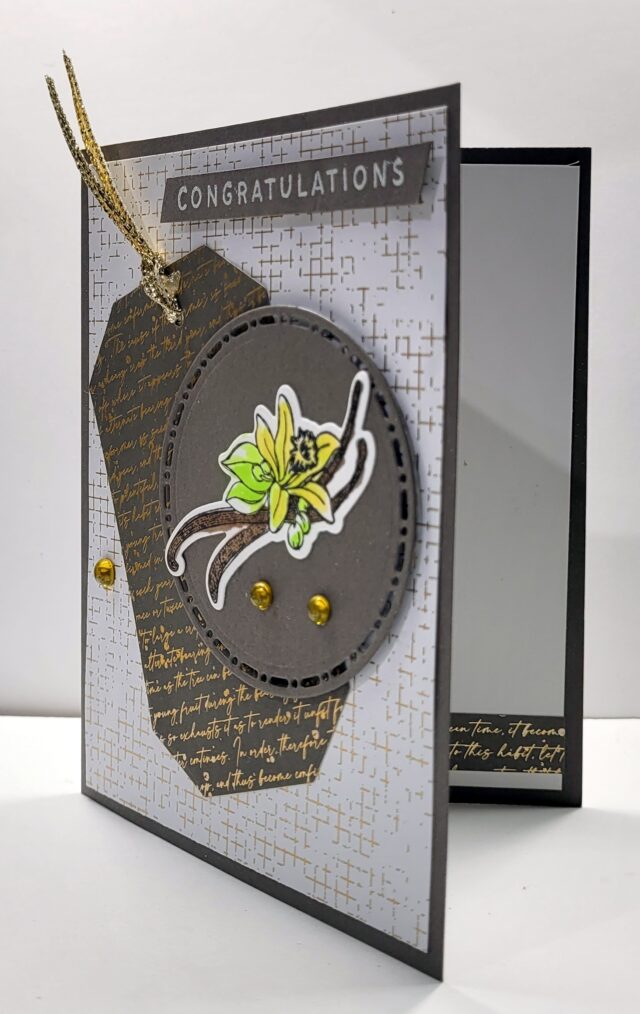
- Adhere the flower to Pebble Path circle. Fold the Gold Trim in half and string through the hole in the label and secure by threading the ends through the loop. Attach the label on an angle to the card front. Attach the circle with Stampin’ Dimensionals to the right side of the label.
- Attach the strip of DSP to Basic White panel and adhere to the inside of the card.
- Attach 1 large Gold Textured Adhesive Backed Dots to the card front and2 smaller ones to the die cut circle.
- Trim the sentiment and angle cut the ends. Attach to top of card with Stampin’ Mini Glue Dots.
Blogs
Need supplies to create this card? Click on the images and you will be taken to my online store.
If You have questions, please email me and I will help you out. karen@simplysaidwithkaren.com


Very pretty card Karen!! Love your color choices!!
I really love this set! Great card!