Timeless Arrangements Bundle – Inspirations in Ink Blog Hop
The Timeless Arrangements Bundle is the featured bundle for this month Inspirations in Ink Blog Hop, We are a group of International Stampin’ Up! demonstrators that like to share what we create to give others ideas.
Please hop with us to see what others are creating.
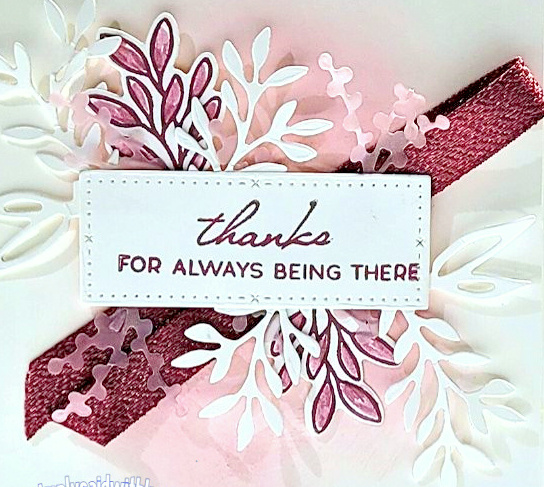
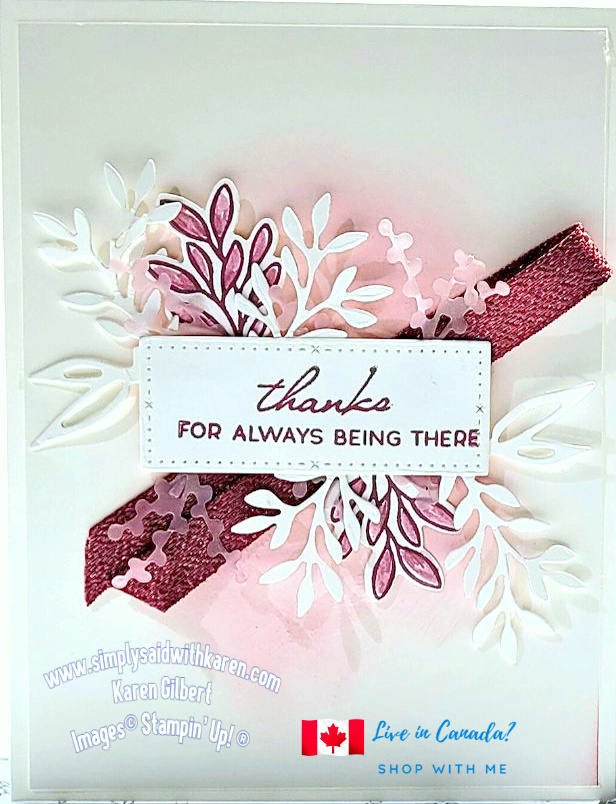
Not only is the stamp set the focus of this card, it also uses one of the 2023-2025 In Colours – Moody Mauve. The one thing I really like about Stamin’ Up! is the coordination of its products, like cardstock, inks, embellishments and designer series paper.
Timeless Arrangements Recipe
Stamps: Timeless Arrangements
Inks: Moody Mauve. Moody Mauve Blends
Paper:
Basic White: 5-1/2″ x 8-1/2″ score at 4-1/4″ and burnish with Bone Folder, 2@ 4″ x 5-1/4″ , Scraps for leaves and sentiment.
Vellum: scraps.
Embellishments: Moody Mauve 3/8″ Woven Ribbon – 8″
Tools:
Stampin’ Cut & Emboss Machine, Timeless Arrangements Dies, Blending Brushes. Blender Pen.
Basic Supplies:
Bone Folder
Stampin’ Seal+
Tear & Tape Adhesive
Stampin’ Dimensionals
Mini Glue Dots
Clear Blocks -A B, C, G.
Simply Shammy or Stampin’ Scrub
Stampin’ Mist Stamp Cleaner (153648)
Grid Paper or Small Grid Paper
Paper Snips
Paper Trimmer
Instructions:
- Use the dies to cut the leaves with the bases attached – 2 from Basic White scraps, 1 from Vellum.
- Stamp 2 single leaves from scraps of Basic White. Die cut with matching dies. Colour the leaves with Moody Mauve ink and a Blender Pen.
- Color the leaves/flowers cut from the Vellum with a Moody Mauve Blends.
- Cut a frame for the sentiment. Use the largest one. Stamp a sentiment on the frame with Moody Mauve ink.
- Attach the leaves to the frame on an angle. See image below.
- Use a Blending Brush & Moody Mauve ink and swirl the color in the center of the Basic White panel. TIP: Remember to swirl the brush on the piece of scrap paper to get rid of some ink. You can always go back and add more ink, but you can’t take the ink away.
- Fold the ribbon in half and attach the two halves together with Seal+ Adhesive. Attach over the ink on the Basic White panel with Seal+, trim the ribbon ends.
- Arrange the leaves and flowers on a diagonal behind the sentiment panel. Attach over the ribbon with Seal+.

- On the second Basic White panel, stamp another sentiment in Moody Mauve ink. Add other decorations if you wish.

- Decorate envelope if you wish.
Click on the links below to hop with us and please leave a comment. We will appreciate it.
Blog Links
Christy Gridley – USA
Deirdre Croal – USA
Julie Golding-Page – Canada
Karen Beck – Canada
Theresa McEntee – USA
Robbie Rubala – USA
Product List
If you wish other products, SHOP WITH ME on my online store.


Wonderful card Karen! Moody Mauve is my favorite new In Color!!
So pretty & soft Karen
Very awesome! Very pretty!