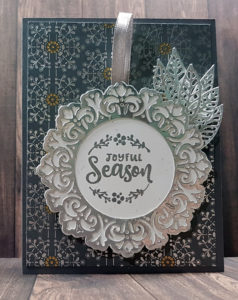
Joyful Christmas Wreath with Brushed Finish Silver Foil
A Joyful Christmas Wreath in silver foil makes a glitzy Holiday card.
Whomever receives this card will will be grateful, because it is so elegant. Ok, silver & gold contribute to that elegance.
Glitzy Card Recipe
Stamp Set: Encircled with Warmth.
Ink: VersaMark
Paper: Basic Gray, Basic White, Silver Foil Specialty Pack, Simply Elegant Specialty Designer Series Paper (DSP).
Accessories: Stampin’ Cut & Emboss Machine, Encircled in Beauty Dies, Artistic Dies, Metallic Embossing Powder ( Silver), Heat Tool, Gray Granite 1/4″ Shimmer Ribbon.
Cutting Measurements:
- Basic Gray – 8-1/2″ x 5-1/2″ score at 4-1/4″ burnish fold with Bone Folder.
- Basic White – 4″ x 5-1/4″ (Inside Panel ), 4″ x 4″ – wreath Layer.
- Silver Foil (Brushed Finish) – 4″ x 4″ (Wreath), (4″ x 3-1/2″ ) Leaves.
- Simply Elegant Specialty Designer Series Paper – 4-1/8″ x 5-3/8″ .
- Gray Granite Ribbon – 5″ folded in half.
Build the Card
- Layer the Simply Elegant DSP on the Basic Gray card front.
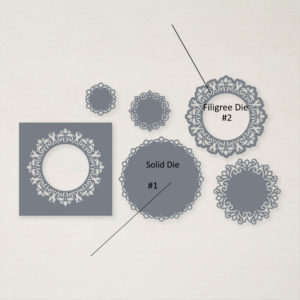
- Die cut the basic White cardstock with the solid large die. (See photo 1 below)
- Use the Filigree Die and cut wreath from Brushed Silver Foil Paper. (See photo 2 below).
- Adhere the Filigree Die cut to the Basic White Die cut.
- Stamp the “Joyful Season” sentiment in the circle using VersaMark. Sprinkle with Silver Metallic Emboss Powder and heat set with Heat Tool.
- With the Artistic Dies, die cut the leaves from the Artistic Dies. Use the Brushed Silver Foil paper.
- Adhere the folded Gray Granite ribbon behind the wreath.
- Snip the leaves in groups of 3. Attach the groups on the right hand side of the wreath.
- Attach the wreath to the DSP with Stampin’ Up! dimensionals.
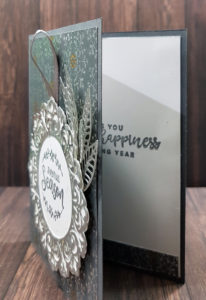
- Stamp a sentiment on the Basic White panel with VersaMark ink and heat emboss with the Silver Metallic Embossing powder. Place a strip of DSP along the bottom of the panel and adhere panel to the inside of the card.
Need supplies and materials to create the Joyful Christmas Wreath card. SHOP WITH ME on my online store.


