↓
 

Simply Said With Karen

Paper Crafting For All

  • Home
  • Blog
  • Stampin’ Up! Online Store
  • On Line Classes
  • View Our Catalogues
  • Event Calendar
  • Cool Tool Tip Videos
  • Questions and Answers
  • Simply With Heart – Etsy Store
  • Gift Certificates
  • Privacy Policy
  • Contact Me
Home 1 2 3 … 76 77 >>

Post navigation

← Older posts

Christmas Present Tags for the Inspiration in Ink Blog Hop

Simply Said With Karen Posted on November 27, 2024 by Karen GilbertNovember 26, 2024

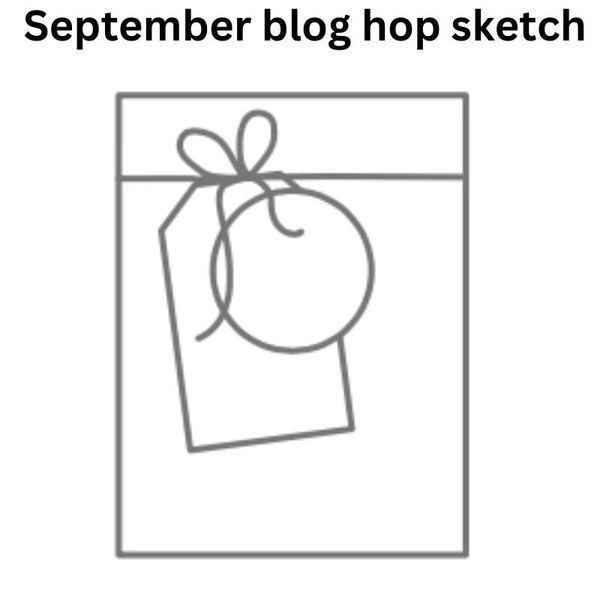
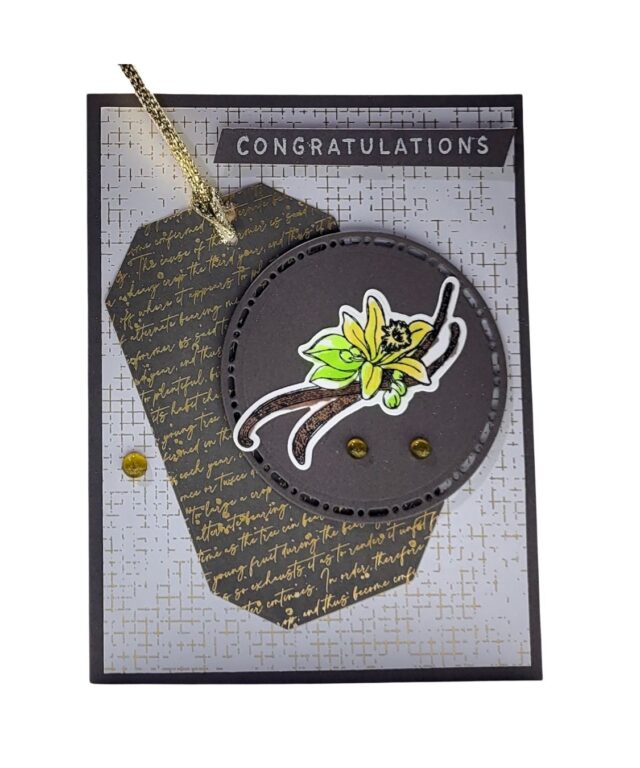
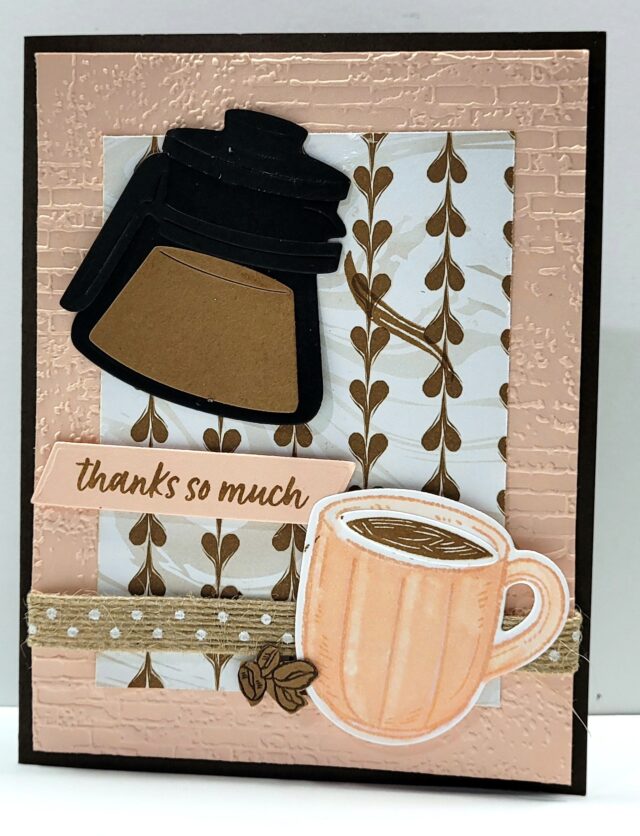
Christmas present tags for your gift parcels can be simple or elegant and add a decorations to your gifts.

It’s time for the Inspiration in Ink Blog Hop.   I hope that you enjoy this blog post and continue to hop along with us to see what the others have created. you will find the list at the bottom of the post. Thank you.

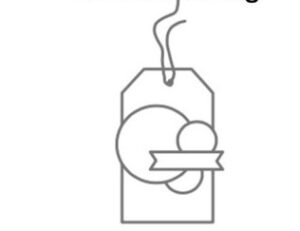
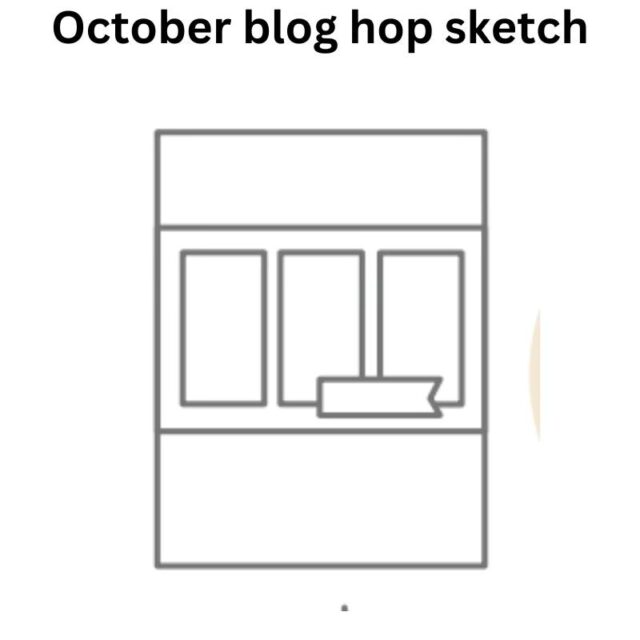
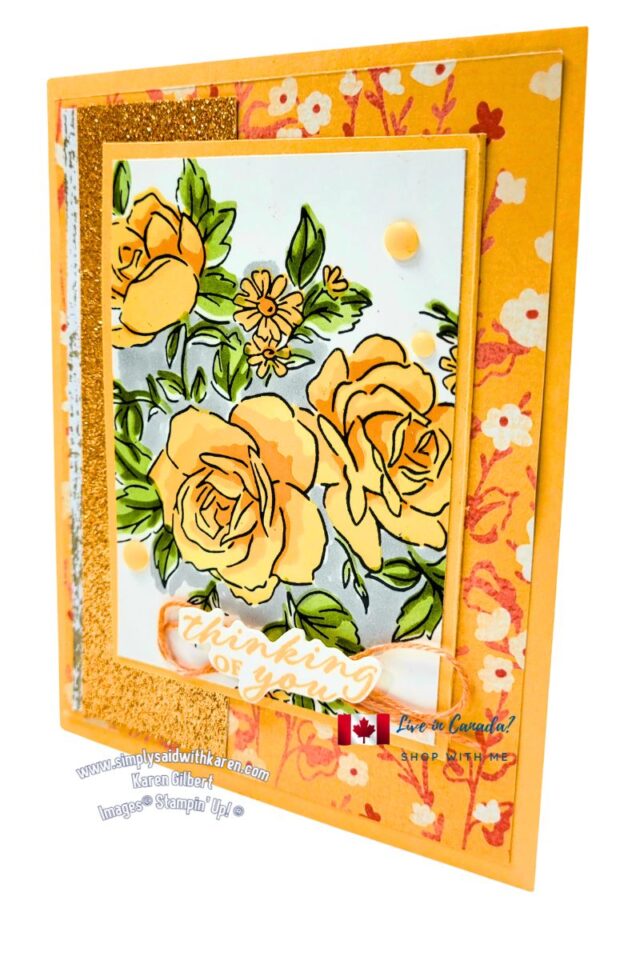
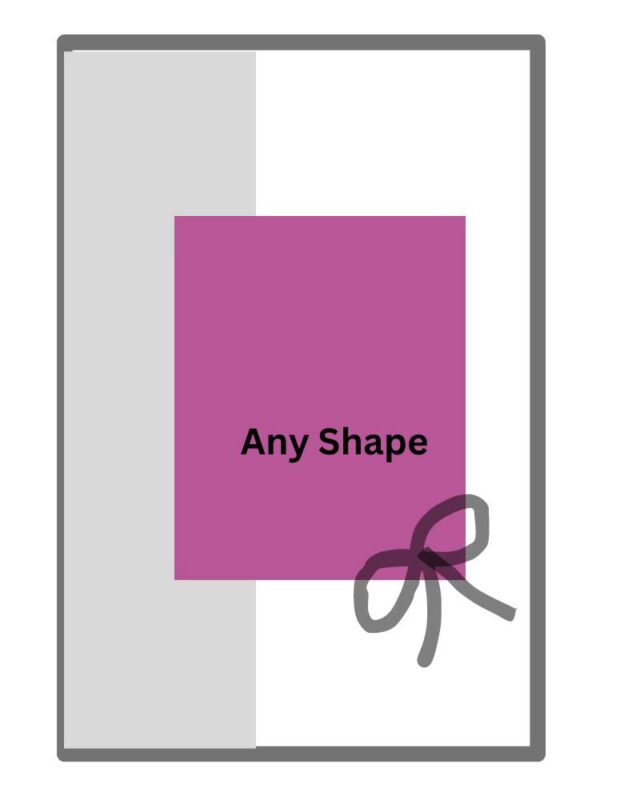
This month we are featuring a sketch from the Mini Catalogue.

Christmas Gift Tags

Christmas Gift Tags

Christmas Tag Recipe
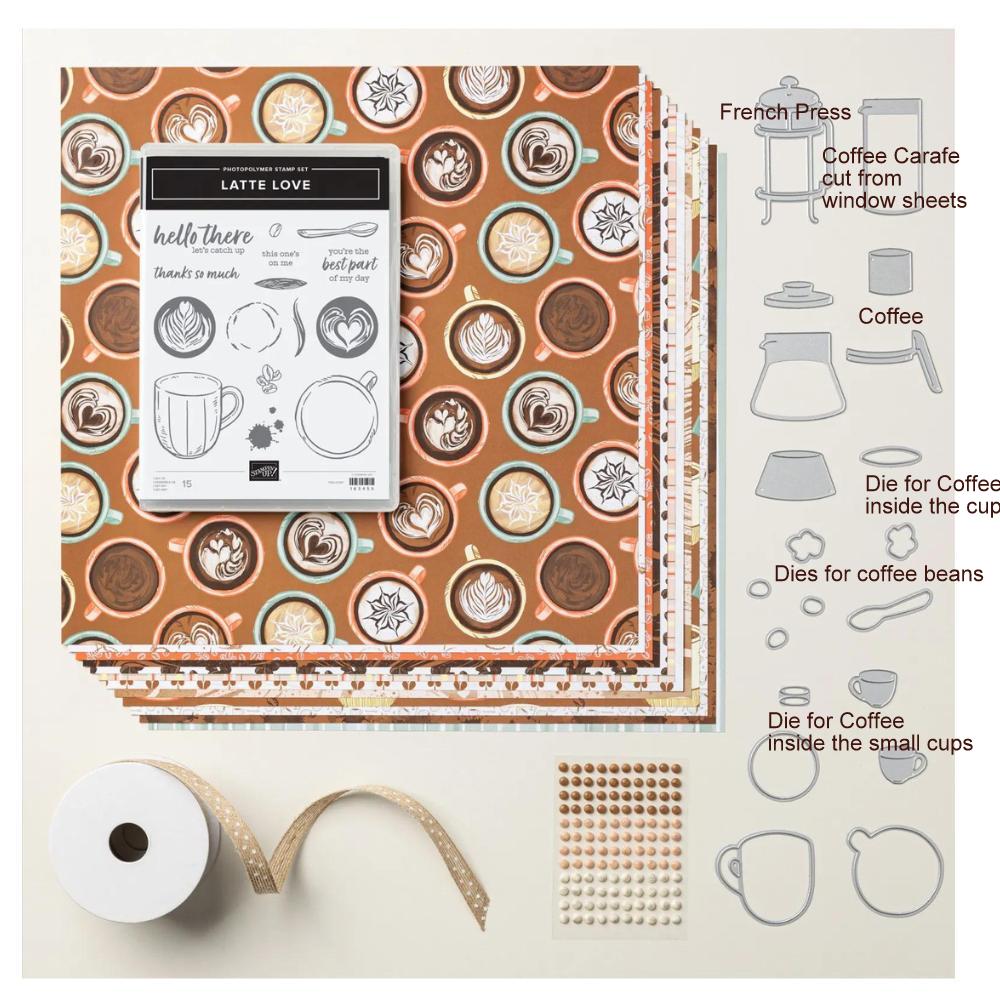
Supplies

Stamps:
Greetings of the Season (Stamps & Dies

Ink:
VersaMark
Early Espresso

Paper: ( including measurements)
Pecan Pie: 5” x 4”, 3-¾” x 2-3/4”, scraps
Early Espresso :scraps
Very Vanilla: scraps
Shaded Spruce: scraps
Sentimental Christmas Designer Series Paper 12” x 12”5” x 4”,

Accessories:
Pecan and Clear Ribboned Adhesive Backed Dots
Very Vanila ¾” Satin Ribbon 6″
Gold & Silver Trim: 3″
Metallics Emboss Powder

Tools:
Stampin’ Cut & Emboss Machine
Countryside Corner Dies
Reindeer Fun Dies
Heat Tool
Bone folder
Paper Snips
Take Your Pick Tool
Stampin’ seal
Multipurpose Liquid Glue
Stampin’ Dimensionals
Mini Glue Dots

INSTRUCTIONS

  1. Die cut the Pecan Pie cs and the DSP with the 2nd largest die from the Countryside Corner Dies
  2. Die cut the Pecan Pie cs  large cirlcle with the die from the Greeting of the Seasons Die.

Cut and Assemble Reindeer Head

  1. Using the dies from the Reindeer Fun Dies, cut the Early Espresso cs using the antler dies, the Very Vanilla cs using the dies with the ears and the Pecan Pie cs using the face die.
  2. Attach the Early Espresso to the Very Vanilla with Multipupose Glue or Glue Dots. Lyer the face over the previous layer.
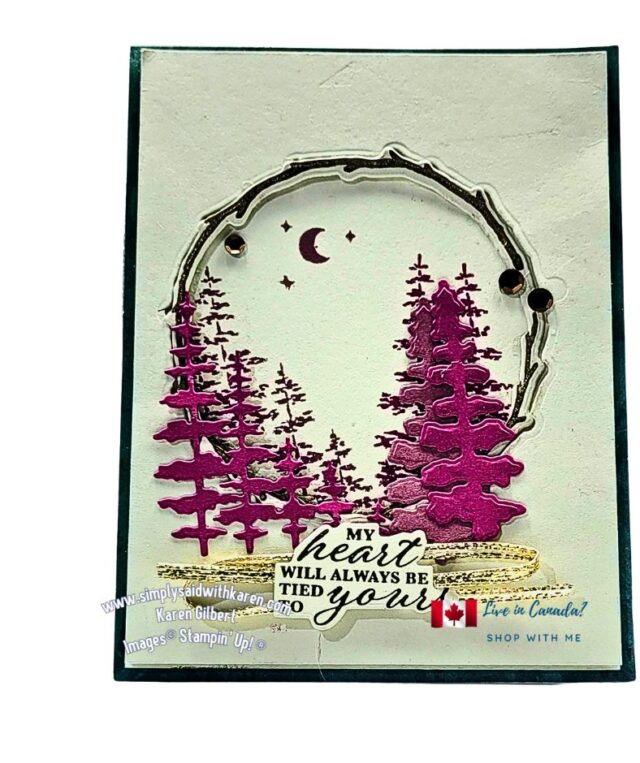
  3. Die cut the wreath from Shaded Spuce with the die from the Reindeer Fun Dies.  Slip the Reindeer Head through the wreath and attach with Glue Dots.
  4. Attach the large Pecan Pie cs to the large piece of DSP with Liquid Multi Purpose Glue.
  5. Adhere the large Pecan Pie label to the DSP and have the left side of label off the DSP.  Turn the tag over and use the Paper Snips to cut the edge even with the tag.
  6. Attach the Reindeer Head and wreath on the Pecan Pie label with Stampin’ Dimensionals.
  7. Use the Embossing Buddy to eliminate the static on a strip of Very Vanilla. Stamp “Merry Christmas” with VersaMark. sprinkle with Gold Emboss Powder and heat set with Heat Tool.  Cut the strip to separate the Merry and Christmas. Slip the cut out center under the corner of the Pecan Pie label and attach.
  8. Attach the sentiment to the bottom part of the label.
  9. Adhere 3 Pecan and Clear Ribboned Adhesive Backed Dots to the front of the label.
  10. Punch a hole in the top of the tag and inset the Very Vanila ¾” Satin Ribbon throught the hole and tie with the Gold trim.
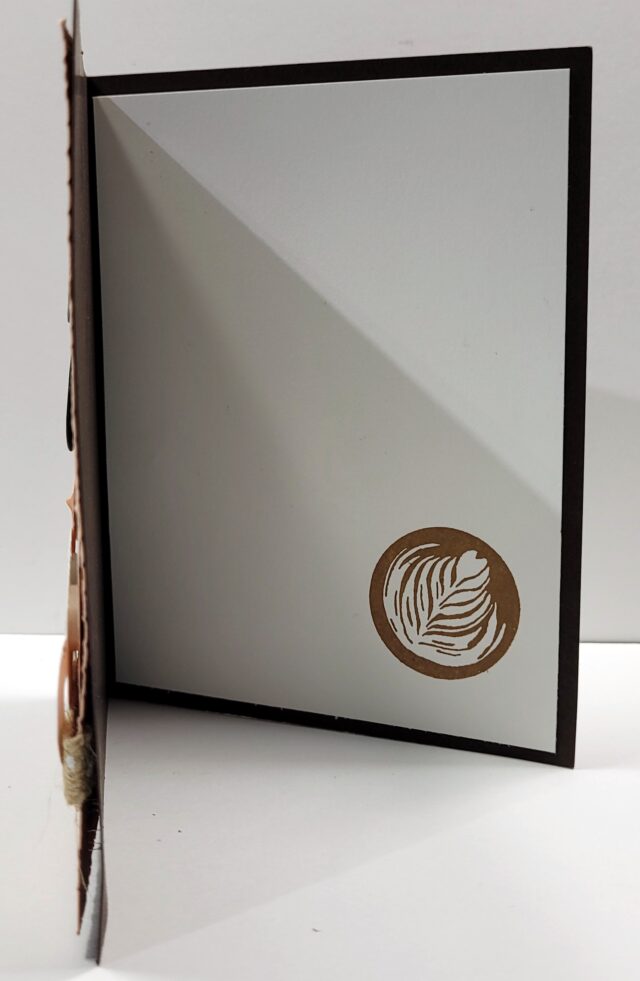
  11. On the back of the tag, stamp “To” and “From”.
  12. Now go and attach to a gift.
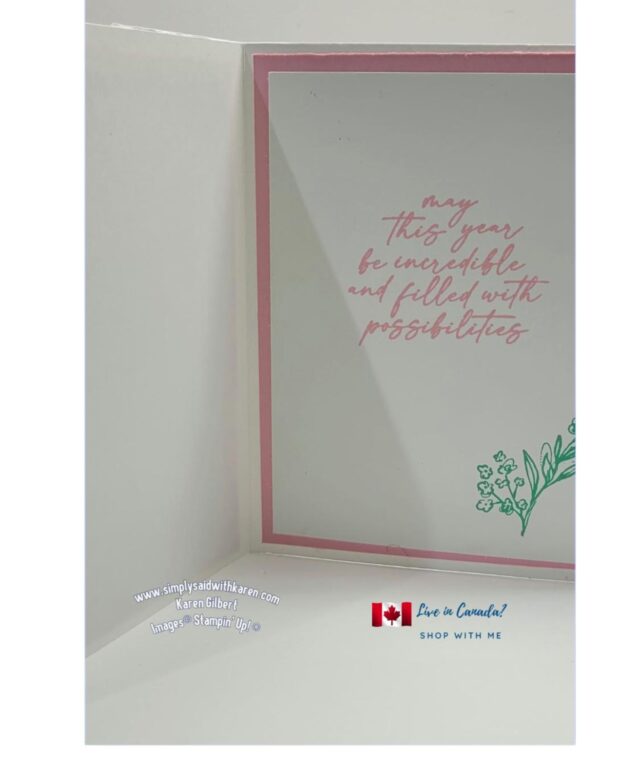
Tag Back

Christmas PresentTag


So that  is it for the Christmas Gift Tag which can adorn your gift.

I hope that you have enjoyed this post and I hope that you will attemp to create your own tags.

Blog Hop List


Do you need supplies to create a CHristmas Tag?  SHOP WITH ME on my online store. Or click on any of the images below to be take make your order.

Do you have a question.  Email Me

Product List

Greetings Of The Season Photopolymer Stamp Set (English)

Greetings Of The Season Photopolymer Stamp Set (English)
[164325]

Greetings Of The Season Dies

Greetings Of The Season Dies
[164112]

Countryside Corners Dies

Countryside Corners Dies
[161471]

Reindeer Fun Dies

Reindeer Fun Dies
[164043]

Sentimental Christmas 12" X 12" (30.5 X 30.5 Cm) Designer Series Paper

Sentimental Christmas 12″ X 12″ (30.5 X 30.5 Cm) Designer Series Paper
[164209]

Pecan Pie & Clear Ribboned Adhesive Backed Dots

Pecan Pie & Clear Ribboned Adhesive Backed Dots
[164204]

Very Vanilla 3/4" (1.9 Cm) Satin Ribbon

Very Vanilla 3/4″ (1.9 Cm) Satin Ribbon
[164120]

Stampin' Cut & Emboss Machine

Stampin’ Cut & Emboss Machine
[149653]
Add All to Cart

Posted in Catalogues, Christmas, Embossing, Gift, Gifts, Stamp Sets, Stampin' Emboss and Die Cut Machine, SU Only Products, Techniques, Tips and Techniques | Tagged bundles, Christmas, Embossing, stamping up, stampingup, stampinup, su, Techniques

Reindeer Fun Christmas Card – Inspiration in Ink Blog Hop

Simply Said With Karen Posted on October 30, 2024 by Karen GilbertOctober 29, 2024


reindeer fun christmas card
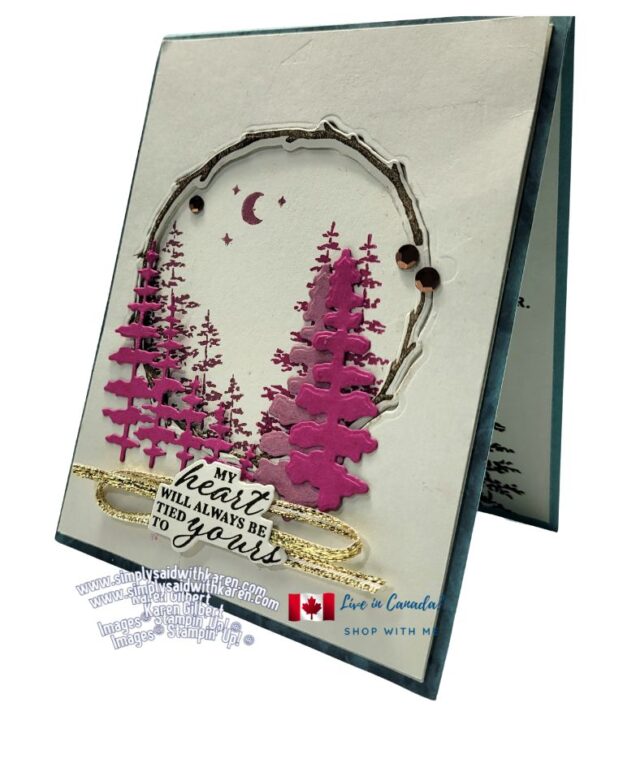
It’s time for the Reindeer Fun Christmas Card and welcome to the October Inspiration in Ink Blog Hop.  I hope that you enjoy this blog post and continue to hop along with us to see what the others have created.

Reindeer FUn Christmas Card

This card is based on a sketch that will help you if you like to have ideas to draw on when creating.  The sketch serves as an idea which you can interpret as you like.  It is important you can see the elements of the sketch in your card.Reindeer fun christmas card

The suite is located in the 2024 August to December Mini Catalogue and if haven’t seen it, then you can look at it online in MY STORE. 

The card uses traditional Christmas colors of red & green and will light up a young person’s eyes with delight.

Reindeer Fun Recipe

SUPPLIES:

Stamps: Reindeer Fun Bundle
Inks: VersaMark, Real Red
Paper: Garden Green (CardBase: 5-1/2″ x 8-1/2″) , Take a Bow 6″ x 6″ Designer Series Paper – 5-1/4″ x 4″, 1/2″x4″,Basic White: Scrap, 4″ x 5-1/4″, Season of Elegance Designer Series Paper – 4″ x 2″ (red and gold side)
Accessories: Cherry Cobbler & Gold 1/4″Satin Ribbon 10″, Cherry Cobbler and White Adhesive Backed Berries.

Tools:Stampin’ Cut & Emboss Machine, Metallics Wow Embossing Powder, Heat Tool Embossing Additions  Tool Kit, Nested Essential Dies,

Basic Supplies: Paper Trimmer, Bone folder, Paper Snips, Take Your Tool Pick, Stampin’ SEAL+, Multipurpose Liquid Glue, Stampin’ Dimensionals, Mini Glue Dots, Tear & Tape Adhesive, Paper Snips.

INSTRUCTIONS: 

  1. Score card base at 4-1/4″ and burnish with Bone Folder.
  2. Attach the Designer Series Paper to the card base with the adhesive of your choice.
  3. Attach the strip of Season of Elegance Designer Series Paper in the top third of the previous layer.
  4. Use the Designer Series Paper with the reindeer on the Granny Apple Green background,  Use the Nested Essential rounded corner die (2nd smallest) to die cut 3 images.
  5. Evenly align the die cuts across the red designer series paper.  Attach with Stampin’ Dimensionals.
  6. On a scrap of Basic White, swipe the Embossing Buddy to eliminate the static cling. Stamp a sentiment in VersaMark. Cover the ink with Gold Embossing Powder and heat set with Heat Tool.
  7. Die Cut using the Nested Essential Dies (the smallest die that looks like the sentiment panel on the card (i don’t know what this shape is called.) Use the smallest die.
  8. Attach the ribbon to the back of the die cut with Stampin’ Seal.
  9. Finally, adhere a red embellishment from the Cherry Cobbler and White Adhesive Backed Berries to each end of the die cut.
  10. Stamp a sentiment on the Basic White panel in  Real Red ink. Adhere a strip of Designer Series Paper to the right hand side of the panel. Then attach it to the inside of the card.

Reindeer fun Christmas Card

I hope that you give the Reindeer Fun Christmas card a try.  It’s easy and will give someone such delight.

If you want any supplies to recreate this card, you can order from My Shop with Me store,

You can always email me if you have any questions


Blog Hop Index


Posted in Aug - Dec Mini Catalogue, Blog Hops, Cards, Christmas, Occasion Cards, Stampin' Emboss and Die Cut Machine, SU Only Products | Tagged bundles, Christmas, dies, Embossing, occasions, Stampin Up, stamping up, stampingup, stampinup, su

Lovely & Sweet Oct Sketch Inspiration Ink Blog Hop

Simply Said With Karen Posted on September 25, 2024 by Karen GilbertSeptember 24, 2024

Lovely & Sweet Oct SketchThe Lovely & Sweet stamp set and dies set, along with the Sketch from the Sept -Dec 2024 Mini Catalogue is  my inspiration for the Blog Hop.  The Sketch makes a great jumping off point. Have you used any of the sketches to create a card or a scrapbook page? (see page 16).  Please hop to the other participant blogs so that you can see how the other bloggers were inspired by the sketch. We thank you for visiting our blogs ,please leave a comment, we would appreciate it.

Inspiration SKETCH Lovely & Sweet Oct SketchLovely & Sweet Oct Sketch


Lovely & Sweet Card Recipe

SUPPLIES:

Stamp Sets Lovely & Sweet
Ink: VersaMark, Tuxedo Black Memento
Papers: Pebble Path CS – 8-1/2″ x 5-1/2″(card base), 3″ x 3″, Nature’s 12″ x 12″Sweetness Designer Series Paper – Cross hatch – 5-1/4 x 4″, Pebble Path with Gold Writing. (4-1/4″ x 2-3/4″), and a strip 3/4″ x 4″ , Basic White- 4″ x 5-1/4″, Scrap for flower.
Accessories: Gold & Silver Trim- 7″, Gold Textured Adhesive Backed Dots, Basics Embossing  Powder (White).
Tools: Stampin’ Cut & Emboss Machine,  Blends: Pecan Pie, LemonLime, Granny Apple Green, Country Corner Dies, Spotlight on Nature Dies, Lovely & Sweet Dies,Heat Tool Embossing Additions  Tool Kit.
Basic Supplies:  Paper Trimmer, Bone folder, Paper Snips, Take Your Tool Pick, Stampin’ SEAL+, Multipurpose Liquid Glue, Stampin’ Dimensionals, Mini Glue Dots, Tear & Tape Adhesive, Paper Snips.

INSTRUCTIONS
  1. Score cardbase at 4-1/4″ and burnish with Bone Folder.
  2. Adhere the cross hatch panel to the cardbase.
  3. Die cut the Pebble Path DSP with the 3rd largest Country Corners Dies.  Use a hole punch and punch a hole in the top of the die cut.
  4. With Stampin’ Cut & Emboss Machine, die cut the circle from Pebble Path with the smaller die cut with the dots.
  5. With Memento Black ink, stamp the flower on Basic White cs, on a scrap of Basic White cs. Use the Stamp’ Blends to color the leaves, flowers and stems.  Die cut with the coordinating Die from the Lovely & Sweet Dies.
  6. On a scrap of Pebble Path, stamp the Sentiment with VersaMark ink. Remember to use the Embossing Buddy from the Embossing Essentials kit.  Sprinkle with the White Emboss Powder and set with Heat Tool.
  7. Adhere the flower to Pebble Path circle. Fold the Gold Trim in half and string through the hole in the label and secure by threading the ends through the loop. Attach the label on an angle to the card front.  Attach the circle with Stampin’ Dimensionals to the right side of the label.
  8. Attach the strip of DSP to Basic White panel and adhere to the inside  of the card.
  9. Attach 1 large Gold Textured Adhesive Backed Dots to the card front and2 smaller ones to the die cut circle.
  10. Trim the sentiment and angle cut the ends. Attach to top of card with Stampin’ Mini Glue Dots.

Lovely & Sweet Oct Sketch

Blogs


Need supplies to create this card? Click on the images and you will be taken to my online store.  

Blog Hop Index

If You have questions, please email me and I will help you out.  karen@simplysaidwithkaren.com

Posted in Annual Catalogue, Birthday, Blog Hops, Cards, Feminine | Tagged dies, Embossing, occasions, Stampin Blends, Stampin Up, stamping up, stampingup, stampinup, su

Round You Go card for Inspiration in Ink Blog Hop

Simply Said With Karen Posted on August 28, 2024 by Karen GilbertAugust 27, 2024

Create The Round you Go card  with the the bundle by Stampin’ Up!  Remember the lollies we used to make?  Well now, Stampin “Up! has eliminated the need to score fold lines, allow us  to cut the papers with die cuts and  no mess, no fuss.  All you need to do is the accordion fold and attach the ends.

Round You GoWe are a group of Demonstrators who are passionate about paper  crating. You will find the list of demonstrators at the end of the post. To see the posts, click on the links and please leave a comment .

This month we took our inspiration from a  Sketch from the  2024 September to January Mini Catalogue.  Sketches are a great jumping off point for creations.

Round You Go Card
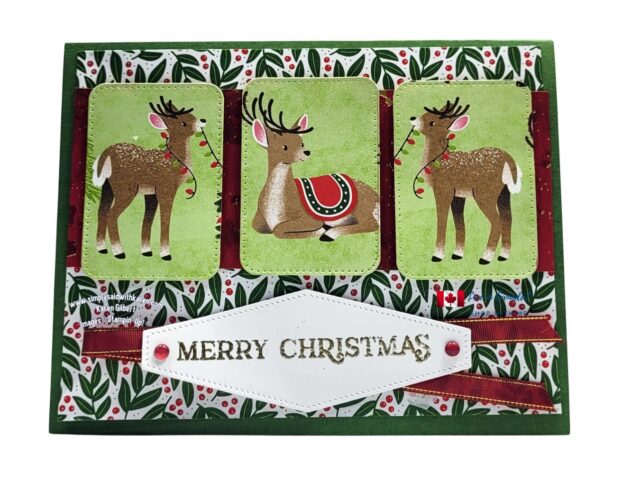
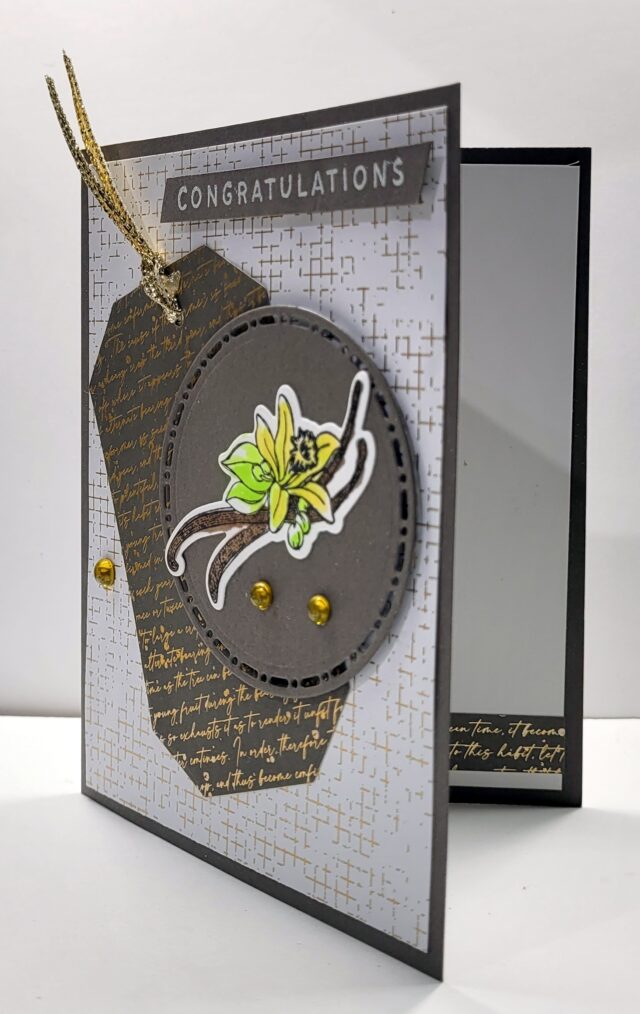
Round You Go Card Recipe

SUPPLIES

Stamps: Round You Go:

Paper:
Basic White 11″ x 4-1/4″, Granny Apple Green: (scraps for pinwheel); and Pumpkin Pie (scraps for pinwheel, Petunia Pop (scraps)
Designer Series Paper: Friends for Life 6″ x 6″ – (5-12″x4-1/4″) , 2 pieces of  5″ x 1-3/4″ , 5-1/4″ x 2-7/8″.
2024-2026 in Colour Glimmer Paper: Pretty in Pink – scrap for sentiment.3-1/2″ x 1-1/4″.

Accessories: Iridescent Rhinestones, Round you Go Dies, Want to Say Dies, 1-1/2″ Punch,

Tools: Stampin Cut & Emboss Machine. Round you Go Dies, Want to Say Dies, 1-1/2″ Punch

Basic Supplies: Paper Trimmer, Bone folder, Paper Snips, Take Your Tool Pick, Stampin’ SEAL+, Multipurpose Liquid Glue, Stampin’ Dimensionals, Mini Glue Dots, Tear & Tape Adhesive, Paper Snips Adhesive Sheets 3-1/2″ x 1-1/4″

INSTRUCTIONS

Create the large pinwheel

  1. Die cut 2 pinwheels from DSP.  Accordian fold the score lines on both pieces. Join the shorter fold on the end to the longer fold on the other section.  Use Tear & Tape Adhesive.  Join the two end to make a circle.  Punch 2 circles with the 1-1/2″ Punch from Petunia Pop cardstock. Manipulate into a flat circle and adhere 1 circle to the center with Multipurpose Liquid Glue.
  2. Turn over and add Liquid glue over the center of pinwheel.  Add the other circle to the center of the pinwheel.
  3. Die cut the circle with the embossing from Pretty in Pink and attach to Petunia Pop circle.Round You Go

Assemble the card

  1. Score the Basic White cardstock at 5-1/2″ and burnish with Bone Folder.
  2. Attach the panel of DSP to the front of card. I used the reverse side of the paper with the multiple colours.
  3. On the side with the medium sized squares, use your Paper Snips and cut up the center of panel about 1-1/4″ and then from each of the corners up to the slit.
  4. Use the large pinwheel die and cut 2 from the Pumpkin Pie scrap and 1 large circle. Attach the 2 together and  offset the petals. Attach the circle to the center of pinwheel..Use the smaller pinwheel die and cut 2 from Granny Apple Green scrap and 1 small circle . Attach the 2 together and  offset the petals.  Attach the circle to the center of pinwheel.  See the photo for the placement of the pinwheels.
  5. Die cut the “Celebrate” background from Pretty in Pink.  Attach the Adhesive Sheet to the Pretty in Pink Glimmer Paper and die cut the “Celebrate” word.  Attach the word to the background and attach to the the bottom right of the card front.
  6. Attach a large Iridescent Rhinestone to the each of the circles.

Thank you for joining us on our Inspiration in Ink Blog Hop.  We appreciate our readers.


Blog Hop Index


If you need supplies to create this card, please Shop with Me

Posted in Adhesive Sheets, Blog Hops, Cards, General, Occasion Cards, Occasions, Stampin' Emboss and Die Cut Machine, SU Only Products | Tagged Adhesive Sheets, bundles, demonstrator, dies, occasions, Stampin Up, stampingup, stampinup, su, Techniques

Blackout Embossing Technique Inspiration In Ink Blog Hop

Simply Said With Karen Posted on July 31, 2024 by Karen GilbertAugust 14, 2024

The Blackout Embossing Technique makes a stunning and beautiful card.  If it’s the last Wednesday os the month, It’s time for the monthly Inspirations in Ink Blog Hop.  We hope you will join us in the hop to other member’s blogs to see what they have for you.  The list of the  participants is below, so just click on the link and you will immediately be taken to their blog post.

While you are there, please leave some love for them.

Black out embossing Technique

blackout emboss technique

The Embossing Technique Card Recipe

SUPPLIES

Stamps:  Something Fancy

Ink:Bubble Bath, Pretty Peacock, Azure Afternoon, Soft Seafoam, Old Olive, VersaMark

Paper: Pretty Peacock (4-1/4″ x 11″) , scrap, Bubble Bath, (4″ x 5-1/4″) Whisper White (3-3/4″ x 5″, Inside Panel – Whisper White – (4″ x 5-1/4:).

Accessories: Silver & White 1/2″ ribbon-8″.Faceted Gems Trio Pack, Metallic Wow Emboss Powder (silver).

Tools: Blending Brushes, Stampin’ Cut & Emboss Machine, Layered Floral 3D Emboss Folder,  Something Fancy  Dies, Heat Tool

Basic Supplies: Paper Trimmer, Bone folder, Paper Snips, Take Your Tool Pick, Stampin’ SEAL+, Multipurpose Liquid Glue, Stampin’ Dimensionals, Mini Glue Dots, Tear & Tape Adhesive

INSTRUCTIONS

Debossed & Coloured Panel

This technique uses the debossed side of the cardstock.  That is, the indent of the images. Usually, we work on the bumpy side or the embossed side.

  1. Emboss the Basic White panel with the Layered Floral 3-D Emboss Folder and the Stampin’ Cut & Emboss Machine..  Work on the  debossed  side. (The deboss side is when the design is depressed or pushed down.
  2. Use the Blending Brushes and brush various ink colour into the depressions.On this card, I used Bubble Bath, Azure Afternoon, for the flowers and Old Olive and Soft  Seafoam, for the leaves.(make sure that there is sufficient ink in the divots.
  3. Once you are satisfied with the coverage, take an ink pad in a dark colour, start at the top of the panel and pull down to lay the ink on the embossed panel. (Make sure that you have your ink pad well inked.)
  4. Make sure the ink is dry before you put the VersaMark on the front panel. Cover the front panel with VersaMark in the same way you did the ink.Emboss with Clear Emboss powder as this will give the front panel a shimmer.  Sprinkle on Clear Emboss Powder and heat set with Heat Tool  Once the clear emboss powder is dry, you can assemble the card.
Assemble the Card
  1. Fold the  Pretty Peacock card base along score line and burnish with Bone Folder.
  2. Trim The Embossed Panel to 3-3/4″ x 5″. From the leftover Cardstock, cut a strip that is 1/2″ x 4″ and attach to the inside Basic White panel.
  3. Attach the Bubble Bath cardstock to the card base, and the embossed panel to the Bubble Bath panel.
  4. Loop the ribbon and attach to card front with Tear & Tape Adhesive.
  5. Stamp a sentiment on a scrap of Pretty Peacock cs.  Sprinkle with Silver Emboss Powder and heat set with Heat Tool.
  6. Die cut with a die from the coordinating dies, Something Fancy. Attach with Dimensionals over the ribbon.  Attach 2 gems at each end of the die cut.
  7. Attach the inside panel with adhesive.

I hope you enjoy this card as much a I did when creating it for you.

Please leave a comment below. Comments help me to gain Blog visitors.

Please click on the links below to visit the other Blogs for some inspiring cards.  Thank you for joining us.

If you have any questions regarding this technique, please contact me at karen@simplysaidwithkaren.com


If you need supplies to create this technique and card, please SHOP WITH ME

Posted in Annual Catalogue, Birthday, Blog Hops, Cards, Coloring, Embossing, Feminine, Occasion Cards, Stamp Sets, Stampin Up, Stampin' Emboss and Die Cut Machine, SU Only Products, Techniques, Tips and Techniques | Tagged Birthday, bundles, dies, Embossing, occasions, Photopolymar Stamps, Stampin Blends, Stampin Up, stamping up, stampingup, su, Techniques

Encircled in Nature, Enjoy Our Natural Surroundings

Simply Said With Karen Posted on July 14, 2024 by Karen GilbertJuly 15, 2024

Encircled In Nature stamps and dies are a great way to recognize what surrounds us.  Nature is everywhere, and it’s free to look at..not many things are free these days, so take advantage.

Thanks to Mary Deatheridge for the inspiration.

Encricled in Nature

Encircled in Nature Card Recipe

SUPPLIES:

Stamps: Encircled in Nature, Wonderful Thoughts

Ink: Moody Mauve, Berry Burst, Early Espresso, VersaMark

Paper:
Lost Lagoon:  11″ x 4-1/4
Perennial Lavender 12″ x 12″ Designer Series Paper (Lost Lagoon watercolour). 5-1/4″ x 4-1/4″
Basic Beige: 2 @ 5″ x 3-3/4″, 1 @ 5-1/4″ x4″ (Inside panel), scrap for sentiment.
Berry Burst: Scraps for sentiment

Accessories: Neutrals Adhesive- Backed Sequins,Gold & Silver 1/8″ Trims

Tools: Stampin’ Cut & Emboss Machine, Encircled in Nature Dies, Wonderful Thoughts Dies,  Embossing Additions Tool Kit,  Heat Tool. Gold Emboss Powder.

Basic Supplies: Paper Trimmer, Bone folder, Paper Snips, Take Your Tool Pick, Stampin’ SEAL+, Multipurpose Liquid Glue, Stampin’ Dimensionals, Mini Glue Dots, Tear & Tape Adhesive.

INSTRUCTIONS

  1. Score the Lost Lagoon Card Base at 5-1/2″, fold & burnish with bone folder.
  2. Attach the panel of DSP to the Card Base.
  3. Stamp the Circle (looks like a twig) on one of Basic Beige cs.  Place the stamp where the disconnected circle will not appear. Stamp in Early Espresso.
  4. Now place the stamped circle on the other piece of Basic Beige and mark with a pencil where the where circle lays on top of the other piece of Basic Beige cardstock.  Stamp  the row of trees inside the circle on the left side in Moody Mauve. Stamp, 2 large trees on the right with Berry Burst ink.
  5. Die cut 2 large trees from Berry Burst cs and Moody Mauve cs, die cut the row of trees from Berry Burst cs.  Attach the 2 large trees to the right side, overlapping the trees and the row of trees to the left hand side.
  6. Stamp the moon and stars with Berry Burst ink.
  7. Stamp a sentiment from the Wonderful Thoughts stamp set in Early Espresso and die cut with matching die.
  8. Loop 7 ” of the Gold trim on the back of the sentiment and attach below the trees.
  9. Attach 3 Neutrals Adhesive Backed Sequins to the card front.
  10. Decorate the inside panel with a sentiment from the Wonderful Thoughts.  I used the long sentiment, curved it onto the block and stamped in Early Espresso. Stamp 4 trees with Early Espresso ink.  Stamp one full strength and move to the left and stamp again without reinking.  This technique is called generational stamping.

Want to make this card and don’t have the supplies? SHOP WITH ME on my Online Store.

Bonus Coupon Days

There is a Stampin’ Up! promotion going on in the month of July. And it’s a good one.  Purchase $60 CDN and you will receive a $6.00 to spend in the month of August.  So, if you order $180.00 (before shipping & taxes), you will receive 3 coupons to use in August. These will be sent your email to the address you have on file with Stampin’ Up!2024 Coupons

Click on any image below to shop that specific product.


Product List

Encircled In Nature Bundle (English)

Encircled In Nature Bundle (English)
[163629]

Wonderful Thoughts Photopolymer Stamp Set (English)

Wonderful Thoughts Photopolymer Stamp Set (English)
[161899]

Moody Mauve Classic Stampin' Pad

Moody Mauve Classic Stampin’ Pad
[161649]

Berry Burst Classic Stampin' Pad

Berry Burst Classic Stampin’ Pad
[147143]

Early Espresso Classic Stampin' Pad

Early Espresso Classic Stampin’ Pad
[147114]

Lost Lagoon 8-1/2" X 11" Cardstock

Lost Lagoon 8-1/2″ X 11″ Cardstock
[133679]

Perennial Lavender 12" X 12" (30.5 X 30.5 Cm) Designer Series Paper

Perennial Lavender 12″ X 12″ (30.5 X 30.5 Cm) Designer Series Paper
[162593]

Basic Beige 8 1/2" X 11" Cardstock

Basic Beige 8 1/2″ X 11″ Cardstock
[164511]

Berry Burst 8-1/2" X 11" Cardstock

Berry Burst 8-1/2″ X 11″ Cardstock
[144243]

Neutrals Adhesive Backed Sequins

Neutrals Adhesive Backed Sequins
[161627]

Gold & Silver 1/8" (3.2 Mm) Trim Combo Pack

Gold & Silver 1/8″ (3.2 Mm) Trim Combo Pack
[161633]

Stampin' Cut & Emboss Machine

Stampin’ Cut & Emboss Machine
[149653]

Wonderful Thoughts Dies (English)

Wonderful Thoughts Dies (English)
[161491]
Add All to Cart
Posted in Annual Catalogue, Cards, General, Occasion Cards, Stampin Up, Stampin' Emboss and Die Cut Machine, Techniques | Tagged bundles, Photopolymar Stamps, Stampin Up, stamping up, stampingup, stampinup, su

Unbounded Flowers and Greetings Are a Hit with Crafters

Simply Said With Karen Posted on June 11, 2024 by Karen GilbertJune 11, 2024

Unbounded Flowers and Greetings suite, in the new Annual Catalogue, is a hit with crafters. It’s not just the stamps and dies, but the In Colour Shimmer paper,  the Designer series Paper and the 2024 -2026 In Colour Resin Dots.This suite compliments the in colours. As well, the unbounded flowers stamp set uses the 2-step method

Unbounded flowers and greetings

Celebrate with Flowers Card Recipes

SUPPLIES

Stamps: Flowers of Beauty, Unbounded Love

Inks:Pretty in Pink, Shy Shamrock

Paper with cutting measurements:
Basic White; 8-1/2″ x 5-1/2″ (Card Base), 2 @ 4″ x 5-1/4″, 5″ x 3-3/4″, scraps for flowers, leaves, twigs sentiment,
Pretty in Pink –  4″ x 5-1/4″
Shy Shamrock – 3-1/2″ x 2″ , scraps

Accessories:   Petal Pink & White 1/4″ Diagonal Trim Combo Pack – ( White), 2024-2026 In Colour Resin Dots

Tools: Stampin’ Cut & Emboss Machine, Flowers of Beauty Dies, Unbounded Dies, Cane Weave 3D Folder

Basic Supplies : Paper Trimmer, Bone folder, Paper Snips, Take Your Tool Pick, Stampin’ SEAL+, Multipurpose Liquid Glue, Stampin’ Dimensionals, Mini Glue Dots, Tear & Tape Adhesive.

INSTRUCTIONS
  1. Score the Basic White card base at 4-1/4″ and burnish with Bone Folder.
  2.  With the Stampin’ Cut & Emboss Machine, emboss the Basic White panel with the Cane Weave 3D Folder.
  3. Die cut the twig  with Basic White scrap and the Flowers of Beauty Dies.
  4. Stamp the flowers with Pretty in Pink ink. Stamp the flowers first at full strength and stamp again without reinking. Die cut with coordinating die. This is known as 2-step stamping.
  5. Stamp the leaves on Shy Shamrock and Basic White scraps with Shy Shamrock ink. Die cut with coordinating die.  Die cut a leaf from Shy Shamrock.
  6. Die cut a label with the leaves on the right side from Shy Shamrock scrap.  Die cut another label from a Basic White scrap.  Keep only the inner portion of the label. Stamp a sentiment on the white portion with Pretty in Pink ink.
Arrange the images on Card Front.
  1. Start with the Basic White twig and adhere to the card front.
  2. Adhere the Shy Shamrock label outline.  Put Multipurpose Liquid Glue on the leaf area.  The other elements will hold the label in place. Attach the sentiment inside the label frame with Multipurpose Liquid Glue.
  3. Attach the 2 sets of leaves behind one of the flowers and attach to the top left-hand side of the label. Adhere the other set of leaves behind the other flower.  Put a Glue dot behind the flower and slide under the leaves .
  4. Finally, tie a bow from the Petal Pink & White 1/4″ Diagonal Trim Combo Pack and attach the bow with Glue Dots.  Place 2 large resin dots and 1 small resin dot from  the 2024-2026 In Colour Resin Dots (Pretty in Pink).
  5. On the inside attach the Pretty in Pink panel.  Stamp the leaves with Shy Shamrock ink on Basic White panel, add sentiment in Pretty in Pink panel.  Attach this panel to the the Pretty in Pink panel.

unbounded Love and Greetings

Please leave me a comment and if you are require any product to recreate the Unbounded Flowers and Greeting card, please click on the images below or by SHOPPING WITH ME 

Unbounded flowers and greetings

If you have questions, please contact me at karen@simplysaidwithkaren.com

Product List

Flowers Of Beauty Bundle

Flowers Of Beauty Bundle
[163376]

Unbounded Love Bundle (English)

Unbounded Love Bundle (English)
[163384]

Pretty In Pink Classic Stampin Pad

Pretty In Pink Classic Stampin Pad
[163807]

Shy Shamrock Classic Stampin Pad

Shy Shamrock Classic Stampin Pad
[163808]

Basic White 12 X12 (30.5 X 30.5 Cm) Cardstock

Basic White 12 X12 (30.5 X 30.5 Cm) Cardstock
[159231]

Pretty In Pink 8 1/2" X 11" Cardstock

Pretty In Pink 8 1/2″ X 11″ Cardstock
[163793]

Shy Shamrock Classic Stampin Pad

Shy Shamrock Classic Stampin Pad
[163808]

Petal Pink & White 1/4" (6.4 Mm) Diagonal Trim Combo Pack

Petal Pink & White 1/4″ (6.4 Mm) Diagonal Trim Combo Pack
[163417]

2024 2026 In Color™ Resin Dots

2024 2026 In Color™ Resin Dots
[163389]

Cane Weave 3 D Embossing Folder

Cane Weave 3 D Embossing Folder
[160580]
Add All to Cart


Posted in Annual Catalogue, Cards, Congratulations, General, Occasions | Tagged bundles, dies, Embossing, occasions, stamping up, stampingup, stampinup, su

Capture Natures Palette with the Layers of Beauty Bundle

Simply Said With Karen Posted on May 29, 2024 by Karen GilbertMay 28, 2024

Capture Natures Palette

Capture Nature’s Palette with the Layers of Beauty bundle and create a stunning card. The card utilizes a sketch for inspiration. A sketch helps you when you design your card.  You can interrupt the sketch any way you want.  You have the ability to turn, the design sideways, upside down to get the look you like.  There is no right or wrong way.  It only needs to appeal to you artistic soul.

Thank you for joining in the Blog Hop.  You will find the rest of the Blog addresses below.  Please have a look at the posts which will provide you with inspiration.

Capture Nature's Palette

Nature’s Palette Card Recipe

SUPPLIES

Stamps: Layers of Beauty, Wonderful Thoughts

Ink: Tuxedo Momento Black, Peach Pie, Lemon Lolly, Pumpkin Pie, Old Olive, Soft Seafoam

Paper: **please note that the measurements are not included here.  They are in the Inspiration in Ink Tutorial (find out below how you can earn this tutorial for free or purchase the tutorial)**.
Peach Pie : Card Base
Unbounded Beauty 12″ x 12″ Designer Series Paper
2024-2026 In Color 12″ x 12″ Glimmer Specialty Paper
Country Woods 12″ x 12″ Designer Series Paper
Basic White
Accessories: 2024-2026 In Color Resin Dots, (2 large, 1 small), Baker’s Twine Essentials Pack (white)
Tools: Stampin’ Cut  & Emboss Machine, Layers of Beauty Dies, Wonderful Thoughts Dies, Stampin’ Blends: Smoky Slate (light), Peach Pie dark), Blending Brushes ,Layers of Beauty Decorative Masks.

Basic Supplies: Paper Trimmer, Bone folder, Paper Snips, Take Your Tool Pick, Stampin’ SEAL+, Multipurpose Liquid Glue, Stampin’ Dimensionals, Mini Glue Dots, Tear & Tape Adhesive.


Capture nature's palette with the Layers of Beauty Bundle

INSTRUCTIONS

1.  Cut the card base and score at 4-1/2″.  Fold and burnish with Bone Folder.
2.  Cut the Unbounded Beauty DSP and attach to card base.
3.  Cut the narrow strip of Country Wood DSP and the 2024-2026 In Color Specialty Paper.               Attach the Country Wood DSP to the Glimmer Paper DSP leaving a narrow strip of the                 woods DSP at the left hand side.
4.  Stamp the large image from the Layers of Beauty stamp set using Memento Black Ink on            Basic White.

How to use the Masks

5.   Lay panel on scratch paper and tack down so it doesn’t move.
6.  Lay Mask#1 down on panel with the notch to the top left.  Use  Blending Brush and                    Lemon  Lolly ink and fill in spaces. Remove Mask #1
6.  Use Mask 2 and follow same steps as step1, use Peach Pie ink.
7  Use Mask 3 and Pumpkin Pie ink.
8.  Use Mask 4 and Soft Seafoam Ink.
9.  Use Mask 5 and Old Olive ink.

10.  Use Smoky Slate Blend (light) and colour in the white space around the image.  This will             ground the image.
11.  Trim the image panel to 2-3/4″ x 4″.  Determine the focal part of the image before                        trimming.   Adhere the image panel to a Peach Pie panel and attach to the glimmer strip.
12.  Stamp sentiment on a scrap in Peach Pie, die cut with coordinating die.  Color a piece of             White  Baker’s Twine with Dark Peach Pie Blend (use the brush end to color). Loop around          the sentiment panel
13.  Attach Basic White panel to the inside of card.  Add a strip of DSP and a sentiment.

The masks are a fun way to add interest to your projects.  In fact, it’s easy to add  colouring to your project

So I hope you enjoyed this post on Capture Natures Palette.

Please hop along with all of us and leave a comment letting me know what you liked and didn’t like.  I am always looking for ways to improve.


Blog Hop Index


Thanks for joining our Blog Hop.

Shop with Me if you need any products to create any projects. Need questions answered? Email me at karen@simplysaidwithkaren.com

Posted in Annual Catalogue, Blog Hops, Cards, General, Stampin' Emboss and Die Cut Machine, SU Only Products, Thank You, Tips and Techniques | Tagged bundles, dies, Masks, occasions, Stampin Blends, Stampin Up, stamping up, stampingup, stampinup, su

Unleash Your Creativity with Stampin’ Up Blends and Color Pencils

Simply Said With Karen Posted on May 13, 2024 by Karen GilbertMay 13, 2024

Unleash your creativity with Stampin’ Up! blends and color pencils. You can use stampin’ blends and water color pencils to create images that are beautiful & vibrant.

unleash your creativity

Moody Magnolia Card Recipe

SUPPLIES

  • Stamps: Moody Magnolia, Thoughtful Expressions
  • Inks: Memento Tuxedo Black,  Pool Party, Pretty in Pink.
  • Paper:(with measurements)
  • Basic White: 8-1/2″ x 5-1/2″ scored at 4-1/4″ . 3-3/4″ x 5″, scrap for sentiment, 4 x 4-1/4″, 3-1/2″x 4-3/4″.
    Pretty In Pink 5-1/4″x 4″,
    Shy Shamrock: 4-1/2″ x 2″
    Accessories:
    Petal Pink & White 1/4″ Diagonal Trim Combo Pack (5-1/2″ and 4″ pieces), Stampin’ Blends: Petunia Pop Duo, Shy Shamrock Duo, Color Lifter
    Tools: Distressed Tile Emboss Folder, Moody Magnolia Dies, Flowers of Beauty Dies, Thoughtful Expressions Dies, Stylish Shapes Dies.Basic Supplies : Paper Trimmer, Bone folder, Paper Snips, Take Your Tool Pick, Stampin’ SEAL+, Multipurpose Liquid Glue, Stampin’ Dimensionals, Mini Glue Dots, Tear & Tape Adhesive.

INSTRUCTIONS

  1. Cut cardbase  from Basic White, score and burnish with Bone Folder.
  2. Emboss Pretty in Pink panel with the Distressed Tile Emboss Folder and Stampin’ Cut & Emboss machine,
  3. Cut the leaves from Shy Shamrock with the die from the Flowers of Beauty Dies.
  4. Cut a piece of Basic White with the middle circular die with the Thoughtful Expressions Dies.  Use a Blending Brush and Pool Party ink to lightly colour the die cut.  Add more ink to the edges of the die cut if you would like them to stand out.
  5. Stamp the large Magnolia flower on the Basic White panel with Memento Tuxedo Black ink.

Watch the video to see how to colour using the Stampin’ Blends and Watercolour Pencils


  1. Adhere  the decorative die cut to the top center of the Basic White panel.  Cut the leaves from Shy Shamrock and adhere to the left hand side so that it overlay the decorative die cut.
  2. Die cut the Moody Magnolia flower in the center of the panel and attach with Stampin’ Dimensionals and attach to the the embossed panel.
  3. Wrap the ends of the 5-1/2″ piece of ribbon along the bottom of the and attach on the back with Tear & Tape adhesive..  Use the other piece to tie around the flat ribbon in a knot..  Trim the ends of the ribbon.
  4. Stamp the sentiment on a scrap of Basic White with Pretty in Pink ink. Die cut with the long banner die from the the Stylish Shapes Dies.  Attach with Dimensionals below the ribbon.
  5. Stamp on the inside of card, decorate your envelope.

unleash your creativity


If you want to recreate this card and need supplies, please click on any of the images below and you will taken to my ONLINE STORE 

You can also contact me at karen@simplysaidwithkaren.com

So unleash your creativity and learn new techniques.

Product List

Basic White 8 1/2" X 11" Cardstock

Basic White 8 1/2″ X 11″ Cardstock
[159276]

Pretty In Pink 8 1/2" X 11" Cardstock

Pretty In Pink 8 1/2″ X 11″ Cardstock
[163793]

Shy Shamrock 8 1/2" X 11" Cardstock

Shy Shamrock 8 1/2″ X 11″ Cardstock
[163795]

Magnolia Mood Bundle (English)

Magnolia Mood Bundle (English)
[163507]

Tuxedo Black Memento Ink Pad

Tuxedo Black Memento Ink Pad
[132708]

Thoughtful Expressions Bundle (English)

Thoughtful Expressions Bundle (English)
[162822]

Pool Party Classic Stampin' Pad

Pool Party Classic Stampin’ Pad
[147107]

Pretty In Pink Classic Stampin Pad

Pretty In Pink Classic Stampin Pad
[163807]

Shy Shamrock Classic Stampin Pad

Shy Shamrock Classic Stampin Pad
[163808]

Petal Pink & White 1/4" (6.4 Mm) Diagonal Trim Combo Pack

Petal Pink & White 1/4″ (6.4 Mm) Diagonal Trim Combo Pack
[163417]

Petunia Pop Stampin’ Blends Combo Pack

Petunia Pop Stampin’ Blends Combo Pack
[163828]

Shy Shamrock Stampin’ Blends Combo Pack

Shy Shamrock Stampin’ Blends Combo Pack
[163825]

Stampin' Blends Color Lifter

Stampin’ Blends Color Lifter
[144608]

Distressed Tile 3 D Embossing Folder

Distressed Tile 3 D Embossing Folder
[162189]

Unbounded Love Dies

Unbounded Love Dies
[163383]

Thoughtful Expressions Dies

Thoughtful Expressions Dies
[162821]

Stylish Shapes Dies

Stylish Shapes Dies
[159183]
Add All to Cart
Posted in Annual Stampin' Up! Catalogue, Cards, Coloring, Embossing, General, Occasions, SU Only Products | Tagged bundles, dies, Embossing, occasions, Stampin Blends, Stampin Up, stamping up, stampingup, stampinup, su, Techniques

Sip & Stamp-Inspirations in Ink Blog Hop

Simply Said With Karen Posted on March 27, 2024 by Karen GilbertMarch 26, 2024

Sip & Stamp with the Inspirations in Ink Blog Hop, made up of International Stampin’ Up! Demonstrators. We love what we do and like to share with others.  So, sit down with a cup of coffee or some other favorite beverage and hop along with us.

Sip & Stamp Inspirations in Ink

Our focus this month is on the Online Exclusives, so everyone chose what bundle they wanted to use.  My choice is Latte Love. These Online Exclusives are not published in any catalogue so you will  have to use the website to see what is being offered. Not only is it a bundle, but you can add other items to make it a suite of products.

Sip & Stamp Inspirations in Ink Blog Hop

Latte Love Bundle Card Recipe

Supplies:

Stamps: Latte Love

Ink: Pecan Pie, Early Espresso, Smoky Slate.

Paper:
Early Expresso – 8-1/2″ x 5-1/2″ (card base), 3″ x 3″ (coffee pot, lid and handle)
Pecan Pie: -3″ x 2-1/4″ Scraps for coffee beans
Petal Pink: – 4″x5-1/4″, scraps for sentiment 
Basic White – 4″x5-1/4″ (card inside), scraps for mug
A Little Latte 12″ x 12″ Designer Series Paper (DSP) – 3″ x 4-1/8″ Scrap for liquid in mug.

Accessories: Natural Polka Dots Ribbon (5-1/4″), Latte Love Dies, Country Corners Dies,  Brick 7 Mortar Emboss Folder, 

Tools: Stampin’ Cut & Emboss Machine, Stampin’ Blends: Petal Pink Duo . 

Basic Supplies: Paper Trimmer, Bone folder, Paper Snips, Take Your Tool Pick, Stampin’ SEAL+, Multipurpose Liquid Glue, Stampin’ Dimensionals, Mini Glue Dots

INSTRUCTIONS

    1. Score card base at 4-1/4″ and burnish with Bone Folder.
    2. Use the Stampin’ Up Cut & Emboss Machine and the Distressed Brick Emboss Folder to add texture to the Petal Pink cardstock..
    3. Attach the DSP to the embossed panel. Add the Polka Dots trim  over the DSP attach to the back of the Petal Pink cardstock panel.
    4. Cut the coffee pot, lid and handle from Early Espresso, the liquid  form Pecan Pie.
    5. Stamp the mug on Basic White cs with Smoky Slate ink. Colour the rim, handle and mug with Petal Pink Stampin’ Blends. Use the Color Lifter to give the mug some texture.  Die cut with coordinating Die.
    6. Stamp the group of coffee beans on the Pecan Pie with Early Espresso ink and die cut. 
    7. Place the elements on the card front.  Use the photo above for placement.  Stamp the coffee stream on the DSP with Pecan Pie Ink.
    8.  Stamp the sentiment on a scrap of Petal Pink with Pecan  Pie ink.  Die cut with smallest die from the Country Corners Die Set.
    9. To decorate the inside panel, stamp the circle with the Bistro Coffee Design with Pecan Pie.


Thank You

We appreciate you joining us on Sip & Stamp Inspirations Blog Hop..  Hope to see you next month, and if you can, please leave a comment.

Need supplies to recreate this card.  Shop my ONLINE STORE.  Don’t forget the Last Chance promotion starts on April 9th.  I will give you a list to the retiring products so that you can make your lists and check them twice. Oops wrong season!!  


Remember that once items are gone they are gone. The bundles that were available for this catalogue year, may still be available but no discount will be available.

2023-2024 Annual Catalogue Last Chance List


Jan – April Mini Catalogue


Posted in Cards, Embossing, Occasion Cards, Stamp Sets, Stampin Up, Stampin' Emboss and Die Cut Machine | Tagged bundles, dies, Embossing, occasions, Stampin Blends, Stampin Up, stamping up, stampingup, su, Thank You

Faux Step Fancy Fold Card Latte Love Suite

Simply Said With Karen Posted on March 18, 2024 by Karen GilbertMarch 25, 2024

Create a faux step fancy fold card using the Latte Love Suite.  This is a much easier method than the measuring, slicing and dicing way to do it.  Will explain how easy it is.

Stampin’ Up’s Latte Love suite is a fun suite and is part of the Online Exclusives and won’t be found in any catalogue. Click on the LINK to see the products in the suite.  Now you can purchase the suite with 1 single item number or purchase a la carte, which means picking only certain products within the suite.

I love the suites because Stampin’ Up! has done all the heavy lifting to put the coordinating products together.  No, longer do you  have to think, “does this go together”?   Of course it does because the creative team has been very selective in their approach to combining products.


Coffee Faux Step Fancy Fold Card Recipe
Supplies

Stamps: Latte Love
Ink: Pecan Pie
Paper with measurements:
Pecan Pie: 9″ x 4-1/4″,9″ x 2-1/4″
Pecan Pie: 3″ x 4″  (back panel), 3 x 4″ (inside panel).
Basic White: scraps for mug, cups, and sentiment,
A Little Latte 12″ x 12″ Designer Series Paper: Cup rings pattern – 4″ x 3″, 1″ x 4″, Coffee Spatters pattern -5-1/4″ x 2″, Coffee Beans pattern
Distressed Gold Pattern: 3-3/4″ x 2″
Window Sheets: 3-3/4″ x 2″ carafe
Adhesive Sheets: Scrapes for French Press
Early Espresso Scraps for coffee.
Accessories: Adhesive Backed Swirl Dots.
Tools:
Stampin’ Emboss & Cut Machine, Latte Love Dies,
Basic Tools: Paper Trimmer, Bone folder, Paper Snips, Take Your Tool Pick, Stampin’ SEAL+, Multipurpose Liquid Glue, Stampin’ Dimensionals, Mini Glue Dots

Instructions
  1. Cut the Pecan Pie according to the measurements above.  On the larger piece of cs, score along the long side with your Paper Trimmer at 1-1/4″,2-1/2″, 5-5/8″.  Do a mountain fold at the 1-1/4″, valley fold at the 2-1/2″ and a mountain fold at 5-5/8″.
  2. On the smaller piece of Pecan Pie, along the long side at 5-1/4″.  Do a mountain fold on this score line.
  3. Attach the splatter designer series paper on the first section skip the next section and add the second splatter DSP to the 3rd panel.
  4. Stamp the mug on Basic White scrap with Pecan Pie ink.  Die cut the mug and the scrap of DSP with the marked with an A photo above. Attach the scrap of the DSP to the inside of cup.  Colour around the rim and handle with Pool Party Stampin’ Blend.
  5. Die cut the small cups from Basic White scraps and the small coffee inserts, insert these into the top of the cups .  Apply the adhesive sheet to the back of the Distressed Gold Paper, and die cut the French Press.  Do not remove the adhesive sheet until later. Die cut the carafe from the Window Sheet.  Try not to get anything like glue or fingerprints on the Window Sheet.  If you do, clean with a clean cloth and Rubbing Alcohol.  Use the Image below to see the different Dies
  6. Ink one of the coffee design stamps with Pecan Pie, stamp off on a scrap 2 times.  Do not reink stamp. Stamp a scrap of Basic White. Cut using the circle die.  Stamp a small sentiment over the previous stamping with full strength Pecan Pie.
  7. Attach a strip of Tear & Tape Adhesive to the bottom short end of the Pecan Pie panel. Remove the tape backing  and attach to the end of the 1st step. Attach another strip of Tear & Tape adhesive to the other end of the of the panel.  Remove the tape backing and attach this end to the back of the back panel. 
Constructing the Card
  1. Place the French Press on the DSP to get an idea of placement. When you are satisfied then, remove the Adhesive Sheet. Place the window sheet behind the French Press, attaching the die cut sides to the adhesive sheets. If you are off the DSP, then do not remove the Adhesive Sheets. If you do, rub with an embossing buddy to take off the adhesive.
  2. Attach the inside coffee to the DSP with Glue Dots. Put the Glue Dots behind the Coffee Press sides.
  3. Attach the mugs, small cup, the coffee bean to the lower step.  Use Stampin’ Dimensional to attach.
  4. Attach the Sentiment to the top right of the middle panel..
  5. Stamp the coffee design
  6. Stamp the coffee design and a sentiment in full strength Pecan pie . Cut out with circle die . Attach the Basic White panel to the back of card to cover the end of the short panel.
  7. and a sentiment in full strength Pecan pie . Cut out with circle die . Attach the Basic White panel to the back of card to cover the end of the short panel.
  8. Attach 3 Adhesive Backed Swirl Dots to the card front.

Do you have any questions or comments? pLease contact me if you do karen@simplysaidwithkaren.com

Do you have any questions or comments? Please contact me if you do karen@simplysaidwithkaren.com.

Create this faux step fancy fold card using the Latte Love suite. Shop My Online Store for any supplies that you require to create this card.

Posted in Adhesive Sheets, Cards, Fancy Folds, General, Occasion Cards, Online Exclusives, Stampin Up, Stampin' Emboss and Die Cut Machine, SU Only Products, Techniques | Tagged dies, occasions, Stampin Up, stampingup, stampinup, su, Techniques

Thoughtful Expressions Bundle Inkspiration Monthly Blog Hop

Simply Said With Karen Posted on February 28, 2024 by Karen GilbertFebruary 27, 2024

The Thoughtful Expressions Bundle is a beautiful stamp and die set.  It was chosen by a group of international demonstrators for their monthly tutorial and Blog Hop.  Everyone captures their own inner style and interpret the way in which they see it.

I hope that everyone will hop with use and enjoy the various cards created with this bundle.  You will find a list of the bloggers below.  Please click on the link and you will be taken to the next blog.  Thank you in advance for leaving a comment.. Click on the Word Bubble on the top right of the blog and you will be taken to the comment area.

Thoughtful Expressions Bundle

So, lets get started:

Thoughtful Expressions with a Joy Fold Fancy Fold.

StampThoughtful Expressions Bundle

Supplies

Stamps:Thoughtful Expressions.
Inks: Highland Heather, Memento Tuxedo Black. Stampin’ Blends:Lost Lagoon, Highland Heather, Subtles Stampin’ Write Markers: Lost Lagoon, Highland Heather
Paper:
Gorgeous Grape – 4-1/4″ x8-1/2″ – Score at3″ , 8″ x 3″ score at 4″ Use Bone Folder to burnish folds.
Lost Lagoon: – 3-3/4″ x 2-1/4″, 3-3/4″ x 3-3/4″, scraps for leaves.
Basic White: 3-3/4″ x 1-3/4″, scraps for flowers.
Pretty Peacock; scrap for filigree flower.
Perennial Lavender Designer Series 4″ x 5-1/4″, ,2-3/4″ x 4″, 2@3-3/4″ x 2-3/4″
Accessories: Baker’s Twine Essentials Pack ( White) – 10″, Glossy Dots Assortment.

Tools:Stampin’ Up! Cut & Emboss Machine, Thoughtful Expressions Dies,

Basic Supplies: Paper Trimmer, Bone folder, Paper Snips, Take Your Tool Pick, Stampin’ SEAL+, Multipurpose Liquid Glue, Stampin’ Dimensionals, Mini Glue Dots

Instructions
  1. Use Multipurpose Liquid Glue to adhere the largest DSP panel to inside of card, the smaller panel to the front of the card, and the 2 remaining pieces to the front of the smaller card and the left side of  the smaller card .
  2. Die cut the Lost Lagoon pieces with the 3rd largest decorative circle die, the and the label with the largest label die.
  3. Use the second largest lagel die to cut the Basic White sentiment panel.
  4. Stamp the 2 smallest flowers on Basic White scraps with Tuxedo Black ink.  Colour using the Stampin’ Blends: Highland Heather duo and Lost Lagoon duo.  Cut with the coordinating dies.
  5. Colour the flowers and leaves stamp with Stampin’ Write Markers (highland Heather and Lost Lagoon. Huff on stamp to remoisten the ink. Cut out with the coordinating die,  Attach to the Lost Lagoon decorative circle.  Use Stampin’ Dimensionals to attach all to the inside of the smaller card.
  6. Tie the cut  Baker’s Twine Essentials Pack around the smaller card on the left hand side.
  7. Stamp a sentiment on the Basic White Label using Highland Heather ink .Attach to Lost Lagoon label, and attach all to front of smaller card with Stampin’ Dimensionals.
  8. Die cut the filigree flower from the scrap of Pretty Peacock cardstock.  Die cut a smaller leaf from Lost Lagoon scrap.  Attach the filigree flowers to leaf with Mini Glue Dots and use Mini Glue Dots to attach to top right hand side of label.
  9. Attach 3 Gorgeous Grape Glossy Dots Assortment to the card front.
  10. Open the small panel of the card base.  Lay the smaller card centered on the DSP and attach the back to the DSP.
  11. Close the small panel over the smaller card and the outside flap over the small panel. See the photo below.Thoughtful Expressions Bundle

Thank you for joining us on the Inspiration in Ink Blog Hop.  I hope that you have enjoyed everyone’s creation.


Blog Hop Index


Product List

Thoughtful Expressions Bundle (English)

Thoughtful Expressions Bundle (English)
[162822]

Highland Heather Classic Stampin' Pad

Highland Heather Classic Stampin’ Pad
[147103]

Tuxedo Black Memento Ink Pad

Tuxedo Black Memento Ink Pad
[132708]

Highland Heather Stampin' Blends Combo Pack

Highland Heather Stampin’ Blends Combo Pack
[154887]

Lost Lagoon Stampin’ Blends Combo Pack

Lost Lagoon Stampin’ Blends Combo Pack
[161680]

Subtles Stampin' Write Markers

Subtles Stampin’ Write Markers
[131263]

Gorgeous Grape 8-1/2" X 11" Cardstock

Gorgeous Grape 8-1/2″ X 11″ Cardstock
[146987]

Lost Lagoon 8-1/2" X 11" Cardstock

Lost Lagoon 8-1/2″ X 11″ Cardstock
[133679]

Basic White 8 1/2" X 11" Cardstock

Basic White 8 1/2″ X 11″ Cardstock
[159276]

Pretty Peacock 8-1/2" X 11" Cardstock

Pretty Peacock 8-1/2″ X 11″ Cardstock
[150880]

Perennial Lavender 12" X 12" (30.5 X 30.5 Cm) Designer Series Paper

Perennial Lavender 12″ X 12″ (30.5 X 30.5 Cm) Designer Series Paper
[162593]

Baker's Twine Essentials Pack

Baker’s Twine Essentials Pack
[155475]

Stampin' Cut & Emboss Machine

Stampin’ Cut & Emboss Machine
[149653]

Thoughtful Expressions Dies

Thoughtful Expressions Dies
[162821]
Add All to Cart

.Want to recreate this card? Click on any of the images above and you shop the specific products for this card. Or, SHOP WITH ME for any Stampin’ Up! products.


Posted in Blog Hops, Cards, Fancy Folds, General, Jan - April Mini Catalogue, Occasion Cards, SU Only Products, Sympathy, Thinking of You | Tagged bundles, dies, occasions, Stampin Blends, Stampin Up, stamping up, stampingup, stampinup, Thinking of You

Hand Drawn Everyday Details

Simply Said With Karen Posted on February 26, 2024 by Karen GilbertFebruary 26, 2024

Hand drawn Everyday Details bundle makes us aware of the simpler things in life.  Stamps & dies coordinate to make your crafting simpler and permit you to try out multiple coloring techniques.

Reminder Sale-a-Bration ends in 4 days.  Order this bundle (stamps & Dies and select a $60.00 free item.  Shop with Me from my online store.


Hand drawn everyday details

Sketched Flowers in a Vase Card Recipe

Supplies


Stamps: Everyday Details. Layering Leaves.

Inks: Tuxedo Black Memento, Pecan Pie, Basic Gray, Stampin’ Blends: Old Olive, Pecan Pie (Combo)

Paper: (with measurements)
Pool Party – 8-1/2″ x 5-1/2″ score at 4-1/4″ and burnish with Bone Folder (Card Base)
Basic White , 3″x 4-1/4″(insert). 1-1/2″ x 1-1/2″ (sentiment), 4″ x 5-1/4″ (inside panel).
Delightfully Eclectic DSP  – 5-1/2″ x 4-1/4″, 1-1/2″x 4″.

Accessories: Rhinestone Basic Jewels,

Tools: Stampin’ Cut & Emboss Machine, Everyday Detail Dies.Basic Twine Essentials Pack (Grey Granite). 

Basic Supplies:Basic Supplies: Paper Trimmer, Bone folder, Paper Snips, Take Your Tool Pick, Stampin’ SEAL+, Multipurpose Liquid Glue, Stampin’ Dimensionals, Mini Glue Dots

INSTRUCTIONS
  1. Use the Stampin’ Emboss Folder and the largest rectangle die, center the die and cut the DSP.
  2. Stamp the vase and flowers with Basic Grey, on the Basic White panel. Set aside to dry  because this ink is water based, it will smear when using the Stampin’ Blends.
  3. Colour the vase with Pecan Pie Blends – Dark around the bottom of vase, and inside of top rim. Use the colour lifter the remove some of the ink to create shading.
  4. With Pecan Pie Blends, colour the center of large white flower, and the small flowers, and the  Rhinestone Basic Jewels.
  5. Use the light Old Olive blend and colour the leaves.
  6. Use Stampin’ Seal around the front edges of the panel. Attach to the back of DSP panel
  7. Stamp the small Basic White square with Pecan Pie with a sentiment from the stamp set. Die cut with smallest circle die. Attach to the card front with Stampin’ Dimensionals.
  8. Cut 5″ of Grey Granite Twine and colour using Dark Pecan Pie Blend.  Attach below the sentiment circle with Mini Glue Dot.
  9. On the inside panel, attach the strip of DSP to top portion of Basic White.  Stamp a sentiment from the Layering Leaves stamp using Pecan Pie.
  10. Stamp a set of leaves in full strength Old Olive ink.  Do not reink and immediately stamp another set of leaves overlapping the first set if leaves.

SHOP WITH ME ON MY ONLINE STORE

Want me to order for you? Email me at karen@simplysaidwithkaren.com

Looking to create a card that is easy and quick? Then the Hand drawn Everyday Details bundle is for you!

Product List

 Everyday Details Cling Stamp Set (English)

Everyday Details Cling Stamp Set (English)
[162861]

Layering Leaves Photopolymer Stamp Set (English)

Layering Leaves Photopolymer Stamp Set (English)
[161277]

Tuxedo Black Memento Ink Pad

Tuxedo Black Memento Ink Pad
[132708]

Basic Gray Classic Stampin' Pad

Basic Gray Classic Stampin’ Pad
[149165]

Pecan Pie Classic Stampin' Pad

Pecan Pie Classic Stampin’ Pad
[161665]

Gray Granite Stampin' Blends Combo Pack

Gray Granite Stampin’ Blends Combo Pack
[154886]

Pecan Pie Stampin’ Blends Combo Pack

Pecan Pie Stampin’ Blends Combo Pack
[161674]

Pool Party 8-1/2" X 11" Cardstock

Pool Party 8-1/2″ X 11″ Cardstock
[122924]

Basic White 8 1/2" X 11" Cardstock

Basic White 8 1/2″ X 11″ Cardstock
[159276]

Delightfully Eclectic 12" X 12" (30.5 X 30.5 Cm) Designer Series Paper

Delightfully Eclectic 12″ X 12″ (30.5 X 30.5 Cm) Designer Series Paper
[161640]

Rhinestone Basic Jewels

Rhinestone Basic Jewels
[144220]

Everyday Details Dies

Everyday Details Dies
[162864]

Stampin' Cut & Emboss Machine

Stampin’ Cut & Emboss Machine
[149653]

Baker's Twine Essentials Pack

Baker’s Twine Essentials Pack
[155475]
Add All to Cart

Posted in Cards, Coloring, Jan - April Mini Catalogue, Occasion Cards, Occasions, SU Only Products | Tagged bundles, dies, occasions, Photopolymar Stamps, Stampin Blends, stamping up, stampinup, su

Perennial Lavender Suite is the Focus this Month

Simply Said With Karen Posted on January 30, 2024 by Karen GilbertFebruary 1, 2024

Perennial Lavender Suite is the focus this month.  It is beautiful. Yes, It’s time for the Inspirations in Ink Blog Hop,.

Painted Lavender

Perennial Lavender Suite

Happy Birthday Card Recipe

SUPPLIES

Stamps: Painted Lavender.

Inks:Fresh Freesia, Highland Heather,

Papers: (with measurements):
Berry Burst (card base): 4-1/4″ x 11″
Fresh Freesia: 4″ x 5-1/4″, scraps
Basic White: 4 x 5-1/4″ , 3″ x 2″,
Perennial Lavender Designer Series Paper: 3-3/4″ x 5″, 4″ x 1/2″. scraps.
Textured Shimmer Paper (Berry Burst): scraps

Accessories: Painted Lavender Dies, Perennial Postage Dies. Want to Say dies,  Essential Baker’s Twine (White), Adhesive Backed Sequins Trio.

Tools: Stampin’ Cut & Emboss Machine

Basic Supplies: Paper Trimmer, Bone folder, Paper Snips, Take Your Tool Pick, Stampin’ SEAL+, Multipurpose Liquid Glue, Stampin’ Dimensionals, Mini Glue Dots.

Instructions:

  1. Score cardbase at 5-1/2″ and burnish with Bone Folder.
  2. Die cut Fresh Freesia with largest Perennial Postage die.  Attach to cardbase.
  3. Die cut DSP with 2nd largest Perennial Postage die.  Attach to Fresh Freesia panel.
  4. Stamp clump of Lavender on Basic White cs using Fresh Freesia Ink. Die cut with matching die.
  5. Die cut 2 twigs from Basic White cs.
  6. Use the “Want to Say” dies and cut a background from Fresh Freesia. Cut the words “Happy Birthday” from Berry Burst shimmer paper scrap.
  7. Adhere the 2 white twigs to the DSP and the clump of Lavender over twigs.
  8. Attach the cut-out letters to the Fresh Freesia background.  Use Stampin’ Dimensionals to adhere to card front.
  9. Tie a bow from the white Essential Baker’s Twine and attach with a glue dot below the words.
  10. Stamp 2 twigs with Fresh Freesia ink twice.  Do not reink the stamp.  Attach the strip of DSP to the Basic White panel an attach the panel to the inside of the card.

Perennial Lavender Suite

Now, I am sure that you have someone with an upcoming birthday.  Why not create this sparkling card for that someone.


Blog Hop Index


If you have questions about this card, contact me at karen@simplysaidwithkaren.com

Shop with me if you need product for recreate this card.

Product List

Painted Lavender Bundle

Painted Lavender Bundle
[162597]

Fresh Freesia Classic Stampin' Pad

Fresh Freesia Classic Stampin’ Pad
[155611]

Highland Heather Classic Stampin' Pad

Highland Heather Classic Stampin’ Pad
[147103]

Berry Burst 8-1/2" X 11" Cardstock

Berry Burst 8-1/2″ X 11″ Cardstock
[144243]

Fresh Freesia 8 1/2" X 11" Cardstock

Fresh Freesia 8 1/2″ X 11″ Cardstock
[155613]

Basic White 8 1/2" X 11" Cardstock

Basic White 8 1/2″ X 11″ Cardstock
[159276]

Perennial Lavender 12" X 12" (30.5 X 30.5 Cm) Designer Series Paper

Perennial Lavender 12″ X 12″ (30.5 X 30.5 Cm) Designer Series Paper
[162593]

Textured 12" X 12" (30.5 X 30.5 Cm) Shimmer Paper

Textured 12″ X 12″ (30.5 X 30.5 Cm) Shimmer Paper
[160838]

Painted Lavender Dies

Painted Lavender Dies
[162596]

Perennial Postage Dies

Perennial Postage Dies
[162607]

Wanted To Say Dies

Wanted To Say Dies
[161594]

Baker's Twine Essentials Pack

Baker’s Twine Essentials Pack
[155475]

Adhesive Backed Sequins Trio

Adhesive Backed Sequins Trio
[161206]

Stampin' Cut & Emboss Machine

Stampin’ Cut & Emboss Machine
[149653]
Add All to Cart


Posted in Cards, Feminine, General, Jan - April Mini Catalogue, Occasion Cards, SU Only Products | Tagged Birthday, dies, occasions, Sale-a-Bration, Stampin Up, stamping up, stampingup, stampinup

Bee Mine Suite great for Valentine, baby and birthday cards

Simply Said With Karen Posted on January 19, 2024 by Karen GilbertJanuary 22, 2024

Use the Bee Mine Suite to create valentine, baby and birthday cards.  You can even stretch it to anniversary and/or wedding cards. This time I did a Birthday card, as I have one coming up.

What event could see yourself using this cute card for?  I would like to suggest: Valentine’s Day, Birthday card, Anniversary card, Baby card, even a wedding card and/or anniversary card.  THe possibilities are endless.
Bee Mine Suite

Bee Mine Suite

SUPPLIES

Stamp set:  Bee My Valentine, So Sincere.

Ink:Tuxedo Black Memento, Daffodil Delight, Sweet Sorbet, Lemon Lime Twist.

Paper: Lemon Lime Twist – 4-1/2″ x 11″  (card base). Sweet Sorbet -4 x 5-1/4″, Bee Mine Designer Series Paper 3-3/4″ x 5″, Basic White – scraps, fo sentimentr  (inside – -4 x 5-1/4), Vellum – scraps, for Wings, Petal Pink-scrap for wings.

Accessories: Adhesive backed Hearts & Flowers, , Bee Builder Punch, Ribbon Duo Combo Pack (Lemon Lime Twist  – 2@4-1/2″

Basic Supplies:Paper Trimmer, Bone folder, Paper Snips, Take Your Tool Pick, Stampin’ SEAL+, Multipurpose Liquid Glue, Stampin’ Dimensionals, Mini Glue Dots.

INSTRUCTIONS

  1. After cutting and scoring the Lemon Lime Twist cs for the cardbase, take the  Bone      folder and burnish the fold.
  2. Attach the DSP to the Poppy Parade Layer. Adhere the 2 lengths of ribbon behind the cardstock.   Adhere the panels to the cardbase.
  3. Stamp the Bee body on the Basic White scrap in Daffodil Delight ink  and the stripes with Tuxedo Black Memento ink.  Use the Bee Builder Punch, to punch out the bee.  Stamp the 2 sets of wings with Petal Pink ink on Petal Pink cs and punch.  Punch 2 sets of wings from Vellum.  Attach with a glue dot to the cs wings.
  4. Stamp the face on the bee.  There are 4 faces with different expressions, so you can use different ones to match the occasion.  Stamp the antenna in Tuxedo Black ink and and punch.
  5. Attach the wings at the back of the bee and adhere to card front with Stampin’ Dimensionals. Adhere the antenna to back of bee’s head.
  6. Stamp the sentiment on a strip of Basic White cs with Sweet Sorbet ink.  Trim to 3/8″ wide , trim the ends on a slant.
  7. Attach with dimensionals below the ribbon.
  8. Adhere a variety of flowers and hearts to the card front.
  9. On the inside attach a panel of Basic White cs. Attach a strip of DSP to bottom of panel.  Stamp the sentiment in Lemon LIme Twist.

Be Mine Valentine

If you don’t have a Stampin’ Up! demonstrator, then I would like to be yours.  Contact me at karen@simplysaidwithkaren.com.

Shop My Online Store

Check out these posts for more inspiration
Using your dies to create a WOW card
Double Pocket Fancy Fold

Product List

Bee My Valentine Bundle (English)

Bee My Valentine Bundle (English)
[162554]

So Sincere Cling Stamp Set (English)

So Sincere Cling Stamp Set (English)
[162283]

Tuxedo Black Memento Ink Pad

Tuxedo Black Memento Ink Pad
[132708]

Daffodil Delight Classic Stampin' Pad

Daffodil Delight Classic Stampin’ Pad
[147094]

Sweet Sorbet Classic Stampin' Pad

Sweet Sorbet Classic Stampin’ Pad
[159216]

Lemon Lime Twist Classic Stampin' Pad

Lemon Lime Twist Classic Stampin’ Pad
[147145]

Lemon Lime Twist 8-1/2" X 11" Cardstock

Lemon Lime Twist 8-1/2″ X 11″ Cardstock
[144245]

Sweet Sorbet 8 1/2" X 11" Cardstock

Sweet Sorbet 8 1/2″ X 11″ Cardstock
[159268]

Bee Mine 12" X 12" (30.5 X 30.5 Cm) Designer Series Paper

Bee Mine 12″ X 12″ (30.5 X 30.5 Cm) Designer Series Paper
[162546]

Basic White 8 1/2" X 11" Cardstock

Basic White 8 1/2″ X 11″ Cardstock
[159276]

Vellum 8-1/2" X 11" Cardstock

Vellum 8-1/2″ X 11″ Cardstock
[101856]

Petal Pink 8-1/2" X 11" Cardstock

Petal Pink 8-1/2″ X 11″ Cardstock
[146985]

Adhesive Backed Hearts & Flowers

Adhesive Backed Hearts & Flowers
[162557]

Bee Builder Punch

Bee Builder Punch
[162553]

Ribbon Duo Combo Pack

Ribbon Duo Combo Pack
[161318]
Add All to Cart
Posted in Cards, Children, Feminine, General, Jan - April Mini Catalogue, Masculine, Occasion Cards, Stamp Sets, Stampin' Emboss and Die Cut Machine, SU Only Products | Tagged 2-Step Stamping, Birthday, bundles, occasions, Sale-a-Bration, Stampin Up, stamping up, stampingup, stampinup, su

Post navigation

← Older posts

  • Facebook
  • Instagram
  • Pinterest
  • YouTube

Event Calendar

Categories

Painted Lavender

Inspirations in Ink January 2024 Tutorial. Earn this tutorial for free when you order totals $50.00 or more.
Tutorials are designed by Global Stampin' Up! Demonstrators.
Contact me if you wish to purchase the tutorial. mailto:karen@simplysaidwithkaren.com

2024 Coupons
Earn Bonus Coupons when you spend $60 CDN during July. Redeem them in August

©2025 - Simply Said With Karen - Weaver Xtreme Theme Privacy Policy
↑ Scroll Up
Verified by MonsterInsights